Best Belt Sander Picks: 5 Tools That Truly Last
A belt sander is a power tool that moves a continuous abrasive belt over two rollers to remove material fast and flatten surfaces. It’s best for leveling joints, stripping finishes, and shaping edges, but it can also ruin a workpiece quickly if you hold it still or use the wrong grit.
Table of Contents
I reach for a belt sander any time I need speed with control: doors that stick, trim that needs flushing, tabletops that need flattening, or welds that need knocking down. The trick is matching belt size, speed, and dust collection to the job so you don’t fight heat, chatter, or clogged abrasives.
Belt sander basics and best uses
What a belt sander does
A belt sander is built for stock removal: it eats high spots, leveling boards and joints faster than an orbital sander. You feel it immediately in your hands—the tool wants to “walk” forward as the belt grabs, and that forward pull is what makes it so effective (and so easy to gouge with).
The best uses stay within its “flat work” comfort zone: flushing edge banding, leveling glued panels, squaring the edge of a slab, or knocking paint off outdoor lumber. For curved parts, I swap to a different machine like a spindle sander because a belt sander’s platen naturally wants to flatten curves into facets.
A common beginner mistake is thinking a belt sander is a finishing tool. It can finish with fine grits, but it’s hard to erase belt tracks if the sander tips or if the belt loads with resin; I usually stop at 120–150 grit on the belt sander and finish with a random orbital so the scratch pattern blends.
For realistic speed, high-end handheld models can reach aggressive belt speeds (stock removal rates are often described in surface feet per minute, with top models exceeding 2,000+ SFPM in tool roundups). Popular Mechanics’ belt sander testing highlights how quickly these tools remove material compared to other sanders (Popular Mechanics: Best Belt Sanders, accessed January 2026).
Common belt sizes
Belt size changes how the tool behaves. Wider belts cover more area and run cooler on big panels, but they’re heavier and less forgiving on edges. Shorter belts turn tighter around the rollers, which can feel more “grabby” at the nose when you feather into corners.
| Belt size | Where it works best (real shop use) |
|---|---|
| 3×18 | Edges, stair treads, small panels, quick trim flushing with better control |
| 3×21 | General woodworking, doors, tabletops, jobsite smoothing with common belt availability |
| 4×24 | Large panels, floors, heavy removal where extra width reduces ridges |
| 4×36 (bench) | Shaping, deburring, repeatable angles on a stationary platen |
| 6×48 (bench) | Serious shop work, flatter platen contact, cooler running on metal and hardwood |
If you’re buying your first belt sander, 3×21 is the easiest size to live with. Belts are everywhere, the tool weight stays manageable, and you can still remove a lot of material without feeling like the sander is dragging you across the board.
Power and speed ranges
Corded belt sanders commonly sit around 6–11 amps. In real use, amps translate to how hard you can lean before the belt slows; a weaker motor forces you to push more, which raises heat and burns wood (that sharp, sweet scorch smell that lingers on oak and maple).
Variable speed helps more than people expect. Lower speed reduces heat on resinous woods and paint removal, while higher speed levels hardwood quickly; the trade-off is that high speed also magnifies tracking errors and makes edge rollovers happen faster if your stance is off.
Cordless units (like a dewalt belt sander in 20V brushless) can feel surprisingly close to corded for short bursts, but they’re still limited by battery heat and runtime. I keep cordless for trim and punch-list work where a cord catches corners, and corded for any job longer than a few minutes of continuous sanding.
What makes a belt sander last
Low vibration build
Low vibration is about more than comfort; it prevents hardware loosening and keeps tracking stable. When a sander buzzes hard, you feel it in your wrists and teeth, but you also see it in wavy scratch patterns that refuse to blend out.
Look for solid platen support and tight roller tolerances. A common failure path is a roller that develops play; the belt starts hunting side to side, then it chews the belt edge, and after that you’re stuck over-correcting with the tracking knob mid-pass.
Easy belt changes
A tool-free lever is a time saver, but it’s also what keeps you sanding with sharp belts instead of “making it work” for one more board. Dull belts force pressure, pressure causes heat, and heat softens glue lines and loads the abrasive—then the belt skates and burns.
Watch the alignment during changes. The beginner mistake is slapping a belt on and cranking the tracking knob wildly; a faster workaround is to install the belt centered, run the sander upside down for two seconds, then micro-adjust tracking in tiny taps so you don’t over-shoot.
Dust collection design
Dust collection determines whether the sander runs cool and cuts consistently. When the dust path is poor, the belt loads and you get that smeared, shiny “polished” look that tells you you’re rubbing instead of cutting.
A good port location sits close to the belt’s discharge and doesn’t clog at the elbow. If you sand pine, cedar, or painted surfaces, expect sticky dust; I keep a small pick or zip tie in the drawer to ream the port after every few belts so airflow doesn’t collapse mid-job.
Warranty and motor type
Warranty matters because belt sanders live a hard life: dust, heat, and side loading at the rollers. A longer warranty often signals better switchgear, bearings, and housings—parts that you don’t notice until the day the trigger sticks or the tracking won’t hold.
Brushless motors shine on cordless belt sanders because they manage heat better and stretch runtime. In day-to-day use, that advantage shows up when you’re feathering a door edge or leveling filler—brushless tends to hold speed without the “surge and sag” feel you get when a battery is near its limit.
Best belt sanders: 5 choices that last 2026
1) Metabo HPT 3×21 Variable Speed
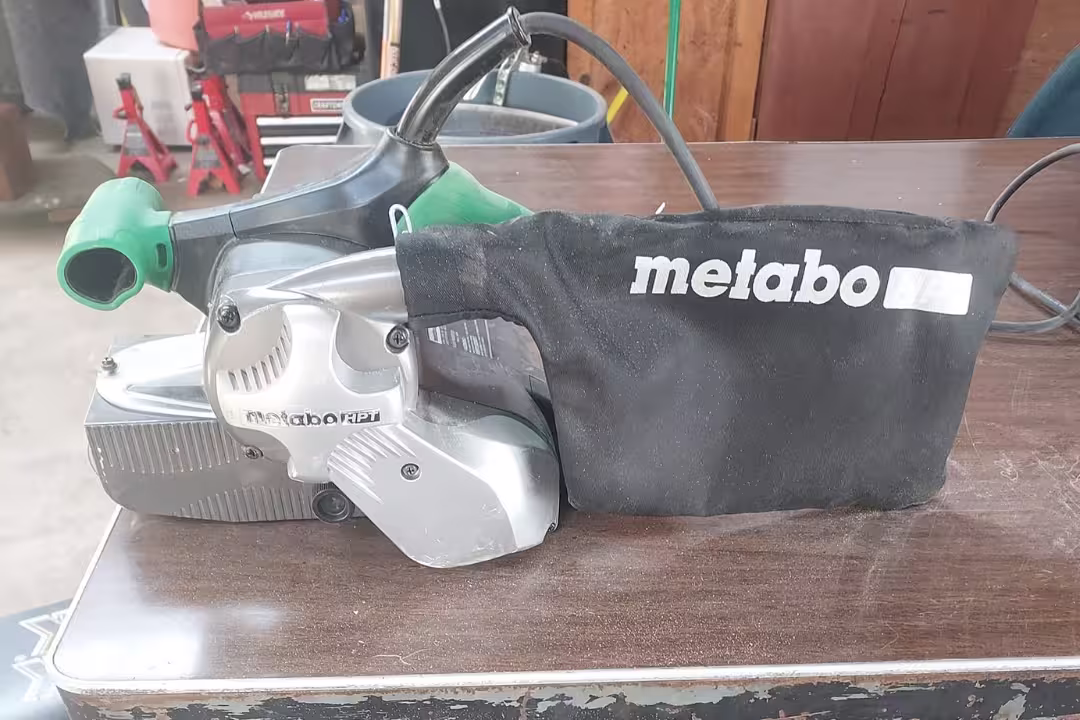
This is the one I grab for balanced work because the variable speed makes it behave on softwood and hardwood without constant grit swapping. It’s also easier to keep flat across a panel because the tool doesn’t feel twitchy at the front roller, which is where beginners usually tip and cut a trench.

Metabo HPT 3 by 21 inch Variable Speed Sander
- 9 amp motor delivers strong, consistent sanding performance
- Variable speed dial lets you match speed to material and finish needs
- Soft grip reduces fatigue for comfortable extended use
- Compact 3 by 21 inch belt is great for woodworking and trim work
- Backed by a five year warranty for added peace of mind
2) DEWALT 20V Brushless Cordless Belt Sander
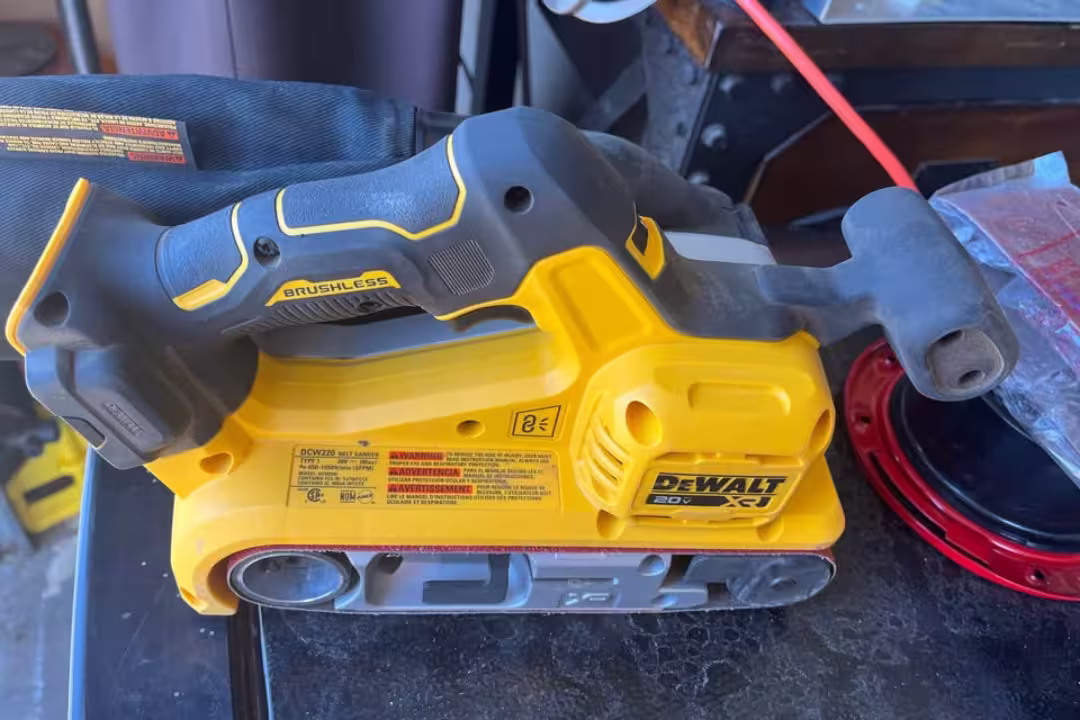
A cordless dewalt belt sander makes sense when a cord would drag across fresh filler or catch on door corners. The main risk is sanding longer than the battery can support at full cut; if you feel the belt speed droop, back off pressure and let the abrasive do the work so you don’t glaze the belt.

DEWALT 20V Brushless Cordless Belt Sander
- Brushless motor for longer runtime and greater efficiency
- Cordless 20V design offers on the go portability with compatible batteries
- Robust belt system for fast stock removal and smoothing
- Front and rear handles provide balanced control and leverage
- Dust port helps manage debris for a cleaner workspace
3) CRAFTSMAN 3×21 Corded value pick
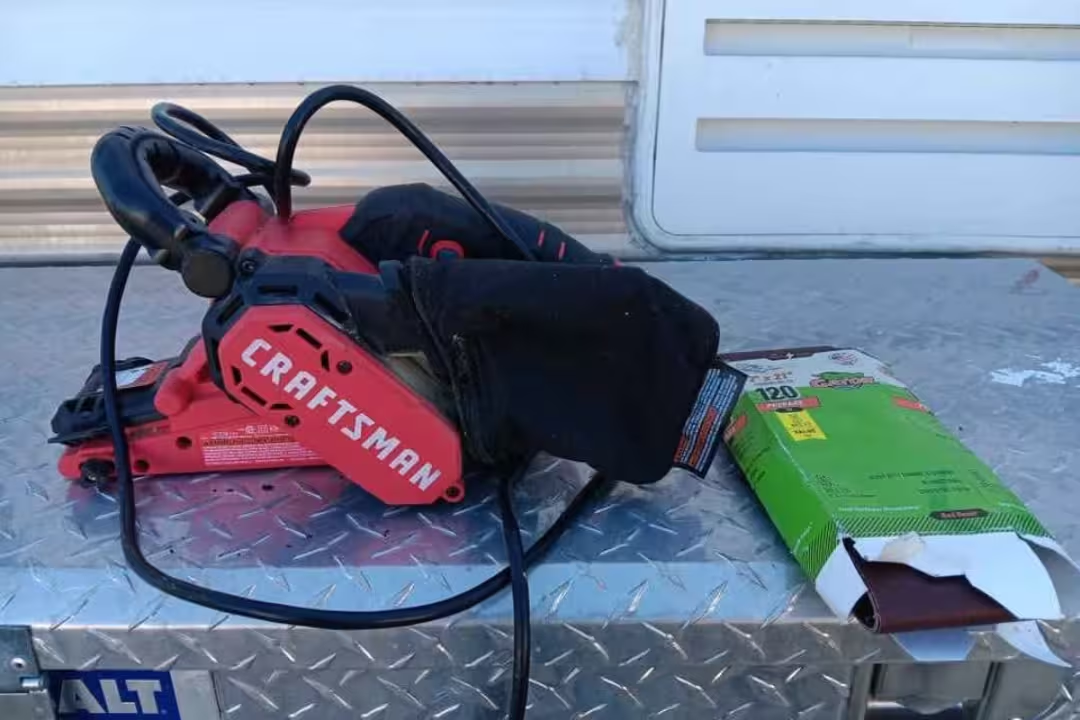
This value pick is a solid “grab and go” corded belt sander for everyday boards and trim. The common slip-up with budget sanders is ignoring tracking until the belt kisses the housing; set tracking before you touch the work and re-check after the first 10 seconds once the belt warms and stretches slightly.
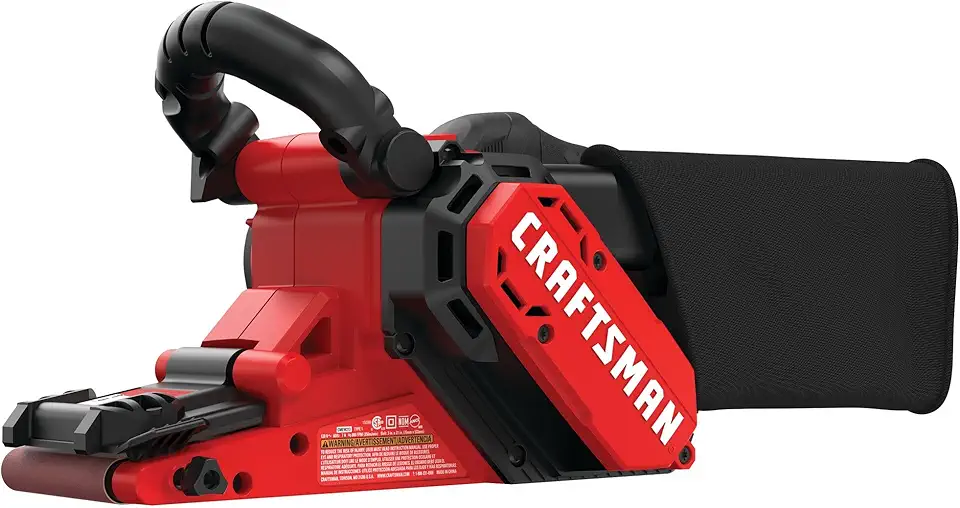
CRAFTSMAN 3 by 21 inch Corded Belt Sander
- 7 amp motor delivers steady power for everyday sanding tasks
- 3 by 21 inch belt balances stock removal with control
- Built-in dust bag helps reduce mess and airborne dust
- Comfortable grip design for improved handling during long jobs
- Easy belt tracking keeps sanding consistent and reliable
4) Makita 4×24 heavy-duty belt sander
For big surfaces, a makita belt sander in 4×24 feels planted and productive, especially when you’re flattening panels where a narrower belt would leave more pronounced lanes. The real-world trade-off is weight and edge risk—keep two hands on it and start with the tool already moving so you don’t dig a divot at the leading edge.

Makita 4 by 24 inch Belt Sander
- Large 4 by 24 inch sanding surface for heavy stock removal and large panels
- Efficient dust collection minimizes airborne dust and keeps workspace cleaner
- Smooth, low vibration operation for comfortable extended use
- Durable construction built for frequent, heavy use
- Ideal for woodworking, sanding floors, and prepping large surfaces
5) SKIL 3×18 pressure-control for precision
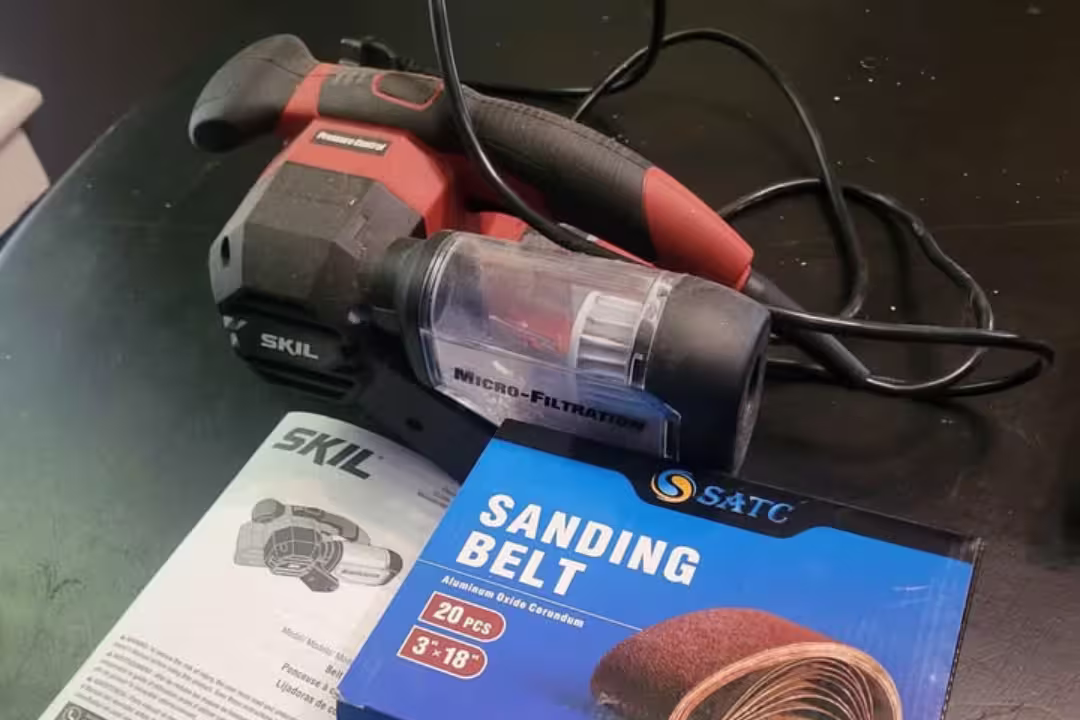
This is the pick I like for learning control because pressure feedback helps avoid gouges. It’s still aggressive, so don’t start on a show face; practice on scrap until you can overlap passes without leaving “stop marks” where you paused for half a beat.

SKIL 3 by 18 inch Pressure-Control Sander
- 6 amp motor delivers consistent sanding power
- Pressure control helps prevent gouging for smoother results
- 3 by 18 inch belt is ideal for edges and flattening
- Dust collection port reduces mess and improves visibility
- Compact, balanced design for easy handling and precision
Bench belt sander options for the shop
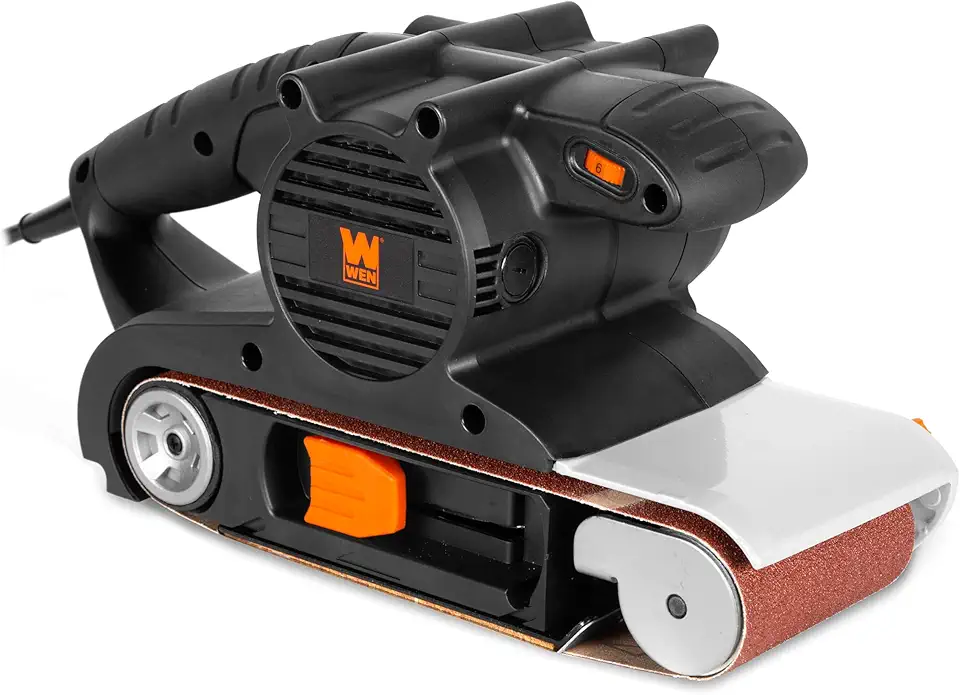
WEN bench belt sander combos
If your work repeats—same bevels, same small parts, steady deburring—a bench belt sander is faster and safer than freehanding everything with a handheld. These WEN combos cover the typical “belt + disc” workflow most small shops rely on.

WEN 4 by 36 inch Belt & 6 inch Disc Sander
- Large 4 by 36 inch belt and 6 inch disc cover shaping to finishing tasks
- Heavy cast iron base for stable, low vibration operation
- Adjustable tracking and easy belt changes speed setup
- Versatile for wood and metal deburring, smoothing, and contouring
- Integrated dust port helps keep the workspace cleaner
Premium bench belt sander mentions
Premium machines earn their keep with stability, truer platens, and better dust shrouds. What you notice first is the sound and feel: less rattly resonance, less buzzing through the stand, and fewer surprise “grabs” when a corner touches the belt.
When I’m researching bench options, I look at belt speed (SFPM), motor output (HP), and how the tracking mechanism locks. Reviews for belt/disc combos often compare specs like ~¾ HP class machines up to heavier premium units (as discussed in Sanderscore belt/disc sander reviews, accessed January 2026).
Disc sander combo benefits
A disc on the side of a bench unit gives you fast, repeatable edge squaring and angle work with a miter gauge. The catch is heat: discs build heat fast on small parts, so light pressure and fresh abrasive prevent that hot, almost tacky feeling where pitch starts to smear.
Keep your fingers safe on tiny parts by using a simple shop-made carrier board. Small cutoffs can get snatched and launched, and that’s one of the most common bench-sander injuries I see when people skip jigs and try to “pinch grip” parts closer and closer to the abrasive.
WEN 4 by 24 inch Combo Handheld and Benchtop Sander
- Powerful 10 amp motor handles heavy material removal with ease
- Variable speed control adapts to rough shaping or fine finishing
- Converts between handheld and benchtop setups for flexible use
- Large 4 by 24 inch belt covers big surfaces quickly and efficiently
- Built-in dust port helps keep the work area cleaner
How to choose the right belt sander
Corded vs cordless
Corded wins for long sessions and consistent speed under load. Cordless wins for edges, ladders, exterior fixes, and any place where a cord would tug the tool off-line right as you’re feathering a delicate transition.
If you’re already on a battery platform, pick cordless only if you own higher-capacity packs. Small packs overheat on heavy sanding, and once a pack gets hot, performance drops and your belt starts glazing.
Belt size matching
Match belt size to the surface area you actually sand. A 3×21 is a practical default; a 4×24 earns its space if you flatten panels or do floor-level work; a bench belt sander shines if you process many small parts and want repeatable results.
If you only sand edges and trim, a shorter belt (like 3×18) often feels steadier because it’s less nose-heavy. That translates into fewer accidental “rollovers” where the sander tips and rounds an edge you meant to keep crisp.
Variable speed control
Variable speed is your burn prevention knob. Slow down for paint stripping, softwoods, veneers, and epoxy; speed up for flattening hardwood, leveling proud joints, and aggressive shaping with coarse grits.
An edge case: some filled or glued surfaces soften with heat, so higher speed can pull filler or smear glue. If you smell warm plastic or see gummy streaks, drop speed, switch to a new belt, and vacuum dust so you’re cutting clean again.
Dust port and bags
Good dust collection is a visibility upgrade and a surface-quality upgrade. If you can’t see your pencil lines, you’ll over-sand, and belt sanders remove material so fast that “one more pass” can become a mistake you can’t hide.
If you don’t have a vacuum, a bag is better than nothing, but don’t trust it for fine dust. I treat bags as chip catchers and still wear a respirator; belt sanding makes a dry, peppery dust cloud that hangs in the air and tastes like the species you’re sanding.
Ergonomics and stability
Ergonomics show up as control. If the front handle is awkward or the rear grip forces your wrist to cock sideways, you’ll tip the tool at the worst moment—usually right at the end of a pass where you’re tempted to lift.
Stability is why I like sanders that feel planted on the platen. A stable tool “sings” with a smoother whoosh, while an unstable one chatters and leaves little half-moon marks that take forever to blend out with finer grits.
Brand notes: Milwaukee belt sander, Ryobi belt sander
A milwaukee belt sander usually gets attention for cordless power and ecosystem convenience, which matters if you’re already carrying those batteries to a jobsite. The practical check is balance: a bigger pack can make the tool feel rear-heavy, so test it on a vertical edge where tipping is more likely.
A ryobi belt sander often appeals on price for occasional use, and that can be a smart choice for weekend projects. The common pitfall is running cheap belts too long; the workaround is to buy fewer tools and better abrasives, since belts have more impact on results than the logo on the housing.
If you’re comparing brand families, it helps to read how each line fits within broader sanding machines in a shop, since belt sanders overlap with drum sanders and other tools. This breakdown of machines for sanding can help you decide what to buy next without doubling up on the same job.
Belt sander maintenance for long life
Tracking checks
Check tracking before the belt touches wood, then re-check after a few seconds once the belt warms. Belts stretch slightly, and that tiny change is enough to start rubbing the housing on one side.
If a belt won’t track, don’t force it. A damaged belt edge or packed dust in the tracking area can cause constant drift; swap belts and clean the roller area before you assume the tool is defective.
Belt replacement timing
I replace belts when cut speed drops or the belt starts to glaze. A dull belt runs hotter, smells sharper, and leaves darker streaks on wood—signals that you’re rubbing dust into the surface instead of slicing fibers.
A practical interval many users cite is roughly 10–20 hours, depending on material and grit, but feel beats the clock. If you have to push harder than usual, the belt is already costing you surface quality and stressing the motor.
Dust port cleaning
Clean the dust path any time suction feels weaker or dust starts spraying from the front. A clogged port also raises heat at the belt because debris can’t evacuate, which makes loading happen faster.
Don’t blow dust deeper into the tool with high-pressure air unless you also open what you can and vacuum it back out. Fine dust inside the housing can shorten switch life and make speed controls behave erratically.
Tension and storage
Correct tension helps with tracking and can extend belt life; too tight adds bearing load, too loose causes slip. If your sander has a quick-release lever, release tension for storage so the belt and rollers don’t sit compressed for weeks.
Store belts flat in a dry cabinet, not on a hook where they can kink. Humidity can curl paper-backed belts, and that curl shows up as a thump-thump feel on startup that makes the tool harder to control until it settles.
Practical Notes From Real-World Use
The biggest surprise for new users is how fast a belt sander can go from “smooth” to ruined. I’ve watched a single pause—half a second while shifting stance—dig a low spot that no finer grit can hide, especially on soft pine where the earlywood disappears first.
Another issue is dust that behaves differently than you expect: sanding old paint can make a fine, dry cloud that feels gritty on your lips and sticks to sweaty forearms. The workaround is simple but overlooked—hook up extraction, wear a respirator, and vacuum the work between grits so you’re not grinding stray grit into fresh scratches.
Belts also don’t cut the same across brands, even at the same grit. When a belt loads early, it starts to squeal and the sander feels like it’s skimming; swapping to a ceramic or better-quality belt often fixes “mystery” burning that people assume is a motor problem.
If you’re still building out your sanding setup, it helps to pair the belt sander with the right supporting machine instead of forcing one tool to do everything. This guide to a sanding machine lineup makes it easier to split roughing, flattening, and finish sanding into the tools that do each step cleanly.
- Start moving before the belt touches the work to avoid divots on the leading edge.
- Mark the surface with pencil lines so you can see low spots without guessing.
- Let the sander’s weight do most of the work; added pressure causes heat and glazing.
- Feather off the end of a pass instead of lifting straight up, which rounds edges.
- Keep a fresh belt ready; swapping early is cheaper than fixing a gouged panel.
If your work regularly needs dead-flat results (tabletops, panels, glued-ups), a belt sander can get you close but it won’t replace a true thicknessing solution. For that, I switch to a dedicated flattening tool like a drum sander where the machine controls flatness more reliably than hand pressure ever will.
A belt sander is at its best when you treat it like a controlled planer: keep it moving, keep it flat, and change belts before you’re tempted to push harder.
Shop note from day-to-day sanding issues
FAQs
How To Use A Belt Sander?
A belt sander is operated by securing the workpiece and moving it steadily across the abrasive belt. Start with a coarse grit, hold the sander flat, and use light even pressure while keeping the tool moving to avoid gouges. Finish with a finer grit and wipe the surface clean.
What Is A Belt Sander Used For?
A belt sander is used for fast material removal and aggressive surface shaping on wood and some metals. It quickly levels rough lumber, removes old finishes, and smooths edges. Use it for stock removal or the initial sanding stage before finer sanding or finishing.
How Can I Avoid Gouging Chatter And Burn Marks When Using A Bench Belt Sander?
Avoid gouging, chatter, and burn marks by using proper technique: keep the workpiece flush, move it steadily, and don’t apply excessive pressure. Ensure the belt is sharp and correctly tensioned, and use the correct grit and speed for the material. Support the workpiece firmly and feed it across the belt, not into it.
Can A Bench Belt Sander Be Used On Metal And What Belts/Precautions Are Required?
Yes, a bench belt sander can be used on metal with the right abrasive belts and safety precautions. Use non-woven or aluminum oxide/ceramic abrasive belts designed for metal at moderate speed, and wear eye, ear, and respiratory protection. Keep sparks controlled, clamp the work securely, and avoid overheating the metal by using light passes or coolant.