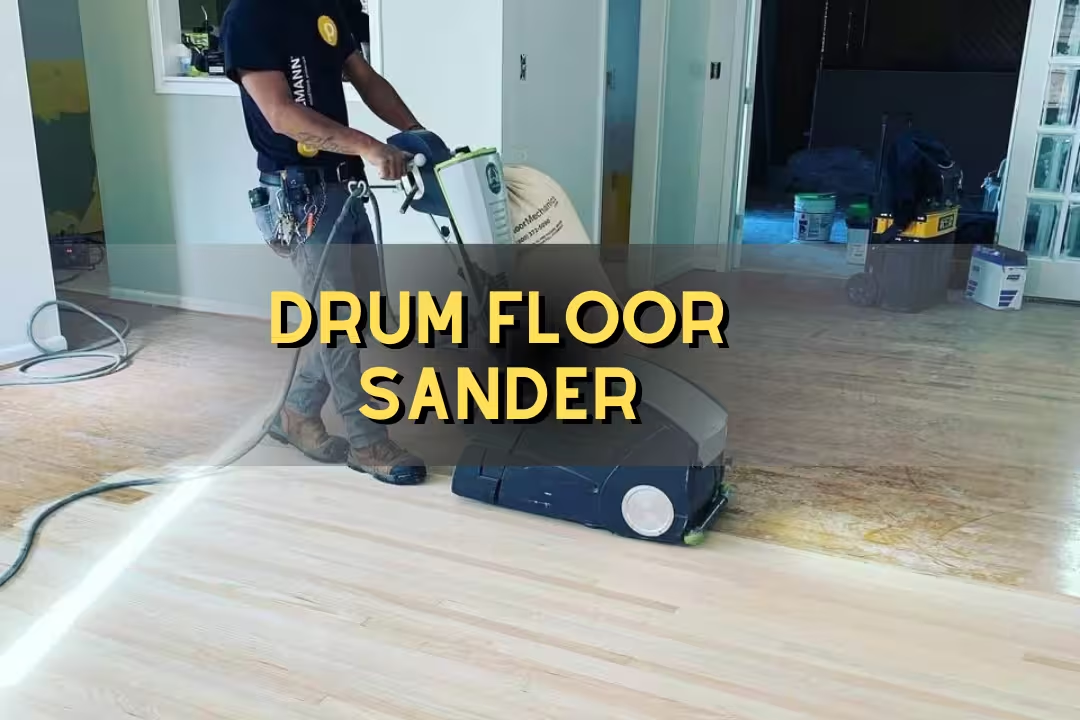
Drum Floor Sander Guide: How It Works, How to Use It, and How to Choose
A drum floor sander is a walk-behind sanding machine with a rotating drum that uses a sanding belt to remove old finish and flatten hardwood floors fast. It’s the tool I reach for when a floor needs real leveling, because it can also gouge wood in seconds if you don’t control lift, speed, and pass overlap.
Table of Contents
This guide explains what a floor sander drum sander is, which types exist, how the sanding mechanics work, and exactly how to use a drum floor sander without chatter marks, stop-start divots, or dust problems.
What a drum floor sander is
A drum sander for floors is a heavy sanding machine where an abrasive belt wraps around a rotating drum. That spinning drum cuts the finish and a thin layer of wood, which is why it can fix cupping and wear patterns that lighter sanders mostly glide over.
On a typical refinish, you’ll feel the machine “bite” when the drum drops—there’s a clear forward tug through the handle and a low growl in the motor pitch. That sensation is useful feedback: if the pitch changes sharply or the machine starts to hop, you’re removing too much, too fast, or your belt is loading up with finish.
Drum sander basics
The core parts are simple: a drum, a belt, a lift mechanism (to raise/lower the drum), wheels for travel, and a bag or hose for dust capture. What’s not simple is the technique—any time the drum sits still while touching the floor, it can carve a groove you’ll chase for the rest of the job.
Beginners often start by “testing” a spot with the drum down. That’s a common mistake that leaves a flat-bottom divot. A better workaround is to start moving first, then lower the drum smoothly over 1–2 feet (feathering), so the cut blends into the pass.
Typical floor-model specs
Most rental-style machines use the familiar 8″ × 19″ belt format, and many run on standard 120V circuits. In practice, the limiting factor isn’t “will it turn on,” it’s whether your circuit trips once the drum is doing real work and the vacuum load in the room adds to it.
For a quick anchor point on rentals, standardrentals.ca/rental/sander-drum-228 lists common drum sander rental details and pricing structure that match what I see across many tool counters. Expect to plan around 15A circuits, long cords, and heavy lift weight—even “portable” floor units are awkward on stairs.
| Spec | Typical floor drum sander range |
|---|---|
| Motor power | ~1.5 HP (home/rental) up to 2.5–5 HP (pro) |
| Belt size | 8″ × 19″ is common |
| Power | 120V, often near 15A under load |
| Cut character | Aggressive; can level and remove finish quickly |
| Dust control | Bag or hose port; performance depends on seals and airflow |
Portable vs stationary
People mix up “stationary drum sanders” (woodshop thickness/finish sanders) and a floor drum sander (walk-behind). The floor machine rides on wheels and sands the surface beneath it; the shop machine holds a board and feeds it through a drum.
If you’re working on furniture parts, a shop unit makes sense. If you’re refinishing a room, the walk-behind is the right tool, and you can cross-reference our overview of sanding machine types to avoid buying the wrong category.
Types of drum sanders for floors
“Drum sander” covers a few designs, but only a couple make sense for floor work. The right pick depends on surface area, how flat the floor is, and whether you need mobility or shop precision.
Benchtop drum sanders
Benchtop drum sanders are for boards and panels, not rooms. They’re compact and handy for reducing thickness or cleaning up glued panels, but they’re the wrong tool for a full floor because you can’t push them across installed flooring.
If your project plan includes trim pieces or stair treads off the floor, a benchtop drum sander can help, and pairing it with a belt sander guide can speed up edge prep. The trade-off is slower stock removal and limited width compared with floor units.
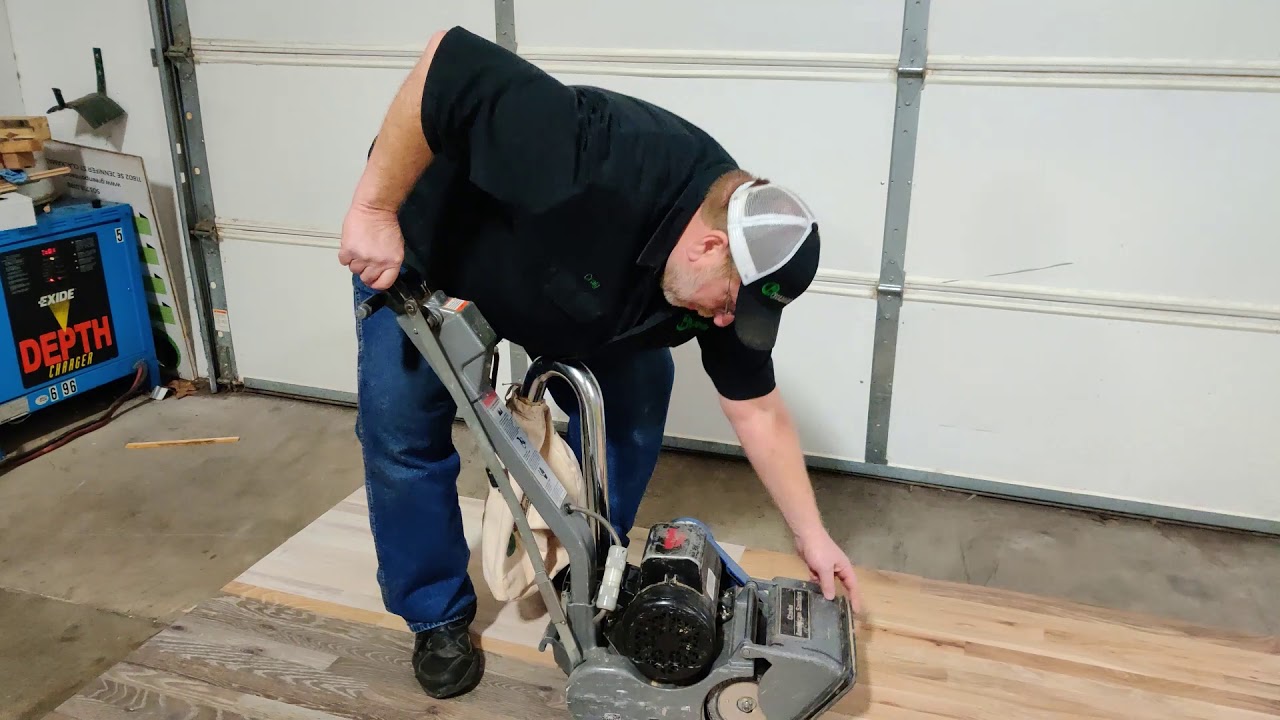
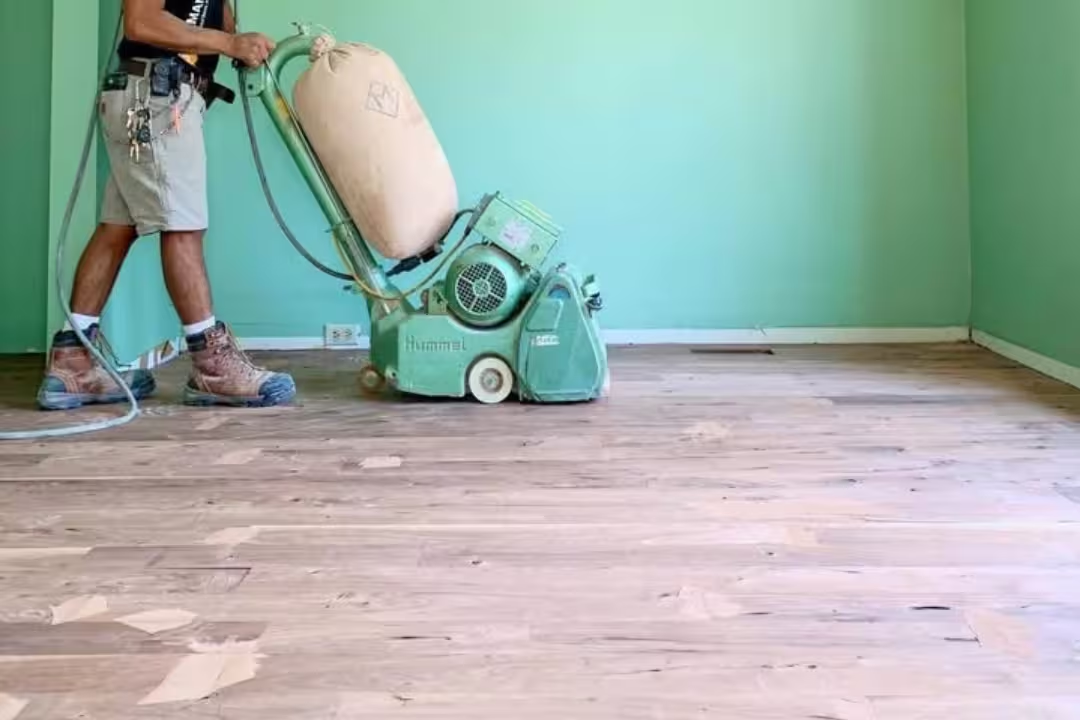
Floor drum sanders
A floor sander drum sander is built for long runs. The weight helps it cut consistently, and the belt width lets you cover a lot of square footage fast, which is why it’s a staple for hardwood refinishing.
The risk is the same thing that makes it productive: that weight plus a spinning drum can dig a trench if you pause, turn sharply, or drop the drum too fast. I like to treat it like a controlled landing—smooth drop, steady walk speed, smooth lift.
Open vs closed designs
Open-ended drum sanders (common in woodshops) let you pass a wide board through by flipping it, while closed designs fully support the work. For floor sanding, you’ll see more consistency and less “edge bias” when the machine’s chassis keeps the drum square and the tracking stays stable—small tracking shifts can create striping across a room.
If you’re looking at shop sanders for flooring by mistake, stop and check the workflow: floor units remove material from installed boards, shop units depend on flat feed tables and consistent pressure across a workpiece. Mixing the two leads to wasted rental days and poor results.
Clarke EZ-8 overview
The Clarke EZ-8 is one of the most common rental/pro units people run into. It’s known for a practical footprint, an enclosed motor design, and a belt format that’s easy to source, so you’re less likely to lose half a day hunting abrasives.
For reference specs and the manufacturer’s positioning, see EZ-8 Drum Sander product page. Real-life note: most problems I see on this style of machine come from poor belt tracking (belt walking to one side) or overfilled dust bags reducing airflow and leaving dust “skid” marks behind the wheels.
How a drum floor sander works
A drum floor sander works by pressing a moving abrasive belt against the floor with controlled downward force. The drum’s rotation plus your forward motion sets the cut rate, and small changes in pace or drum drop angle show up as visible marks after finishing.
Sanding mechanics
The abrasive cuts high spots first. That’s why a drum sander is so good at flattening: it naturally targets proud boards and finish ridges, then gradually reaches the lows as you make more passes.
Edge case: floors with loose boards or popped fasteners can chatter under the drum, leaving repeating ripples. Before sanding, I walk the floor and listen for squeaks, then re-fastening those spots keeps the drum from “drumming” the floor like a washboard.
Pressure and speed
Down pressure comes from machine weight and your lift control; speed comes from your walking pace. If you slow down without lifting, you increase dwell time and deepen the cut, which is how you get stop marks.
A clean way to control cut without drama is to keep pace steady and change grit instead of muscling the machine. If you need more bite, drop to a coarser grit; if you need less, step up and add an extra pass.
Feathering technique
Feathering is the skill that separates good results from “I can see every pass.” You lower the drum while already moving, then lift it while still moving, so the start and end of each run fades out instead of leaving a hard edge.
Workaround that helps beginners: pick two floorboard seams as landmarks and practice drops/lifts between them with the sander unplugged. The handle motion should feel like easing a heavy suitcase down a step—controlled and smooth, never a slam.
Dust collection basics
Most floor drum sanders use a bag, some use a hose to a vacuum. Dust collection isn’t just cleanliness—fine wood dust hangs in the air and coats your tongue with a dry, bitter taste if you skip a respirator, and it can build up around baseboards where you later apply finish.
Never let the bag get packed tight. Airflow drops, the machine runs hotter, and dust starts leaking from seams and trailing behind the wheels, which can scratch the floor on the next pass.
How to use a drum floor sander
If you only remember one rule: keep the machine moving any time the drum is down. That prevents gouges and saves hours of correction sanding.
Pre-sanding assessment
Start with a slow walk-through in bright light. Look for raised nail heads, staples, old carpet tack strips, finish blobs, and cupped boards—your goal is to remove anything that can tear a belt or cause a sudden grab.
Common beginner miss: sanding engineered flooring like solid hardwood. Many engineered floors have a thin wear layer; a drum sander can cut through it fast. If you’re unsure, check a vent cutout or threshold edge before you commit to coarse grits.
- Set protruding fasteners below the surface (punch nails, reset staples).
- Remove tack strips and scrape adhesive lumps before the first pass.
- Mark squeaky/loose boards and fasten them so the drum won’t chatter.
- Seal off doorways and vents to keep dust from migrating.
Grit progression
A practical progression for many hardwood floors is 40/60 → 80 → 100 (sometimes 120). You’re not chasing “smooth” after the first grit; you’re chasing flat and uniform with all old finish removed.
Edge case: if the floor has deep pet stains or black water marks, don’t keep dropping grits endlessly trying to erase them. You can thin the wear layer too far near board edges; spot replacement, stain strategy, or a darker finish plan may be smarter than aggressive removal.
Pass strategy
I plan passes like mowing a lawn: straight lanes with consistent overlap. Start along the grain for most strip floors; use a slight angle only for serious leveling, then return to with-grain passes to clean up cross-scratch.
Keep your overlap consistent (about 1–2 inches is a good target on 8-inch machines). Too little overlap leaves ridges; too much overlap wastes belts and heats the drum.
Edge and corner work
A drum unit won’t reach tight areas under baseboard overhangs, toe-kicks, and corners. That’s why edge sanders and hand scraping exist: you blend the perimeter so the room doesn’t have a visible “picture frame” of different scratch patterns.
Workaround I use to make blend lines disappear: run the edger grit sequence one step ahead of the drum (for example, if the drum is on 60, edge with 80). Then your final blending pass with a finer grit ties both zones together without the edge area looking over-cut.
Dust management and safety
Wear hearing protection, eye protection, and a respirator rated for fine dust. After 20 minutes behind a drum sander, your ears will ring and your throat will feel dry without it, since the machine’s pitch sits in a fatigue-inducing range.
Fire risk is real: fine dust in a bag can ignite from a spark or static, and freshly sanded dust piles can smolder if contaminated. Empty bags often, store dust in a metal container outdoors, and don’t leave dust piles near solvents or finish rags.
Drum floor sander vs other sanders
A drum sander is for fast removal and flattening. Other sanders exist because there are plenty of floors where aggressive cutting is a bad trade—thin wear layers, softwood dents, parquet direction changes, or light refresh jobs.
Drum vs orbital
Orbital units are easier to control and far less likely to gouge, which makes them a safer pick for many DIY refinishes. The trade-off is time: orbitals can take much longer to remove thick polyurethane or flatten cupped boards.
If you want background on sanding machine categories before picking, our breakdown of drum sander basics pairs well with this section and helps spot feature differences that matter on the floor.
Drum vs vibrating
Vibrating/sheet sanders are better for light finishing and for patterns like parquet where grain direction changes constantly. They’re slow on heavy finish removal, and they clog fast if you try to chew through thick, heat-softened coatings.
Common mistake: using a vibrating sander after a drum sander without matching scratch patterns. If the drum leaves deep 40-grit lines, a sheet sander won’t erase them quickly; you’ll burn hours and still see scratches under finish.
Drum vs edge sander
An edge sander isn’t a replacement for a drum floor sander; it’s a companion tool. The drum handles the field, the edger handles the perimeter, and ignoring either one leaves visible transitions along baseboards.
Watch for edger “dish-out,” where you tilt slightly and hollow the edge area. Keep the edger flat, keep it moving, and use a light touch near thresholds where the wood is often thinner from prior refinishes.
Best by floor type
Solid hardwood (oak, maple) usually tolerates a drum sander well if you control feathering. Softwoods dent easily, and engineered floors can be ruined fast, so gentler machines win in those cases.
For a broader look at how different sanding systems fit different materials, see commercial floor sanders overview. I use the same logic on job planning: match aggressiveness to the floor’s margin for error, not your patience level.
Choosing the right drum floor sander
Pick a drum floor sander by matching motor power, belt format, dust control, and transport needs to your floor size and condition. The “best” model is the one you can power reliably, move safely, and get belts for without delays.
Motor horsepower
More horsepower helps keep drum speed stable under load, which reduces chatter and random deep cuts when you hit tougher finish patches. For small residential rooms, 1.5 HP is common; for heavier work, more power gives you steadier cutting.
Common mistake: assuming higher HP means you can skip grit steps. Skipping steps often leaves deep scratches that show up after stain like tiger stripes, especially under raking light from windows.
Drum and belt size
Wider coverage reduces pass count, but it raises the penalty for bad technique because each mistake is wider and more visible. The common 8×19 format hits a sweet spot: belts are easy to find and the machine still fits through doorways.
Watch belt tracking and tension. If the belt wanders, it can shred against the side plate and throw grit chunks, which can leave long scratches that don’t disappear until you drop back down in grits.
Power and portability
Many floor units run on 120V, which sounds simple until you’re on an older circuit shared with lights or a vacuum. A tripped breaker mid-pass can leave a drum-down stop mark, so I keep a plan for dedicated outlets and I avoid using the same circuit for heaters or compressors.
Transport matters more than most people expect. Getting a drum sander up stairs isn’t just heavy—it’s awkward and bruises shins fast when the weight shifts; using a proper hand truck and removing detachable sections prevents drops that knock drum alignment out.
Dust collection features
Look for tight bag connections, decent bag volume, and a path that doesn’t choke with fine dust. If the machine leaks, you’ll see a light tan film on window sills and you’ll feel grit under your shoes that can scratch the floor when you turn.
Pro workaround: clamp a short length of flexible hose as a “relief” at the bag connection if the collar fit is loose. That reduces accidental bag drop-offs mid-run, which otherwise dumps dust right where you’re about to sand.
Abrasive selection
Aluminum oxide belts are a solid default for most floors. Zirconia belts cut faster and resist loading on tough hardwood and old finishes, but they cost more, so I reserve them for demanding removal where downtime would cost more than the belt.
If belts clog quickly, don’t keep pushing—heat builds, resin smears, and you get burnished streaks that refuse stain. Swap to a fresh belt, reduce pressure (keep pace up), and consider a more open-coat abrasive if the finish is gummy.
Drum floor sander rental and buying
Renting makes sense for one-time refinishing jobs; buying makes sense if you’ll repeat the work or you need full control over machine condition. With rentals, check drum lift smoothness, belt tracking, and dust bag seals before you leave the counter—those small issues create big surface defects.
Typical rental pricing
Rental rates commonly land around a half-day, daily, and weekly tier. What surprises many people is that you often pay more in abrasives than rental time if you’re stripping thick finish or sanding a large area, so budget belts realistically and buy extra of the grits you’ll live on (often 40/60 and 80).
Purchase pricing range
New contractor-grade machines can run several thousand dollars, and used pricing depends heavily on drum condition and lift mechanism wear. If you inspect a used unit, rotate the drum by hand (unplugged) and feel for roughness or wobble—any bearing noise tends to telegraph into the floor as vibration.
Clarke EZ-8 specs
The EZ-8 class is widely used because it balances manageable size and solid cut. It’s also common in rental fleets, which makes parts and belts easier to source during a job when something shifts and you need a fix fast.
If you want the manufacturer’s data in one place, American Sanders EZ-8 details is a clean reference. Real job note: I always check the cord strain relief and plug condition because a warm plug or loose ground can cause intermittent cutouts that leave stop marks.
Transport considerations
Plan transport like you’re moving a compact appliance. Protect your vehicle, bring tie-downs, and keep the sander upright so oil/grease doesn’t migrate where dust will cake it into a gritty paste.
Beginner mistake: tossing belts loose in the trunk where they crease. Creased belts can “thump” once mounted, and that thump prints a repeating pattern into the floor. Keep belts flat and dry.
Sanding belts and essential accessories
These are the accessories I keep close so the job doesn’t stall mid-room when a belt loads up or an edge line needs blending. The following picks match common 8×19 drums and typical edge work needs.

80 Grit 8 inch x 19 inch Sanding Belts 12 Pack
- Premium aluminum oxide 80 grit for fast, consistent material removal
- Sized for 8 inch x 19 inch drum sanders for a precise fit
- Consistent grit across each belt for even sanding results
- 12 pack keeps replacements on hand to reduce downtime
- Flexible, tear-resistant construction for longer belt life

Assorted 8 inch x 19 inch Sanding Belts 10 Pack
- Assorted grits from 40 to 120 for aggressive removal to fine finishing
- Designed to fit EZ-8 and similar 8 inch x 19 inch drum sanders
- Durable aluminum oxide construction for prolonged use
- 10 pack provides handy spares for continuous jobs
- Suitable for both commercial floor sanding and home projects

Pro 7 inch Floor Edger
- Designed for tight corners and baseboards where larger sanders can't reach
- Robust motor delivers consistent performance for edge work
- Compatible with standard 7 inch sanding pads for easy supply sourcing
- Compact, lightweight design improves maneuverability and control
- 115 volt power suited for professional and DIY jobs
8×19 belt sizing
8″ × 19″ belts are a common standard on many floor drum sanders. The fit matters: a belt that’s slightly off can slip, crease, or track sideways, and that’s when you start seeing random gouges that don’t match your pass pattern.
Pro workaround: before you start a room, mount a belt and run it briefly off the floor to confirm tracking. If the belt walks, correct it before the first pass—fixing tracking after you’ve sanded half the room often means re-sanding to erase uneven scratch bands.
Belts by project
Old finish removal and flattening eat belts faster than clean bare-wood smoothing. For heavy polyurethane removal, I plan extra coarse belts because the finish softens with heat and loads the grit, and you’ll feel the machine start to “skate” instead of cut.
If you’re doing a light refresh (thin finish, minimal unevenness), start finer and save wood thickness. That choice also reduces the risk of sanding through at board edges and high spots.
Aluminum oxide vs zirconia
Aluminum oxide is the everyday belt: predictable cut, good life, good price. It’s my go-to for the middle grits (60–100) where I want consistent scratch refinement, not wild stock removal.
Zirconia bites harder and tends to resist loading, which helps on dense hardwood and stubborn finishes. The trade-off is cost, and on softer woods it can be too aggressive if your technique isn’t steady, so it’s better used intentionally, not automatically.
Complementary tools
A drum sander rarely finishes a floor by itself. You’ll get cleaner results if you pair it with an edge sander, good lighting, a shop vacuum for cleanup between grits, and a hand scraper for corners where machines leave tiny untouched crescents.
If you’re building out a sanding setup, our guide to an oscillating drum sander can help for curved trim and small parts that a floor rig can’t touch. Keep the workflow separate: don’t bring dusty floor belts into fine shop sanding areas, or you’ll embed gritty contaminants into softer woods.
Practical Notes From Real-World Use
The biggest surprise for most first-timers is how physical the machine feels after 30 minutes. Your hands buzz from vibration, your forearms tighten from controlling the forward pull, and the room smells like warm, dry wood dust—almost sweet—mixed with a sharper note when old finish heats up under the drum.
The next surprise is how small setup mistakes become hours of extra sanding. A slightly loose dust bag collar can leak a band of grit that gets crushed under the wheels, leaving micro-scratches that only show up after the first coat of finish hits the floor.
Uneven old floors can fight your plan. I’ve had floors where one section had thicker finish or harder wood, and the machine cut unevenly across the room unless I slowed my grit changes and added a “bridge” grit (like 50 between 40 and 60). That extra step feels wasteful until you see the finish go down evenly without highlight scratches.
Beginners often over-sand edges trying to match the field, then the perimeter stains darker because it’s more porous from extra abrasion. A solid workaround is to keep the edger moving, stop one grit earlier at the edges, then blend with a final light pass so the whole floor has a more uniform scratch pattern before stain.
If you want more context on how sanding machines fit into a full workflow, our overview of machines for sanding helps you plan the handoff between drum, edge, and final smoothing so you don’t end up chasing defects after finish day.
FAQs
How Do You Use A Drum Floor Sander Without Gouging The Floor?
Use a properly set-up drum sander with a sharp, evenly-tensioned drum and move it steadily along the grain to avoid gouging.
Take light passes, check dust collection, keep the sander moving at a uniform speed, and overlap passes slightly; switch to finer grits and inspect often to correct any high spots.
What Grit Sandpaper Should I Start With On A Drum Sander For Floors?
Begin with 36–60 grit depending on floor condition: use 36 or 40 for heavy finish removal and 60 for light sanding.
Always test on a small area, make multiple light passes, and step up to 80–100 grit for smoothing and before applying finish to ensure a uniform surface.
Is A Drum Sander Better Than An Orbital Sander For Hardwood Floors?
A drum sander removes more material faster and is better for major refinishing, while an orbital sander is safer for light sanding and edges.
Use a drum sander for deep repairs and leveling, but choose an orbital for final smoothing, tricky areas, and to reduce risk of gouges; many pros use both tools in sequence.
Can You Use A Drum Floor Sander On Engineered Wood Or Softwood Floors?
You can use a drum sander on some engineered and softwood floors, but proceed with caution because thin wear layers and soft timber are easily damaged.
Check the engineered board’s wear-layer thickness—avoid drum sanding if the layer is under 3–4mm; for softwoods, take very light passes or use an orbital to prevent over-sanding and uneven removal.
How Much Does It Cost To Rent A Drum Floor Sander For A Day?
Daily rental for a drum floor sander typically ranges from $40 to $80, depending on model and location.
Also budget for sanding pads, edge sander or buffer rental, sandpaper discs, and possible delivery or deposit fees; week rates are often cheaper per day and prices vary by region.