Frustrated by uneven cuts or wasted time at the bench? A few simple setup moves will make your radial arm saw cut truer and run smoother. This post walks through seven clear tips — from securing the base and oiling the arm to aligning the motor and running test cuts. Follow these steps and your next projects will finish faster with fewer surprises.
Table of Contents
A radial arm saw can make fast, repeatable crosscuts, miters, dadoes, and even rips when it’s set up correctly. This guide walks through a proven setup sequence so your adjustments “stack” the right way and stay accurate.
Radial Arm Saw Setup Overview
Radial arm saw basics
A radial arm saw (also called radial arm saws, a radial saw, a RAS saw, or even “radio arm saw”) is a stationary saw where the motor rides on an overhead arm and slides through the cut. That sliding action is why setup matters so much: if the arm, yoke, table, or fence is off, the error shows up in every pass.
Most models share the same geometry: the blade must be 90° to the table surface and also 90° to the fence for clean square crosscuts. Start with the base and table, then work upward to the arm, yoke, and motor alignment so later tweaks don’t undo earlier work.
Why setup saves time
A careful initial setup cuts future recalibration because every angle scale and index stop gets “trained” to true square. One step out of sequence can force you to chase errors for the rest of a project, while a correct setup often reduces re-checking by 50–70% because your 90° and 45° stops stay trustworthy.
If you’re organizing a small shop, pair your saw station with a flat bench and clamps so long boards stay supported and still. A solid workbench setup makes test cuts and fence adjustments faster and more repeatable.
Set the base and table first; every other adjustment depends on them.
Shop setup principle
Setup Tip 1: Secure the Radial Saw Base
Stand stability
Your first job is to stop movement. Any wobble becomes vibration, and vibration becomes blade wander and inconsistent cut lines—especially on long pulls through hardwood.
Pick a stand that can’t rack side-to-side. If you’re using a cabinet base, confirm it sits flat on the floor with no rocking. If the base rocks, shim the feet before you touch alignment settings, since the saw will “change” every time weight shifts.
- Push hard on each corner and watch for sway.
- Check fasteners on any folding stand and tighten them.
- Add a lower shelf with weight (tools, sandbags) if the stand feels light.
1/4-inch carriage bolts
Bolt the saw base down using 1/4-inch carriage bolts so the head can’t spin while you tighten the nut. A bolted connection also forms a more rigid triangle between the saw, stand, and fasteners than screws alone.
This step often takes 5–10 minutes, and it pays back quickly because you won’t keep “fixing” accuracy that’s really just the saw shifting under load. For a step-by-step mounting and setup sequence, see Setting Up a Radial Arm Saw.
Setup Tip 2: Install and Lubricate the RAS Saw Arm
Oil the column
Before the arm goes on, wipe the column clean and add a thin coat of motor oil. That light film reduces binding and makes height changes smoother, which helps you set blade-to-table geometry without fighting friction.
Less resistance also makes fine positioning faster; many users feel roughly a 30% drop in “stickiness” after lubrication, which is the difference between smooth adjustments and overshooting a mark.
Safe arm install
The arm assembly can be around 60 pounds, so get help if you need it. Keep fingers out of pinch points where the receiver meets the column, and support the arm evenly so it doesn’t cock to one side.
During installation, use the crank to lower the arm slightly so it doesn’t rotate unexpectedly while sliding in. If the receiver doesn’t seat squarely, you can bake in a left/right tilt that shows up as a persistent out-of-square cut.
Setup Tip 3: Mount the Yoke and Bearing Rollers
Yoke install
The yoke carries the motor and controls how the blade tracks as you pull through a cut. Support the motor/yoke, remove the large Allen screw at the arm end, then guide the yoke so the bearing rollers land in their ways without scraping.
Many classic designs use four rollers, with two rollers riding on eccentric cams. Newer radial arm saws may use concave rollers on round rods, but the goal stays the same: no slop, no bind, smooth travel.
Roller cam adjustment
Turn the eccentric cams to bring the rollers inward until the carriage feels snug but still glides. You’re aiming for controlled movement with no side-play, because side-play becomes heel (blade dragging sideways) and tapered cuts.
After you tighten the main fastener, pull the carriage through its full travel and listen. A smooth “whoosh” is fine; clicking or catching means a roller isn’t seated or is adjusted too tight.
Setup Tip 4: Level the Table Support Rails
Front/rear rail leveling
Your table must present a consistent plane under the blade. Loosen the two bolts per rail (front and rear), then tap rail ends until both rails sit at a uniform height across their lengths.
Uneven rails create high corners, which can twist the sacrificial top and throw off dado depth. If you cut joinery, rail leveling is the difference between “fits once” and “trim and retry” all day.
Wrench drag check
Use the blade as a visual pointer and bring it over a bolt location on the rails. Slide a wrench between the shaft end and rail; it should drag slightly in the same way at both rails and at multiple points.
| Check | What “Good” Feels Like | What to Fix |
|---|---|---|
| Wrench drag at front rail | Light, consistent drag | Tap rail end up/down, re-tighten |
| Wrench drag at rear rail | Matches front rail drag | Level rear rail to match front |
| Drag changes along rail | Same feel at multiple points | Loosen bolts, re-seat rail, tighten evenly |
Setup Tip 5: Align Arm and Motor for Square Cuts
90° to table
Set the motor so the blade shaft is vertical to the table. Bring the blade down near the table surface (unplug the saw), place a reliable square against the blade plate (avoid the teeth), and adjust until you read true 90°.
Remove play before tightening: push the handle clockwise to seat parts against their stops, then snug fasteners in a consistent pattern. Tighten top pairs first, then lower pairs, so clamping pressure doesn’t twist the motor as you lock it down.
90° to fence
Swing the arm to the crosscut position and set it so the blade travel is square to the fence. Use a framing square or machinist square between the fence face and the blade plate, then adjust the arm index/pointer so the scale reads true at 0°.
If the arm scale reads 0° but cuts aren’t square, trust the cut and the square, not the paint on the scale. After correction, that index becomes your fast reference for repeat cuts without re-checking each time.
Craftsman radial arm saw and DeWalt radial arm saw notes
A Craftsman radial arm saw often has lots of adjustment points and may show wear in detents, rollers, or locks, so take extra time removing slop before you lock settings. A DeWalt radial arm saw (and many heavier vintage DeWalts) often holds alignment well once set, but it still needs the same sequence: base, rails, arm, then yoke/motor.
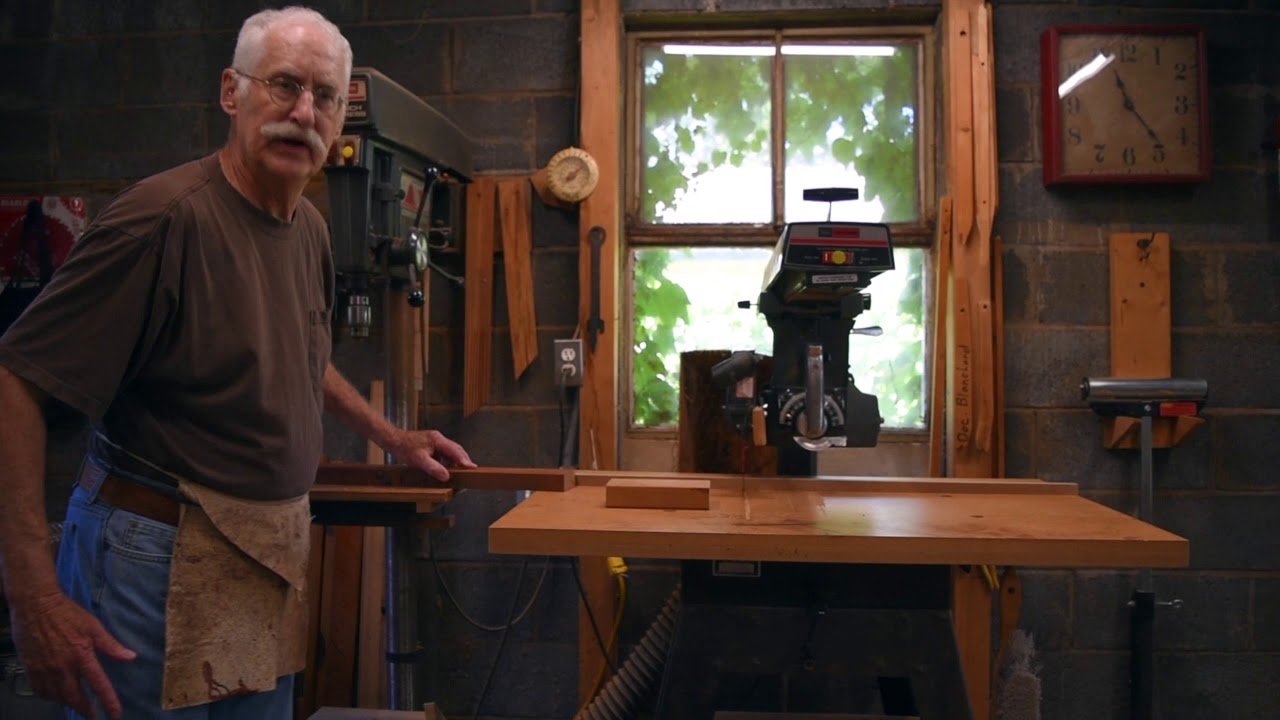
If you want a second visual walkthrough for alignment steps and common mistakes, watch YouTube: Radial Arm Saw setup video and compare each step to your hardware before you tighten anything permanently.
Setup Tip 6: Anti-Kickback and Ripping Setup
In-rip vs out-rip
Ripping on a radial saw requires the correct direction and guarding. Set the saw to the labeled in-rip (left) or out-rip (right) position so cutting forces press the stock against the fence instead of climbing and pulling.
Out-rip often gives more width capacity when the rear table supports the board (some setups reach around 26 inches), but only use what your specific model supports safely. Keep the table clear of chips like you would on a table saw so stock doesn’t ride up mid-cut.
Ripper fence locking
Lock the rip fence and carriage so nothing creeps. Add an auxiliary sacrificial fence/spacer set to your cut width, then tighten the carriage and fence locks firmly; a locked setup can speed repeated rips by about 40% because you stop measuring each pass.
If you’re clamping stop blocks or sacrificial faces, use clamps that won’t shift under vibration. A quick review of types of clamps helps you pick the right style for fences and stops.
Negative hook blade
For ripping and even assertive crosscut pulls, a negative hook (about 5–6°) blade reduces the self-feeding tendency that can trigger kickback. Many combo blades don’t have a strong negative rake, so check the blade spec before you rely on it for safer feed behavior.
For more shop-tested tips on radial arm saw ripping behavior and guarding habits, compare notes with experienced users in Radial Arm Saw Tips and Tricks.
Setup Tip 7: Fine-Tune and Verify with Test Cuts
Indexing pin tweak
If your yoke or arm uses an indexing pin, loosen the mount bolts slightly and tweak until the pin drops in with the blade truly square. This step turns the detent into a repeatable reference instead of a “close enough” stop.
After you adjust, tighten the mount and re-check with a square before cutting wood. A small index error grows into visible gaps when you build frames, boxes, or face frames.
Heel check
Heel happens when the blade trails sideways and rubs the kerf, leaving burn marks or a tapered edge. Make two scrap crosscuts, flip one piece, and put the cut faces together; any gap suggests the blade isn’t tracking straight.
Fix heel by removing carriage slop first (roller cams), then re-check arm-to-fence square. Don’t chase heel by altering the fence if the carriage still has side-play.
Carriage slide tilt test
Test whether the carriage wants to drift forward or backward on its own travel. A slight front-to-back tilt—around 1/4 inch out of level over the table depth—can stop unwanted slide on some setups, but keep it small and consistent so accuracy stays predictable.
Do a final set of scrap tests: crosscut at 90°, miter at 45°, and a short rip on safe stock to confirm the fence locks, anti-kickback parts, and blade choice behave as expected. A 5-minute verification can save hours of rework once you start cutting project parts.
If you want an alternative machine for repeated crosscuts after you’ve compared station layouts, these options are common choices. They can also complement a radial arm saw station for jobsite work.

DEWALT 12-Inch Single-Bevel Miter Saw (DWS715)
- 15-amp motor provides strong, consistent performance
- 12-inch blade handles larger stock and long crosscuts
- Easy-to-read miter detents for precise angle stops
- Durable construction built for jobsite use
- Onboard storage and simple blade changes for convenience

DEWALT 12-Inch Double-Bevel Sliding Miter Saw with XPS
- XPS LED shadow light for instant blade-to-line alignment
- Double-bevel capability for efficient crown and bevel cuts
- Sliding design expands cutting capacity for larger boards
- Powerful motor maintains speed under load for clean cuts
- Includes blade wrench, clamp and dust bag for job readiness

DEWALT 12-Inch Double-Bevel Sliding Miter Saw (DWS779)
- High-speed 3800 RPM motor for smooth, efficient cutting
- Double-bevel design simplifies angled cuts and crown molding
- Increased crosscut capacity handles wider material
- Includes blade wrench and material clamp for secure cutting
- Built for durability on demanding job sites
FAQs
ًWhat Is A Radial Arm Saw Used For
A radial arm saw is primarily used for making accurate crosscuts, miters, and bevel cuts in wood by pulling a mounted blade across the workpiece. It is also useful for dadoes, rabbets, and repetitive cut tasks when set up correctly. While versatile, it is best suited for crosscutting operations rather than heavy ripping compared to a table saw.
How Do I Safely Set Up And Operate A Radial Arm Saw To Avoid Kickback And Binding?
Always secure the workpiece, use a sharp blade sized for the cut, and keep the saw and fence aligned to minimize kickback and binding.
Set blade depth correctly, use clamps or push sticks for small pieces, stand to the side of the cut, and feed wood at a steady pace; stop if you hear unusual resistance or noise.
What’s The Difference Between A Radial Arm Saw, A Table Saw, And A Miter Saw — Which Should I Buy For My Shop?
Choose based on the cuts you do: a table saw is best for ripping and fence-guided work, a miter saw excels at precise crosscuts and angles, and a radial arm saw offers versatile crosscuts, bevels, and molding capability.
For most home shops, a quality table saw plus a compact miter saw covers nearly every task; only choose a radial arm saw if you need its sliding crosscut and molding strengths.
How Do I Align And Adjust The Blade, Fence, And Bevel On A Radial Arm Saw For Accurate Cuts?
Use a reliable square and straightedge to make small, precise adjustments until the blade is perpendicular to the table and parallel to the fence.
Tighten the locks, set bevel stops, make test cuts, and fine-tune the miter and depth settings for repeatable accuracy.
Can A Radial Arm Saw Rip Boards Or Is It Strictly For Crosscuts And Molding?
A radial arm saw can rip in certain setups but is primarily intended for crosscuts, miters, and molding work.
Ripping requires careful fence alignment, the right blade, and safe feeding; many woodworkers prefer a table saw for regular ripping because it is safer and more efficient.