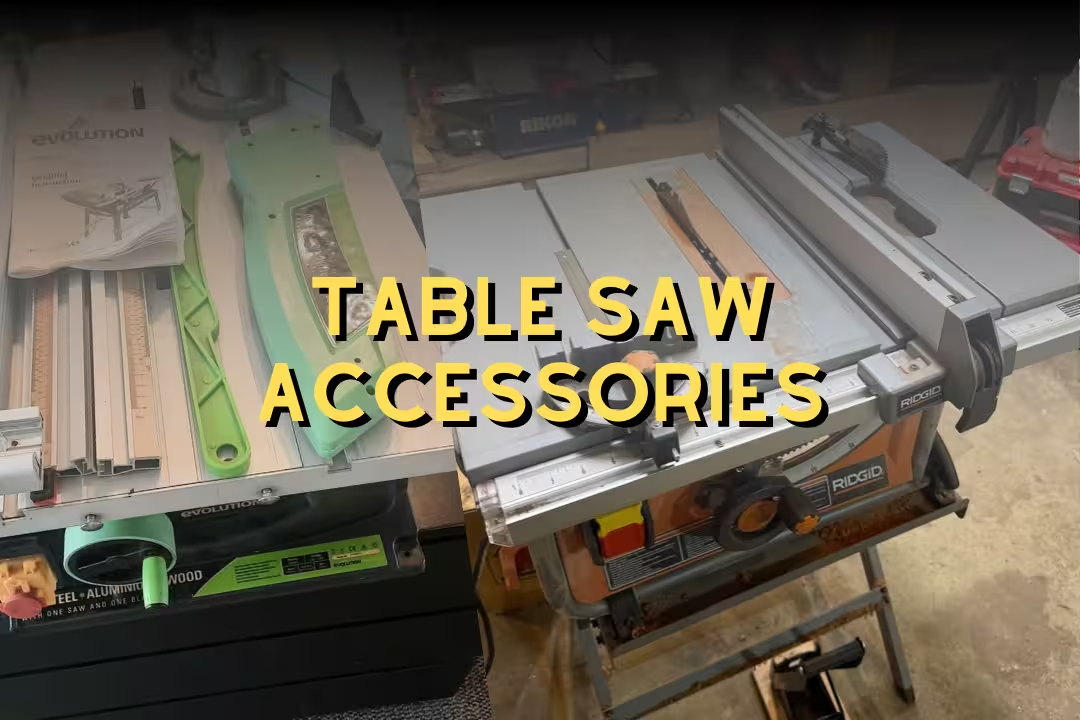
Table Saw Accessories: 7 Upgrades for Safer Cuts
Table saw accessories are add-ons like push sticks, riving knives, featherboards, sled parts, and outfeed supports that reduce kickback risk and help you guide wood accurately past a blade spinning at high speed. The right accessories also make cuts more repeatable because your stock stays controlled, supported, and aligned from infeed to outfeed.
Table of Contents
I treat accessories as part of the saw’s safety system, not optional extras, because most table saw “scares” start with stock shifting a fraction of an inch at the wrong time. Once you feel a board start to chatter and then load up against the blade, you don’t forget the sound or the sharp vibration in your fingertips.
Why table saw accessories improve safety
Most table saw attachments improve safety by controlling three things: the workpiece, your hands, and the blade path. If your setup reduces sideways drift into the back of the blade and keeps your hands out of the “line of fire,” injuries and ruined parts drop fast. For a quick overview of common accessories and what they do, I like this reference from 9 common table saw accessories and their uses .
Kickback reduction
Kickback happens when the kerf closes or the board twists and the rear teeth grab the stock, launching it back at you. Accessories that keep stock pressed to the fence (featherboards), keep the kerf open (riving knife), and control the last 12 inches of a rip (push blocks) all work together to stop that “grab-and-go” moment.
A common beginner mistake is trying to “muscle” wood through a bind. If you feel the feed pressure spike or hear the pitch rise, stop feeding, hit off, and keep the board pinned until the blade stops. Then fix the cause: fence alignment, warped stock, or missing riving knife.
Hand clearance
Hand clearance isn’t just distance from the blade. It’s also keeping your hands out of the path where a board could kick back. Push sticks, push blocks, and thin-rip jigs let you keep pressure where it belongs (down and forward) while your fingers stay away from the blade and away from the board’s “launch lane.”
Watch for the classic error: reaching over the blade to stabilize offcuts. Use outfeed support and plan your stance so you don’t have to lean. If you can’t finish the cut without reaching, change the setup before you cut.
Cut accuracy
Accuracy improves safety because accurate cuts reduce second passes, cleanup cuts, and awkward “just shave a hair off” moves that pull hands closer to danger. Sleds and miter bar kits remove slop, featherboards reduce drift, and digital angle gauges stop the trial-and-error bevel routine that wastes material and tempts risky positioning.
If you’re already tuning your saw, pairing accessories with a properly set fence matters a lot. This ties directly into how you set parallelism and toe-out, which I cover in table saw fence.
Safer feeding with push blocks and sticks
Push blocks and sticks are the first accessories I hand someone who’s learning a table saw, because they fix the two biggest early problems: feeding hesitation and sloppy pressure. A good push aid feels planted—your palm pressure transfers to the board without skating—and you can feel the blade load change through the handle instead of through your fingertips.
Key features
Look for high-friction contact, a stable heel, and a handle that doesn’t force your wrist into a weak angle. If the rubber pad is too slick or too small, you’ll compensate by pushing harder, which makes a sudden slip more likely right at the danger zone.
- Wide base for downward pressure on thin rips
- A positive “heel” that hooks the board’s back edge for forward drive
- Replaceable pads so grip stays consistent over time
- Comfortable handle height so your knuckles don’t drift toward the blade
- Bright color so it’s visible in your peripheral vision
One more pro detail: keep at least two push tools at the saw. When the last 6–10 inches clears the blade, a second tool lets you keep down-pressure on the keeper piece while guiding the offcut safely away from the blade’s back teeth.
Best uses
Push sticks excel on standard rips where your hand would otherwise follow the board past the blade. Push blocks shine when you need both down-pressure and forward pressure, like narrow rips, slightly cupped boards, slick melamine, or anything that tends to skate on cast iron.
Here are a few push tools that match different feeding needs.

Powertec 5 Pack Push Blocks and Sticks
- Five piece set gives extra push blocks and sticks for multiple stations
- Dual ergonomic handles boost control and reduce hand fatigue
- High grip surfaces increase contact and reduce slippage
- Helps keep hands clear of blades to minimize kickback risk
- Versatile for table saws, router tables, band saws and jointers

MicroJig GRR RIPPER GR 100 Pushblock
- 3D hold down design secures narrow and wide stock for safer cuts
- Combines pushing and holding to control workpiece movement
- Adjustable for different thicknesses and cutting angles
- Bright yellow body improves visibility at the saw
- Increases cut accuracy while reducing tear out and kickback

Universal Push Block for Table Saws and Jointers
- Ergonomic shape gives secure control when feeding stock across blades
- Simple assembly gets you working quickly with minimal tools
- Compatible with table saws, router tables, band saws and jointers
- High friction contact areas protect the workpiece and reduce slip
- Compact design helps maneuver small or narrow pieces safely
A mistake I see a lot: using a push stick to push forward but forgetting down-force. If the board lifts even slightly, the rear teeth can grab it. Fix that by combining a push stick with a featherboard, or switch to a push block that naturally applies down-pressure.
Blade guards and riving knives for anti-kickback
Blade guards and riving knives work best as a pair: the riving knife prevents the kerf from closing into the blade, and the guard blocks accidental contact while deflecting chips and dust. On older saws, upgrading guarding can change how comfortable you feel making routine cuts because you’re not staring at exposed teeth during the last inches of a pass.
Blade guard upgrades
Aftermarket guards often improve usability, which matters because a guard that’s annoying gets removed and never comes back. Clear guards help you track the cut line, and better hardware tends to reduce rattling. If you’re curious what an upgraded guard setup looks like on an older saw, this walkthrough from WWGOA’s Shark Guard article shows the kind of real improvements that get people using guards again.
Riving knife setup
Riving knife setup is about alignment and spacing. If it’s not in line with the blade, it can steer the workpiece into the fence or cause the board to hang up mid-cut. I set the knife so it tracks the blade plate closely, then I make a test rip in scrap and watch for any sideways pressure change as the cut passes the knife.
Edge case: thin-kerf blades and full-kerf riving knives can clash, forcing the stock to spread wider than the kerf. If you see burn marks starting right after the knife, check kerf vs knife thickness and swap parts to match.
Dust and visibility options
Dust control affects safety because dust hides your cut line and makes the table slick. A guard with a dust port, paired with decent collection, keeps the air clearer and reduces that gritty feel on your forearms. If your guard fogs with fine dust, add airflow or increase suction—visibility drops fast once static starts clinging to plastic.

Beginner trap: removing the guard for one “quick cut” and then doing five more. If your guard isn’t fast to reinstall, upgrade it or set up a dedicated sled/fixture so you can keep guarding on for standard ripping.
Featherboards to control stock against the fence
Featherboards apply side pressure that keeps stock tight to the fence, which reduces fence drift and kickback risk. You’ll feel the difference immediately on long rips: the feed becomes smoother, the blade sounds steadier, and the cut edge shows fewer random burn streaks from tiny lateral shifts.
Infeed stability
Infeed placement matters more than most people think. Put the featherboard ahead of the blade so it controls the stock before the cut happens. If you clamp it past the blade, it can pinch the offcut into the rear teeth, which raises kickback risk instead of reducing it.
If you need extra control on a bowed board, use two featherboards: one near the front to start the cut straight, and one a bit farther back but still before the blade. That split pressure often flattens the board’s urge to wander without forcing you to press hard with your hands.
EVA vs plastic
EVA feather material tends to grip without denting softwoods as badly as rigid plastic fingers. Plastic featherboards can hold very firmly, but they sometimes leave shiny pressure marks on pine or compress the edge of MDF. If you’re ripping pre-finished plywood, a slightly “softer” hold can reduce surface scuffs while still controlling drift.
Common mistake: overtightening. Too much pressure makes feeding jerky, which tempts you to push harder and can cause the stock to suddenly lurch. Dial pressure so the board slides with steady resistance and doesn’t chatter.
Thin rip jigs for safe narrow strips
Thin rip jigs let you cut narrow strips while keeping the main board against the fence, which keeps your hands farther from the blade and keeps the offcut from getting trapped. They’re one of the cleanest answers for repeat strips like edge banding, lattice, or segmented work where consistency matters.
Repeatable spacing
Repeatability comes from referencing the jig off the fence while the strip is defined by a fixed stop. Once set, each strip comes out the same without re-measuring. You’ll also notice less panic in the last few inches of a cut, because you’re not trying to balance a skinny offcut between fence and blade.
T-slot compatibility
T-slot fit isn’t universal across every saw and aftermarket fence. Measure your slot and confirm the jig’s runner size so it doesn’t bind. Binding feels like a sticky start, then a sudden release, which is the exact “surprise motion” that can pull stock into the blade.
This style of jig is a solid starting point for narrow-strip work without building a custom fixture.

Thin Rip Jig for Table Saw 3/8 inch x 3/4 inch T Slot
- Makes precise narrow strip cuts for repetitive ripping tasks
- Compatible with 3/8 inch x 3/4 inch T slot table and router tables
- Quick setup for consistent spacing and fast production
- Durable construction for accurate long term use
- Improves safety and reduces tear out on thin stock
Beginner trap: trying to cut ultra-thin strips from twisted stock. If the board has tension, the kerf can close. Joint one face/edge first or rip oversized, then plane to final thickness for safer results.
Crosscut sled and miter bar kits for accurate cuts
A good crosscut sled turns a table saw into a controlled cutting platform for square parts, repeat lengths, and safer small pieces. The tactile difference is huge: instead of balancing stock against a miter gauge that can flex, you feel the sled glide with even resistance while the work stays trapped against a fence.
UHMW miter bars
UHMW bars slide smoothly and don’t swell like wood runners can. If your saw lives in a garage, humidity swings can make wooden runners sticky one week and loose the next. UHMW tends to keep that “buttery” glide without slop, which is what prevents micro-wobble at the cut line.
T-track sled kits
T-track kits speed up building because you can add stop blocks, hold-down clamps, and repeat jigs without drilling new holes every time. That matters once you start batching parts, where one stop block set wrong can ruin a whole run before you notice.
Here are miter bars and kits that cover basic runner upgrades through full sled hardware.

Crosscut Sled Miter Bars 2 Pack 3/4 inch x 3/8 inch x 17 inch
- Two premium UHMW miter bars provide smooth, low friction movement
- Predrilled holes and included screws simplify installation
- Fits U track and a variety of router table and sled setups
- Sturdy 17 inch length for improved fence support and accuracy
- Reduces wobble for cleaner, repeatable crosscuts

Universal Slider Miter Bars 20 millimeter 2 Pack
- Designed to fit both U shape and T shape miter slots for broad compatibility
- Smooth sliding action for precise sled and fence movement
- Robust construction for stable cutting and long life
- Easy to install on table saws, T rails and bench drills
- Helps improve repeatability and reduces side play
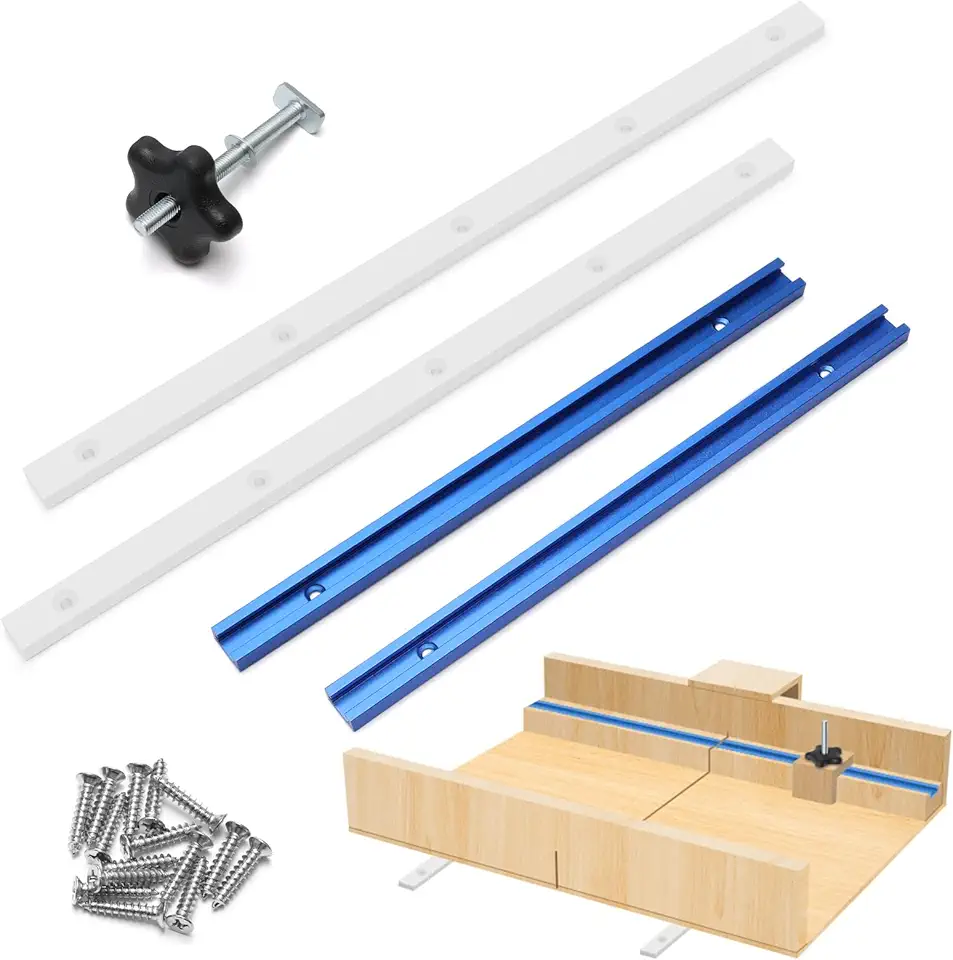
21 Piece Crosscut Sled Kit with T Tracks and Miter Bars
- Complete kit includes two aluminum T tracks and two UHMW miter bars for a ready build
- Knobs and screws provided for straightforward assembly
- Aluminum tracks help maintain straight, accurate fence alignment
- Modular components let you customize the sled to your needs
- Improves crosscut precision and workshop safety
Table saw extension alignment
Table saw extension wings and outfeed extensions must sit coplanar with the main table. If an extension is even slightly low, stock noses down as it leaves the blade and you’ll see a tiny step at the end of a crosscut. If it’s high, sheets catch and you feel that sudden “thunk” as an edge hits the lip.
| Symptom | What usually fixes it |
|---|---|
| Board drifts off fence mid-rip | Add a featherboard ahead of blade; verify fence is parallel |
| Burn marks after riving knife | Match knife thickness to blade kerf; realign knife to blade |
| Crosscuts vary in length in a batch | Add stop block on T-track; confirm sled fence is square |
| Sheet goods “catch” leaving table | Shim extension/outfeed to coplanar; wax table surface lightly |
If you’re deciding whether to upgrade the saw itself or keep investing in accessories table saw setups, it helps to compare options side-by-side. I laid out what to look for in best table saw.
Setup and support upgrades: angle gauges, outfeed, blade brakes
Setup and support accessories don’t look exciting, yet they prevent the situations that cause bad cuts and scary feeds: unsupported stock tipping, bevels set wrong, and blades that take too long to stop. When a long board starts to fall off the back, you can feel your shoulders tense and your hands start reacting instead of guiding, which is exactly what you want to avoid.
Digital angle gauges for bevels
Digital gauges remove guesswork from bevel cuts. I use them to set the blade, then I lock the bevel and re-check after tightening because some saws shift a hair when the lock cams down. That tiny shift is how you end up “mystery gaps” on miters that looked perfect at the gauge.
This compact option is handy for quick blade checks.

Klein 935DAG Digital Angle Gauge
- Measures a wide range of angles for versatile setup and layout work
- Clear digital readout for fast, readable measurements
- Compact and durable for jobsite and workshop use
- Lets you quickly set and verify blade and bevel angles
- Ideal for carpentry, metal work and general DIY projects
Table saw outfeed roller supports
Table saw outfeed support is what keeps you from “catching” stock at the end of a cut, which can twist the board into the blade. Rollers help, but they must be set dead in line with the cut path. If a roller is skewed, it steers the board sideways and you’ll see the kerf start to tighten.
This style of folding roller stand works when you need portable support that stores flat.

WORKPRO Folding Roller Stand 250 pound Capacity
- Adjustable height suits different tool heights for outfeed and support
- Heavy duty frame supports up to 250 pound loads for large stock
- Folding design packs flat for convenient storage and transport
- Upgraded roller head provides smooth material feeding and positioning
- Stable steel construction for reliable workshop performance
Pro workaround: for sheet goods, I prefer a low-friction outfeed surface over rollers. Rollers can let plywood “coast” and yaw slightly, while a slick table keeps consistent drag and straighter tracking.
Blade brakes for fast stop
Blade brakes reduce exposure time after a cut. That matters during offcut clearing and measurement checks, where people get casual and move hands into the table area. A fast stop also helps during a bind because you can shut down and wait less time with the board pinned in place.
This cartridge-style replacement matches saws that use TSBC 10R2/10R3 type cartridges.

Table Saw Brake Cartridge for 10 inch Blades
- Stops the blade quickly to reduce injury risk and damage
- Designed as a direct replacement for TSBC 10R2 and 10R3 models
- Easy install for minimal downtime
- Durable materials ensure reliable activation over many uses
- Helps prevent kickback and costly blade incidents
Mistake to avoid: treating a brake like a substitute for feed control. Brakes help after something goes wrong; riving knives, featherboards, and push blocks reduce the odds of it going wrong in the first place.
Practical Notes From Real-World Use
Space limits are the first real constraint. Many shops don’t have room for permanent outfeed tables, so people rely on roller stands. The downside is rollers move when a long board “nudges” them; I fix that by adding weight to the stand base or pinning the feet against a stop on the floor.
Accessory stacking can backfire. A featherboard, a tall fence face, and a push block can fight each other if you don’t plan where your hands will go. I do a dry run with the saw off: slide the stock through, place both push tools, and confirm nothing forces my wrist into a weak angle near the blade.
Sled friction surprises people. UHMW runners glide nicely, but sawdust packed in miter slots turns that glide into a gritty scrape you can feel through the sled fence. I keep a small brush at the saw and clear the slots before accuracy work, especially after breaking down plywood.
Wood movement is the hidden enemy of “perfect” setups. A board that was flat yesterday can cup overnight, then bind mid-rip and tempt you to push harder. When I’m ripping thin strips or anything long, I joint one edge first or rip a straight reference, then go to final width.
Maintenance drift is real. Rubber pads glaze, featherboard fingers wear, and your fence face picks up dents that catch stock. A quick monthly reset helps: scuff push-pad rubber lightly, wax the table, clean pitch off the blade, and verify the fence. For blade care, I keep sharpening workflow separate from saw setup; this pairs well with sharpening stone habits for edge tools so accuracy stays consistent across the shop.
The safest cut is the one where the work stays controlled from the first inch of infeed to the last inch of outfeed, without your hands needing to “save it” mid-cut.
Shop rule used during table saw setup checks
FAQs
What Are The Must-Have Table Saw Accessories For Beginners?
Essential table saw accessories for beginners include a quality push stick, blade guard, featherboards, a miter gauge, and a reliable rip fence.
These items improve safety and cut consistency for common projects. As you progress, add a zero-clearance insert, dust collection, and a good blade selection to expand capability.
How Do I Choose The Right Blade For Ripping Vs Crosscutting On A Table Saw?
Choose a ripping blade with fewer, larger teeth for fast, straight rip cuts and a crosscut blade with more, finer teeth for smooth end-grain cuts.
Match blade type (rip, crosscut, or combination) to the cut and material, and check tooth geometry and hook angle. For general workshop use, a good combination blade is convenient, but keep dedicated blades for fine finish or specialty materials.
Do Aftermarket Fences And Miter Gauges Make A Big Difference In Accuracy?
Yes — quality aftermarket fences and miter gauges can significantly improve accuracy and repeatability over many stock accessories.
A precision fence gives truer rip cuts and better alignment, while a robust miter gauge produces more precise crosscuts and angles. Upgrading is one of the most cost-effective ways to raise overall cutting quality.
How Do I Install And Use A Zero-Clearance Insert And When Should I Use One?
A zero-clearance insert installs by replacing the saw’s throat plate with a tight-fitting plate that the blade cuts to match its kerf.
Raise the blade and make a test cut so the insert forms the exact slot; it supports the workpiece at the blade for cleaner edges and less tear-out. Use zero-clearance inserts for thin plywood, small parts, dados, and any cut where finish and safety matter.