Jointer vs Planer: When to Use Each Tool and Which Is Best for You
Ever held a warped board and wondered whether to use a jointer or a planer? They look similar but do different jobs. A jointer flattens a face and squares an edge. A planer makes faces parallel and sets the thickness. Read on to learn which to use first and how to pick the right machine for your shop.
Table of Contents
Picking between a jointer vs planer gets easy once you know what each machine can and can’t fix on rough lumber. This guide explains the core differences, the best order to use them, and how to choose the right setup for your shop.
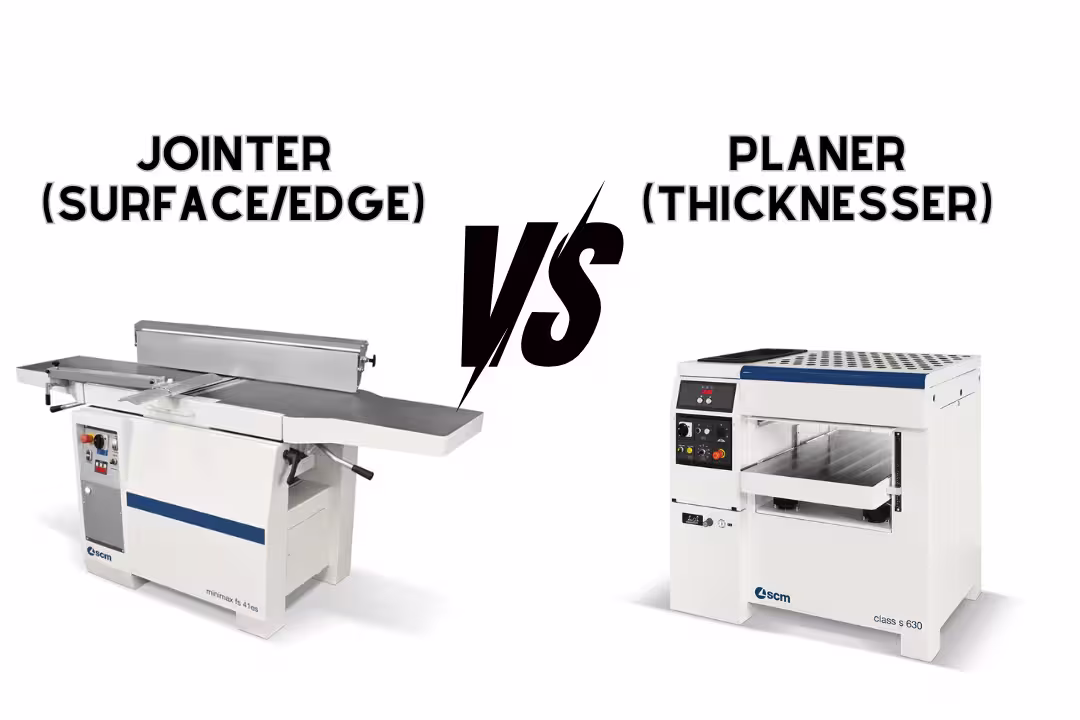
Jointer vs Planer: Core Differences
The fastest way to separate planer vs jointer is to focus on the result: a jointer creates a flat reference surface and a straight edge, while a planer makes the opposite face parallel and brings boards to a repeatable thickness. If you try to use the wrong tool first, you’ll often keep the warp and just make it “neater.”
What a jointer does
A jointer removes high spots to make one face flat, then it can straighten and square one edge to that flat face using the fence. This is why it’s the go-to tool for twisted, cupped, or bowed boards before you think about thickness.
For consistent results, keep cuts light and steady, and use proper infeed/outfeed technique so the board registers on the outfeed table after the first few inches. A jointer shines on glue-ups because a straight edge closes gaps without excessive clamp pressure.
What a planer does
A thickness planer shaves the top face while rollers feed the board through, producing a consistent thickness across multiple boards. It also makes the second face parallel to the first, which is perfect for cabinet parts, face frames, and shelves that must match.
A planer can’t “create flat from nothing” on a warped board because the rollers press the stock down during the cut. Without a true reference face, you risk planing a flat-looking board that still springs or rocks on the bench.
Cut mechanism overview
With a jointer, the board rides on a flat bed across an in-table cutterhead, so the machine can remove twist by referencing the table geometry. With a thickness planer, the cutterhead sits above the stock and feed rollers drive the material through to a set height, so the focus is repeatable thickness.
If you’re comparing a wood planer vs jointer, notice where the board is supported: jointer support is from the tables; planer support is from the bed plus roller pressure. That support difference is why the jointer is the flattening tool, while the planer is the sizing tool.
Typical capacities
Most small-shop jointers are 6–8 inches wide, while common benchtop thickness planers are 12–13 inches wide, letting you thickness wider boards than you can joint. Typical maximum depth of cut is about 1/8 inch per pass on many jointers and around 5/32 inch on many planers, but lighter passes often leave a cleaner surface and reduce tear-out.
Capacity isn’t only width; bed length matters for straightening edges and flattening longer boards. For a quick baseline on machine sizing and safe use limits, cross-check specs and safety notes from a trusted source like CPSC Power Tool Safety.
| Feature | Jointer | Thickness Planer |
|---|---|---|
| Main job | Flatten one face, straighten/square one edge | Make faces parallel, bring stock to final thickness |
| Best first step? | Yes, on rough/warped lumber | No, unless one face is already flat |
| Common widths | 6–12 in. | 12–13 in. (benchtop common) |
| Typical outcome | Reference surfaces for later milling | Uniform parts for joinery and assembly |
When to Use a Jointer
Use a jointer when a board won’t sit still on the bench or when two edges won’t close into a tight seam. This is the tool that gives you reference geometry so every later step becomes predictable.
Flatten faces
Flattening starts by removing the high spots until the board stops rocking, leaving you with one true face. Mark the high areas with pencil, take shallow passes, and keep downward pressure over the outfeed table once enough surface is registered.
If the board is badly twisted, reduce the problem before jointing by cutting it closer to final length, or rip it into narrower strips and joint each strip. That simple change often converts problem lumber into usable stock without fighting the machine.
Square edges
After you have a flat face, set it against the fence and joint one edge until it’s straight end-to-end. Verify with a reliable square, then adjust the fence so the edge is 90 degrees to the face for joinery and glue-ups.
If you need a sprung joint for panel glue-ups, take a couple extra passes that remove a hair more from the center than the ends. That leaves a slight hollow that clamps shut, giving stronger seams in real-world assemblies.
Glue-up prep
A jointer is the fastest path to glue-ready edges because it produces repeatable straightness across multiple boards. For panels, alternate growth rings up and down and joint mating edges in pairs so any tiny fence error mirrors, creating a closed joint.
For deeper guidance on combo setups and whether they fit your workspace, see this internal guide on jointer planer combo, then compare that workflow to separate machines.
Spiral cutterheads
Spiral (helical-style) cutterheads use small carbide inserts that shear the wood at an angle, which often means less tear-out on figured grain and a quieter cut. If you mill lots of curly maple or knotty stock, a spiral head can save time you’d spend sanding or scraping.
Insert cutterheads also simplify maintenance because you rotate or replace a single insert instead of resetting long knives across the full width. That makes it easier to keep the machine cutting clean, which reduces burn marks and feed resistance.
Here are popular spiral jointer options worth comparing by width, table support, and cutterhead style.

WEN 6-inch Spiral Jointer
- 6-inch spiral cutterhead for tear-free, smooth finish
- 10 amp motor provides steady power for consistent cuts
- Compact benchtop footprint fits small shops and workbenches
- Adjustable fence and depth controls for precise edge joints
- Easy maintenance and dust port for cleaner operation

WEN 8-inch Spiral Jointer
- 8-inch spiral cutterhead delivers smooth, tear-free surfaces
- Extendable table adds support for wider stock
- 10 amp motor for reliable, consistent performance
- Adjustable fence and depth settings for accurate jointing
- Integrated dust port and simple maintenance

WEN 12-inch Spiral Benchtop Jointer
- 12-inch spiral cutterhead provides wide, smooth cutting capacity
- 12 amp motor delivers consistent power for demanding jobs
- Extendable cast iron table adds support for larger stock
- Replaceable carbide inserts simplify maintenance and keep edges sharp
- Adjustable fence and dust port improve accuracy and cleanup
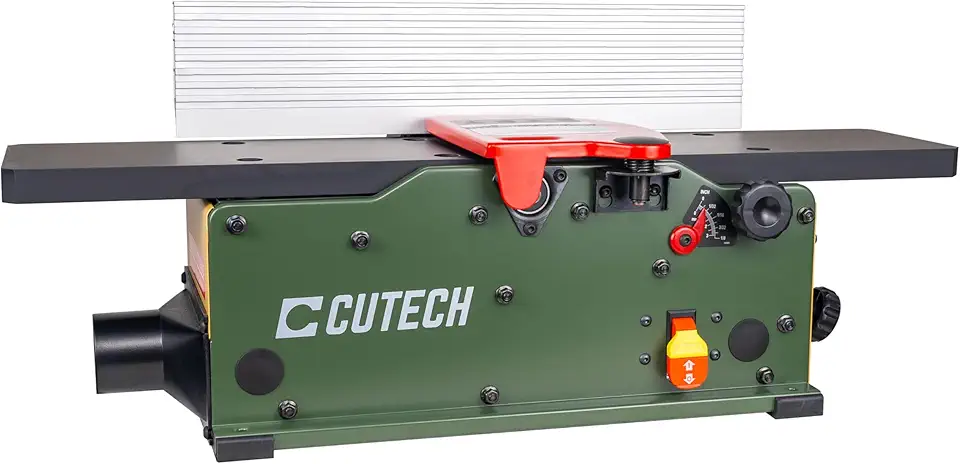
Cutech 6-inch Spiral Benchtop Jointer
- 6-inch spiral cutterhead with 12 carbide inserts for a smooth, tear-free finish
- Teflon-coated aluminum tables reduce friction for easier feed
- 19-5/8-inch aluminum fence offers stable, accurate guidance
- 10 amp motor supplies consistent cutting performance
- Easy insert replacement and built-in dust port for simple maintenance
When to Use a Planer
Use a planer once you already have one flat face and you need repeatable thickness across parts. It’s the fastest way to turn rough boards into matched components for joinery.
Thicknessing stock
Thicknessing means setting your target dimension and bringing every board to the same measurement in controlled steps. Take light passes, especially on hardwoods, to reduce tear-out and keep the motor from bogging, which improves surface quality.
Batch work speeds things up: plane all boards at one setting, then lower the cutterhead slightly and repeat. This keeps thickness consistent and cuts down on measuring time between boards, which reduces fit issues during assembly.
Parallel faces
After jointing one face, place that face down on the planer bed so the machine references it and cuts the opposite face parallel. This is the heart of square stock: one flat face from the jointer, one matching face from the planer.
If you don’t own a jointer yet, you can sometimes fake a reference face using a planer sled and shims, then plane the opposite side. That workaround helps, but it’s slower and still doesn’t replace a jointer for edge straightening.
Wide board advantage
Many benchtop planers handle 12–13 inches, so they often thickness boards that a 6-inch jointer can’t flatten in one piece. If a board is too wide to joint, rip it, joint the pieces, plane them to thickness, then glue back for a clean panel.
For wide processing, strong dust collection matters because planers create piles of chips fast. You can sanity-check airflow needs and shop dust hazards using guidance from OSHA Woodworking.
Snipe reduction tips
Snipe is a deeper cut near the board ends caused by shifting pressure as stock enters or exits the rollers. Reduce it by supporting long boards, taking lighter finishing passes, and feeding boards back-to-back so the rollers stay loaded, which lowers the chance of end gouges.
Another simple trick is to leave boards a bit long, then cut off the sniped ends after milling. That approach works great for rails, stiles, and shelves where you can plan for waste length up front.
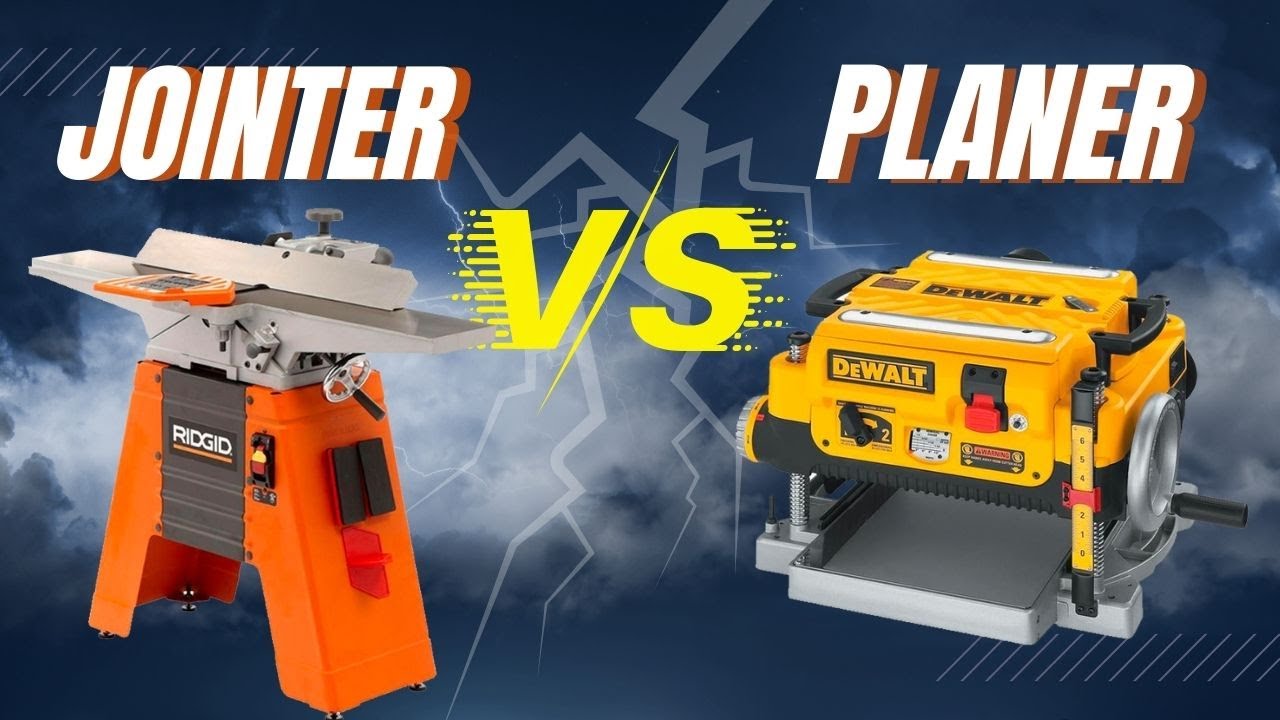
Best Workflow: Jointer First, Planer Second
The standard workflow answers most jointer planer vs planer confusion: you create one reliable reference surface on the jointer, then you use the planer to copy that reference into consistent thickness. This order prevents you from “locking in” warp with the planer.
Joint a reference face
Start with the worst face up, remove only what you need, and stop once the board registers solidly with no rocking. Mark that face as your reference face so it always goes against fences and planer beds until the part is fully milled.
Joint an edge
Put the reference face against the jointer fence and straighten one edge. Check with a straightedge, then label it as your reference edge for table saw ripping and layout.
Plane to thickness
Place the reference face down and plane the opposite side until it’s clean and parallel. Sneak up on final thickness with lighter cuts so you don’t overshoot and so you get a better finish pass.
Repeat for consistency
Mill all boards for a project in the same session when possible, since moisture changes can move stock overnight. Run parts in groups (same species and grain) to keep settings stable and get matching thickness across the build.
Jointer Planer vs Planer Options
If you’re comparing a jointer planner (common misspelling) or a jointer/planer combo to a standalone planer, focus on what work you do most. Your choice comes down to flattening needs, floor space, and how often you switch between operations.
Planer-only limits
A planer-only shop can thickness boards well, yet it won’t reliably remove twist or cup without extra setups like sleds and shims. You’ll also struggle to create glue-ready edges, so you end up using a table saw plus edge sanding, which can drift from true straightness.
If you mostly buy S4S lumber, a planer can still earn its keep by matching thickness for joinery and cleaning minor defects. Once you start buying rough lumber for savings, the lack of flattening becomes a daily bottleneck.
Combo machine tradeoffs
Combo jointer/planer machines save space by sharing a cutterhead, and they can be a smart pick for small shops that still want proper face-jointing. The cost is changeover time: switching modes interrupts flow, which matters if you mill lots of batch stock.
Pay attention to table length, fence rigidity, and how quickly the machine converts between functions. If you want a deeper breakdown of configurations, visit this internal page on jointer types and compare them to combo designs.
Space vs speed
Separate machines are faster for production because each tool stays set up, so you can move from jointing to thicknessing without changing anything. Combos win when space is tight, since one footprint can replace two machines, which is a big deal in garage shops.
To choose, write down your top three project types and the board sizes you actually process, then match capacity and workflow to that list. That simple step avoids paying for unused width or living with too-small capacity for your normal builds.
Which Is Best for You
The best choice depends on budget, space, and whether you start from rough lumber or pre-milled boards. Use the quick guide below to match tools to your shop reality.
Beginners small shops
If you’re new and working in a tight space, a planer is often the first buy because it creates consistent thickness for joinery and upgrades store-bought S4S boards. Add a jointer later or use a sled method short-term, but treat that as a temporary fix.
Hobbyists midrange
Hobby shops get the best results with both tools: a 6–8 inch jointer plus a 12–13 inch planer covers most furniture projects. This setup speeds up milling sessions and helps you buy rough lumber for better selection and lower cost per board foot.
Pros heavy duty
Production work benefits from wider jointers and strong planers that handle hardwood all day with minimal downtime. Look for long beds, powerful motors, and cutterheads that reduce tear-out so you spend less time fixing surfaces and more time cutting joinery with repeatable accuracy.
- Buy a jointer first if you often process warped rough lumber and need flawless panel glue-ups.
- Buy a planer first if you mostly need consistent thickness and you start from S4S boards.
- Pick a combo machine if space is your limiting factor and you can accept changeover time.
- Upgrade to spiral/helical cutterheads if tear-out or knife-setting time slows you down.
If you want shop project ideas that match your tool setup, browse the woodworking blog and build a short list of parts you commonly mill. That list helps you choose capacity and features based on real builds, not guesses.
These starter-friendly options are useful if you’re building out a small shop or adding a portable tool for quick edge work and trimming.

CRAFTSMAN 10-Amp Benchtop Jointer
- High-speed cutter delivers up to 22,000 cuts per minute for smooth finishes
- 10 amp motor provides dependable power for benchtop tasks
- Stable construction reduces vibration for cleaner joints
- Adjustable fence and depth stops for accurate edge work
- Easy access for blade maintenance and dust collection

WEN 3-1/4-inch Electric Hand Planer
- 3-1/4-inch cutting width for trimming and smoothing small boards
- 6 amp motor balances power and control for finish work
- Adjustable depth control for precise shavings
- Ergonomic handle and lightweight body reduce user fatigue
- Clean chip ejection and dust bag compatibility for tidy workspaces
Accessories and Safety Essentials
Good accessories improve results and reduce risk, since both machines expose fast-moving cutters and generate a lot of chips. Build a simple setup around safe feeding, strong dust pickup, and sharp cutters.
Push blocks PPE
Use push blocks on the jointer to keep hands away from the cutterhead, and wear eye and hearing protection every time. Set a personal rule that your hands stay at least 6 inches from the cutting area, and avoid loose sleeves and gloves near rotating cutters.
Dust collection
Planers can fill bags fast, so connect a dust collector or a high-flow extractor matched to your port size. Better collection improves visibility, reduces cleanup time, and prevents chips from getting recut, which can leave track marks on the surface.
Knife maintenance
Dull knives cause tear-out, burning, and extra load on the motor, so keep a schedule for rotation or replacement. If your surface starts looking fuzzy or you hear more strain, swap or rotate cutters before you waste time sanding a torn grain surface.
Replacement blades
Having spare knives on hand cuts downtime, especially if you hit hidden grit or a staple. Match length and hole pattern to your cutterhead, then do a test cut on scrap to confirm clean edges.
Disconnect power before changing knives, clearing jams, or adjusting cutterhead parts, and keep guards in place during operation.
CPSC Power Tool Safety
FAQs
What’s The Difference Between A Jointer And A Planer?
A jointer flattens one face and squares an edge, while a planer makes the opposite face parallel and adjusts the board’s thickness. The jointer creates a flat reference surface and true edges for glueups; the planer copies that flat face to the other side and brings boards to a consistent thickness. Together they produce fully dimensioned lumber quickly and accurately.
Can I Use A Planer Instead Of A Jointer To Flatten One Face Of A Board?
No, a planer alone will not reliably flatten a warped or cupped face because it rides on the opposite surface and duplicates its shape. You can flatten a face with a planer only if you first create a flat reference using a jointer, hand plane, or a flattening sled. For occasional work, a sled plus careful setup is an effective workaround.
Do I Need Both A Jointer And A Planer For My Small Woodworking Shop?
You don’t strictly need both tools for a small shop, but having both makes dimensioning faster and easier. Many hobbyists get by with a planer plus alternative methods for edges such as hand planes, a shooting board, or a table-saw jig, then add a jointer later as needed. Consider your space, budget, and the projects you build before buying both.
Which Should I Buy First – A Jointer Or A Planer?
Buy a planer first if you must choose, because it lets you thickness lumber and is more versatile for preparing stock. If you work with a lot of rough, warped boards or need perfectly square edges for frequent glueups, prioritize a jointer instead. Alternatively start with a planer and use hand tools or a shooting board for edges until you can add a jointer.