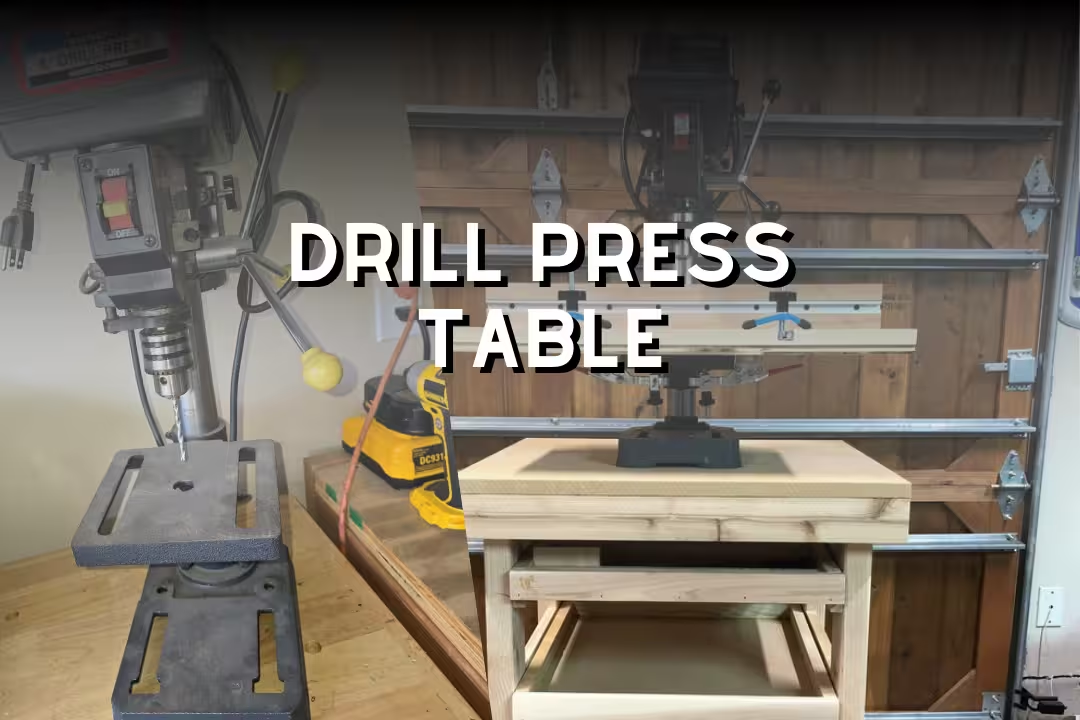
A drill press table is the work surface on a drill press where you clamp and position material for drilling. Upgrading it usually means adding a larger top, a fence with stops, better clamping, and replaceable inserts so holes land faster and cleaner with fewer re-setups.
Table of Contents
Drill press table upgrades that save time
Stock tables work, but they’re built for broad use and quick manufacturing, not fast woodworking workflows. After a few projects, you feel it in your hands: more reaching, more re-clamping, and that dull vibration that makes the bit “sing” and leave slightly fuzzy hole edges in plywood.
Why stock tables slow you down
The typical factory table is small, round or short-fronted, and full of awkward slots that don’t match your clamps. When you try to pin down a cabinet side or a long rail, the clamp feet end up half-on, half-off, and the workpiece wants to pivot the moment the bit grabs.
Most stock tables also skip a real fence and stop system, so repeat holes turn into “mark, line up, hope, drill.” That’s fine for one-off metal work, but it burns time on shelf pins, dowels, hardware, and jigs where location stacks up across 20–80 holes.
Clamping gets worse on a table top drill press because the head and column are close to the bench. You’ll catch your knuckles on the column, and you’ll notice you’re leaning around the machine instead of feeding straight down, which is when bits wander and holes go slightly out of square.
What better drill press table changes
A good upgrade gives you repeatability: you set a fence once, lock a stop, and drill parts like a batch process. The feed feels smoother because the work can’t skate, and you’ll hear less chatter because the part stays flat instead of flexing on a tiny contact patch.
You also get control over tear-out and exit holes with a sacrificial insert or backer. That matters on veneered ply and hardwood edges where a ragged exit can ruin a show face, even if the hole is “technically” in the right place.
If you’re building a more organized shop flow, the drill press starts acting like a small “hole station” beside your bench and clamping tools. A larger top and better clamping layout pairs nicely with the workholding approach in types of clamps, since you can finally use those clamps the way they were meant to sit.
1. Larger drill press table work surface
A bigger surface is the upgrade you feel immediately. Instead of balancing a workpiece on a small casting, you can lay it down flat, keep both hands on the part, and clamp without the clamp bodies fighting the column.
Right-size for projects
I size a woodworking-focused top so the fence can sit far enough from the bit to support wide panels, but not so big that it turns into a lever that amplifies column flex. For most shops, a 24×12 style surface is a sweet spot that still fits small floor presses and many benchtop models.
When you go very large (custom 30×28 builds), you’ll gain support but you must watch for headroom and column clearance. The edge of the table can block the crank arc or collide with the base on some machines, which forces you to remove the top just to tilt or lower the factory table.
Woodworking tables are often MDF or ply, which feels warmer and less “ringy” than cast iron under your palms. The trade-off is humidity: seal it well, or it can swell and lift around T-track screws, which will telegraph into accuracy.
Woodsmith shows several practical table upgrade ideas, including larger surfaces and fences; see Upgrade Your Drill Press Table (Woodsmith, accessed February 2026) for reference dimensions and layout concepts.
Benchtop stability gains
On a table drill press (benchtop unit), a larger top often reduces the number of times you loosen, swing, and re-lock the stock table. Fewer movements means fewer chances to bump the table out of square and chase accuracy with a wrench.
Stability improves when the work is clamped farther apart, which cuts that see-saw effect where the piece rocks under feed pressure. You’ll feel the bit bite more cleanly, especially with Forstners and hole saws, since the part can’t pivot and “grab” your wrists.
If you want a ready-made larger top, these boxes fit the “big surface + fence” pattern and install faster than building from scratch.

WEN 24-inch Drill Press Work Table
- Generous 24-inch by 12-inch work surface for larger projects
- Adjustable fence and stop block for repeatable, accurate drilling
- Sturdy construction reduces vibration for cleaner holes
- Easy to mount to most drill presses for quick upgrades
- Works with common inserts and clamps for versatile setups
For a thicker MDF top with an aluminum fence and flip stop, this is another common route for quick upgrades.

O'SKOOL Adjustable Drill Press Table
- Fits 12-inch and larger drill presses for broad compatibility
- Durable aluminum fence with flip stop for fast, repeatable positioning
- Thick MDF work surface sized at 23.625 inch by 15 inch by 1 inch for stability
- Replaceable insert plate protects the table and accepts different chucks
- Simple installation and solid clamping for safer drilling
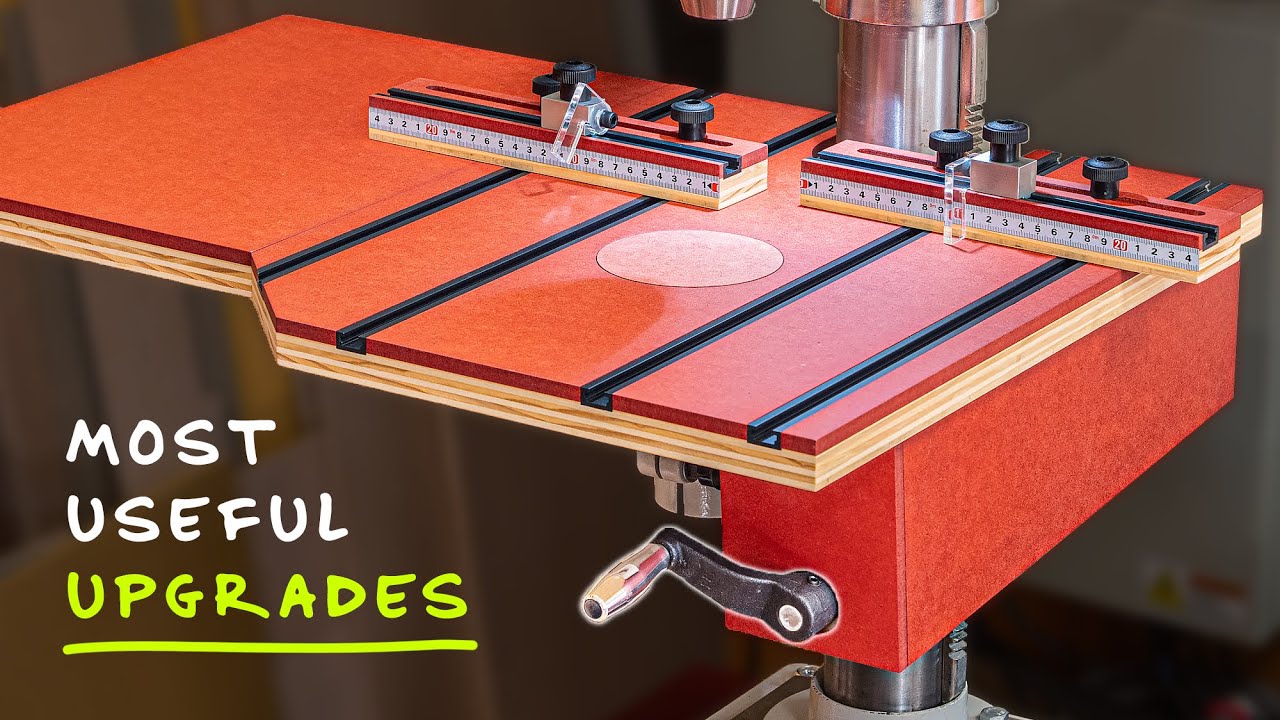
2. Precision fence and stop system
A fence turns the drill press from “point and poke” into positioning. Once the fence is squared and locked, you can register edges the same way every time, which is the real key to shelf pins, dowel joints, hinge cups, and hardware patterns.
Adjustable fence setup
I set the fence by drilling a test hole in scrap, then sliding the fence until the hole’s center matches my layout line. A common beginner mistake is trusting the printed scale; it’s useful for returning near a setting, but real accuracy comes from test holes and a physical stop face.
Watch the fence face material. Bare aluminum can let dusty wood creep under vibration; a strip of slick tape or a sacrificial wooden face gives more consistent registration and is easy to re-joint if it gets chewed up by a bit.
Flip stops batching
Flip stops shine when you have 8–40 identical parts. You drop the part against the stop, drill, and repeat, and your hands fall into a rhythm: slide, tap, feed, retract, slide. That rhythm is what saves time, not the fence itself.
A mistake I see is setting the stop for the finished length, then forgetting the bit’s centerline offset from the fence. A fast workaround is to keep a setup block (a scrap with a known hole) and set the stop by fitting the scrap to the bit, then locking everything down.
Table drill press repeatability
Repeatability on a table drill press improves most when the fence locks without racking. If one end tightens first, the fence skews, so you get holes that “walk” a hair as you batch parts, which shows up later as dowels that won’t seat or shelf pins that bind.
This style of integrated fence/table package is a solid path if you want repeat holes without building a custom top right away.

Rockler Drill Press Table and Fence
- Integrated fence provides accurate, repeatable drilling and edge alignment
- Solid tabletop improves stability and reduces wobble
- Easy-to-use stops and clamps speed up jigged work
- Designed for straightforward mounting to common drill presses
- Ideal upgrade for woodworkers seeking tighter tolerances
3. Front-mounted drill press table height controls
Front controls don’t sound exciting until you use a floor press with the table low and the crank tucked behind the column. Reaching around the back while holding a heavy table is where you pinch fingers and take those shin bumps that you strangely remember the next day.
Front crank relocation
Relocating the crank to the front means you can raise/lower the table while staying square to the work. The trade-off is alignment: if the extension shaft isn’t collinear, it can bind, and you’ll feel a crunchy spot mid-lift instead of a smooth, even resistance.
Don’t ignore clearance with fences and oversized tops. On some benchtop machines, the relocated crank handle can clip the edge of an auxiliary top, so you end up removing the handle constantly, which cancels the time savings.
Quick-lock table levers
Quick-lock levers cut table height changes from “loosen two bolts with a wrench” to a short cam action. The risk is overconfidence: a lever that feels tight can still slip if the clamp faces are oily or the table collar has wear grooves.
A reliable workaround is to clean the collar and mating surfaces, then mark your usual heights with a paint pen. If the mark creeps after drilling, that’s your cue to re-face the collar pads or use a secondary clamp for heavy work.
Table top drill press clearance
On a table top drill press, the challenge is vertical room. A thick auxiliary table, a fence, and a tall vise can eat your quill travel fast, so you’re forced to adjust height more often than expected.
I keep a low-profile clamp set for benchtop work and reserve tall vises for metal where the setup stays consistent. If your press has short quill travel, keep the top thinner and use a replaceable insert rather than stacking plates.
4. Replaceable zero-clearance insert plates
Replaceable inserts are a simple upgrade that improves cut quality and saves sanding time. The first time you drill veneered ply and the exit is crisp instead of ragged, you’ll stop “accepting” tear-out as normal.
Tear-out reduction
Zero-clearance works by supporting fibers around the bit as it exits, which reduces chip-out. A common mistake is reusing the same insert after it’s peppered with holes; once the area around the bit is blown out, it stops being supportive.
For clean holes, I drill into the insert with the same bit size used on the project, then keep the insert labeled. That “matched” insert also makes alignment easier because the bit drops into the existing pilot and self-centers without wandering.
Swap-and-go inserts
Swap-and-go only works if the insert sits perfectly flush. If it’s proud, stock slides and catches; if it’s low, thin parts can dip and drill slightly off-depth. The fix is a few strips of shim tape under the insert ledge so it repeats flat every time.
Here are accessory options that bundle inserts, fences, and related hardware, plus a larger accessory-ready table for easy mounting.

POWERTEC Drill Press Accessory Kit
- Complete kit adds a T-track fence and laser etched scale for precise alignment
- Includes clamps, flip stops, and adjustable inserts for repeatable drilling
- Fits larger tables and upgrades existing setups quickly
- Knobbed inserts make tool-free adjustments simple and secure
- Durable components designed for workshop use and heavy tasks

VEVOR 24-inch Drill Press Table
- Generous 24-inch by 12-inch tabletop for larger workpieces
- Adjustable fence and stop block for precise, repeatable cuts
- T-slots and built-in scale support multiple clamps and vises
- Sturdy MDF top balances durability and affordability
- Designed for wide compatibility with many drill press models
5. T-tracks and clamping system
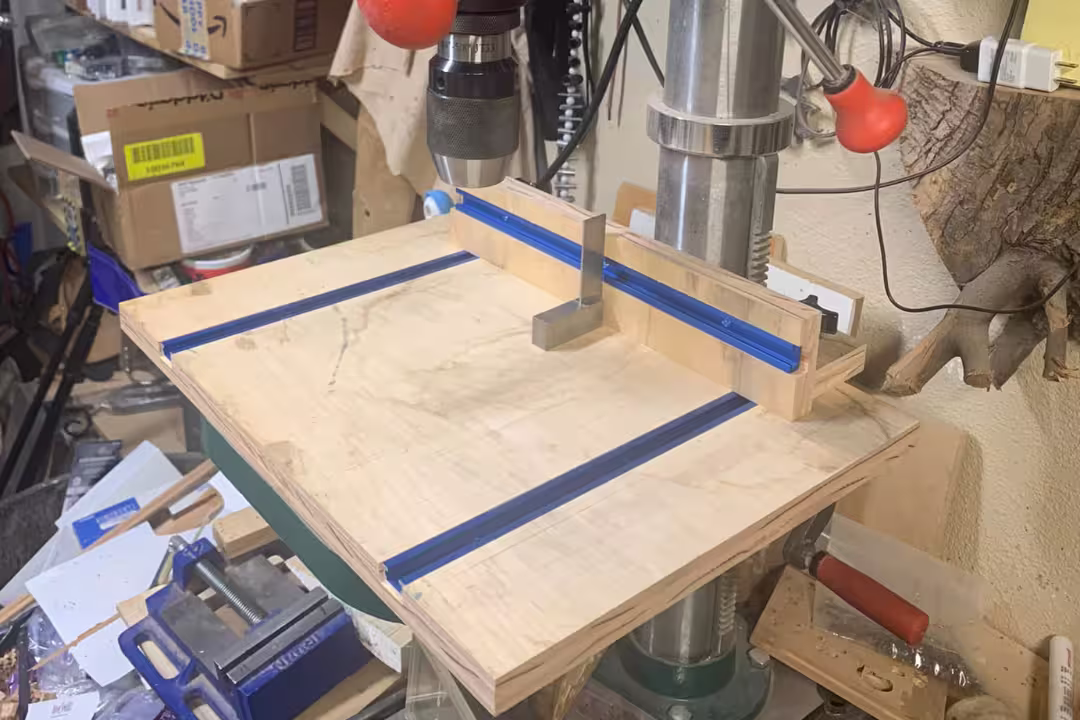
T-tracks change how you hold work because clamps can land where they actually need to be, not where the casting happens to have a slot. With good workholding, you’ll feel less “bite and jerk” at the handle because the workpiece can’t twist when the flutes load up.
Full-length T-tracks
Full-length tracks let you clamp long parts without tipping. The common mistake is placing tracks too close to the center, which crowds the insert area and forces clamps into awkward angles; I keep the inner edge far enough out so clamp feet sit flat and pull downward, not sideways.
Track installation has one real-world constraint: screw heads must sit below flush. If you feel a fingernail catch while sliding a jig, that tiny ridge will collect dust and start affecting repeat stops over time.
Multi-clamp layouts
When I’m drilling cabinet parts, I often use two clamps: one near the fence to prevent lift, one opposite to stop rotation. This is where a bigger top shines, because you can spread clamping forces and avoid denting soft woods with over-tightened single clamps.
- Use one clamp to stop rotation (closest to the bit’s torque line).
- Add a second clamp to stop lift if you’re using Forstners or hole saws.
- Put a thin backer under show faces to prevent bruise marks from clamp pads.
- Keep clamp handles out of the feed path so your knuckles don’t hit mid-stroke.
Milling table for drill press compatibility
A milling table for drill press usually means an X-Y cross-slide vise/table for controlled positioning. It can be useful for light-duty layout work, but the main limit is rigidity: drill press quills and spindles aren’t built for sustained side loads the way a mill is.
If you mount an X-Y table, keep expectations realistic: use it for positioning holes and light slotting in soft materials, and keep feeds gentle. The beginner error is trying to “mill steel” and getting chatter that feels like a buzzing through the handle, plus accelerated quill wear.
6. Level, smooth, vibration-free table surface
A flat, smooth surface makes drilling feel calmer. When the table is uneven, you’ll sense a tiny rock in thin stock, and that rock turns into angled holes and torn fibers at the exit.
Flatten and polish
If your stock cast table has pits or dings, filling and sanding can help, then a light oil prevents rust and reduces friction. The payoff is subtle: the work slides more predictably and you don’t get “hitching” when you nudge a part against the fence.
A smoother table and better work support often improve hole quality more than people expect, because the work stays flat and the feed stays consistent.
Shop observation from repeated plywood and hardwood drilling setups
Square-to-spindle checks
Squareness is where time disappears if you ignore it. If the table isn’t 90° to the spindle, you’ll drill parts that look fine until assembly, then dowels lean and faces won’t close. I check with a square against a straight bit, then lock everything and do a test hole in scrap.
A fast workaround for presses that drift is to keep a dedicated “setup square” and check before batch work. It takes a minute, but it saves the hour you’d spend plugging and re-drilling misaligned holes.
Cast iron upgrade option
Cast iron tables add mass, which can reduce vibration and make the feed feel steadier. The downside is weight: you’ll notice it when raising the table, and on some smaller columns it can increase droop if the collar and rack aren’t in good shape.
If you want the mass and a machined surface, this is the kind of upgrade to look at.
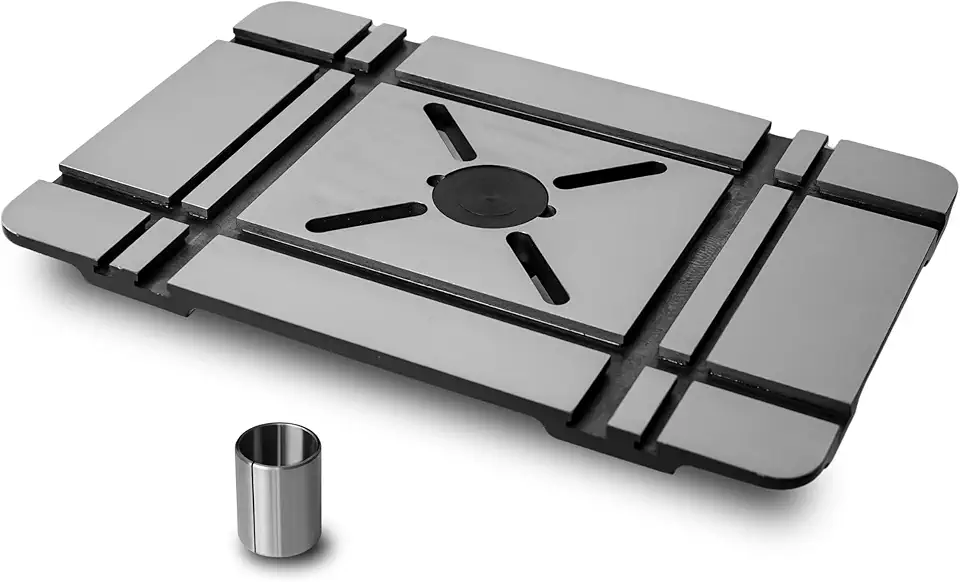
Deluxe Cast Iron Drill Press Table
- Solid cast iron construction for maximum rigidity and minimal vibration
- Precision machined surface ensures accurate, repeatable drilling
- Compatible with Nova, Grizzly, and Jet drill presses for easy upgrades
- Accepts inserts and clamps for flexible setups
- Heavy build improves hole quality for demanding woodworking tasks
7. Dust collection and lighting add-ons
Dust and poor light cause small mistakes that ruin parts. When chips pile up against the fence, the part stops registering flat, and you’ll drill a hole that’s off by a hair without noticing until you try to fit hardware.
Fence dust port
A fence dust port works best when it’s near the bit and slightly behind the cut so chips naturally travel into suction. The mistake is putting the port too far away; then chips spray forward and pack under the work like gritty bearings.
For a shop layout that supports cleaner workflows, it helps to think of the drill press like a station next to your bench and storage. If you’re reorganizing, compare setups with woodworking workbenches so the vacuum hose, clamps, and bit index live where you actually stand.
Forward LED lighting
Forward lighting matters because the chuck and quill cast a shadow right where you’re aiming. With a small LED aimed from the front-left, you can see the bit point bite the pencil mark, and you’ll feel more confident feeding without hovering your face close to the spinning tool.
Cleaner, faster sessions
Cleaner tables stay accurate longer. Fine dust under an insert or fence creates tiny gaps that change registration; that’s why I brush the fence face and blow out T-tracks between batches instead of waiting until the end.
Practical Notes From Real-World Use
The first problem I hit with a larger auxiliary top was clearance: the table looked perfect, then the crank path or column knobs interfered once the fence was mounted. The fix was trimming the back corner and shifting the fence track forward, which kept full function without sacrificing support where it mattered.
Another surprise was how fast MDF can get “dishy” around the insert opening if you over-tighten clamps in the same spots. You won’t see it at first, but you’ll feel a slight lip when sliding thin stock. Sealing the top, using larger clamp pads, and rotating sacrificial faces kept the surface flat longer.
Cross-slide tables sound like a shortcut to milling, but I’ve watched people fight chatter and blame the tool. The real issue is that a drill press isn’t built for aggressive lateral cuts, so the workaround is to use the X-Y motion for positioning holes, keep cuts light, and move heavier shaping to a router setup like a router table where the tool and workholding are meant for side loads.
Finally, beginners often skip the “boring” step: re-checking squareness after a table move. That’s how a whole batch gets ruined. I keep a short checklist taped to the machine so I don’t trust memory on busy days.
Drill press table upgrade ROI and time savings
Time savings come from fewer setups, fewer re-clamps, and fewer scrap parts. The best ROI upgrade is usually a larger top with a fence, then inserts, then T-tracks, because those changes cut the “walk back and fix it” loop that eats shop time.
Setup-time wins
Setup speed improves when you can clamp anywhere and register from a stop. You stop measuring each part and start producing consistent parts, which feels different: your hands stay relaxed, you feed at the same pace, and the machine sound stays steady instead of rising and falling with micro-adjustments.
| Upgrade | Where the time savings actually comes from |
|---|---|
| Larger table surface | Fewer table moves and fewer awkward clamps on big panels |
| Fence + flip stop | Batch drilling without re-measuring each part |
| Zero-clearance inserts | Less tear-out cleanup and fewer “redo the show face” parts |
| T-tracks | Fast, repeatable clamp placement for irregular parts |
| Dust + lighting | Fewer alignment errors and less time clearing chips at the fence |
Accuracy and rework reduction
Rework often hides in “close enough” holes. A fence and stable top reduce drift, which means hardware fits without egging holes, and dowels line up without forcing. That also reduces splitting, since you’re not prying joints into place.
One common mistake is chasing accuracy with more pressure. If the bit is dull or the work isn’t clamped, pressing harder just makes the bit grab and wander. The better fix is a sharper bit, a backup board, and solid registration against a fence.
Budget DIY vs buy-out options
DIY can be cost-effective if you already have sheet goods and hardware, and it lets you fit your exact press limits. Purchased tops trade money for speed: faster install, cleaner track alignment, and less trial-and-error on insert fit.
If you’re debating how far to take “station” upgrades, compare it to how a good fence transforms a saw. The same logic that applies in table saw fence upgrades applies here: you’re buying repeatability more than raw capability.
FAQs
How To Attach Drill Press Table?
Attach a drill press table by sliding it over the column or stem, positioning it where you need, and tightening the table-lock bolt or clamp.
Use a bubble level and a straightedge to check that the surface is flat and square to the chuck, and adjust the tilt or height before fully tightening.
Always lock securely and test with a slow spin to confirm no wobble; wear eye protection and keep hands clear when making adjustments.
How To Build A Drill Press Table?
Build a drill press table by cutting a flat top from hardwood or MDF and attaching it to a clamping or bracket system that fits your press column.
Include a removable fence, T-tracks or threaded inserts for jigs, and a central hole sized for clearance around the chuck.
Seal or finish the top to resist tear-out and ensure all fasteners are tight before using the table.
How To Square A Drill Press Table?
Square a drill press table by using a machinist square or a combination square between the table surface and a test piece held against the chuck.
Loosen the table lock, make small adjustments to the table tilt and rotation until the square reads true at several positions, then re-tighten and re-check.
For higher precision, use a dial indicator on the table surface while rotating the chuck to dial out any runout.