A jet lathe is a bench or floor lathe made by JET that spins wood (and, in some models, metal) so you can cut it with turning tools for bowls, spindles, and parts. Pick the right JET model by matching swing, distance between centers (DBC), motor power, speed control, and shop power to the projects you’ll actually turn.
Table of Contents
If you’re also comparing a jet wood lathe, jet mini lathe, or a jet metal lathe, the selection process stays the same: capacity first, then torque and speed control, then stability and accessories.
Match jet lathe size to projects
Size is the spec that quietly decides what you can make without fighting vibration, stalling, or unsafe setups, so I treat capacity as step one. JET wood lathes are commonly grouped as mini (small swing/DBC), midi (middle), and full-size (large), and that maps cleanly to pen turning, bowls, and big furniture parts (source: American Rotary – best wood lathe for beginners, accessed January 2026).
If you’re unsure, look at the biggest thing you want to turn next year, not this weekend, because “upgrading later” often means rebuying a stand, chuck, and tool rests to fit a different spindle. I keep a short list of projects (pens, bowls, table legs) and then compare them to swing/DBC and the shop footprint so the lathe doesn’t end up wedged into a corner where you can’t stand comfortably.
Swing and DBC
Swing is the max diameter you can turn over the bed, and DBC (distance between centers) is the max length between headstock and tailstock. In real use, you want headroom: a “12-inch swing” lathe might technically clear a 12-inch blank, but you’ll hate the first roughing pass when an out-of-round chunk slaps air hard enough to vibrate your elbows and make the tool chatter.
DBC gets overlooked until you try to drill a lamp body or turn a long spindle and your tailstock runs out of travel. I’ve also seen beginners buy extra bed extensions before they’ve fixed their workholding and tool control, then blame the machine when the real issue was poor blank prep and weak mounting.
| Lathe class | Typical JET capacity range | Best-fit projects | Main beginner risk |
|---|---|---|---|
| Mini | Up to ~10″ swing / ~18″ DBC | Pens, small spindles, small boxes | Buying too small, then forcing unsafe oversized blanks |
| Midi | ~12–16″ swing / ~18–36″ DBC | Bowls, chair legs, small furniture parts | Underestimating vibration if stand/bench is light |
| Full-size | 16″+ swing / 36″+ DBC | Large bowls, platters, long spindles | Under-planning shop power and floor space |
Jet mini lathe range
A jet mini lathe shines when you want compact storage and quick setup for pens and short spindles, especially if your shop shares space with bikes or lawn tools. The trade-off is leverage: a small lathe can still turn clean work, but a slightly unbalanced blank will feel “springy,” and you’ll hear a hollow drumming sound through the bench if the mounting isn’t solid.
This is also where many people mix up categories: a “mini” wood lathe isn’t a jet metal lathe, and tool control is different. If your goal is metal bushings or precision shafts, you’ll want a true metal lathe (leadscrew, carriage, cutting tools) rather than trying to force a wood lathe to do metal work.
Jet wood lathe midi range
The midi jet wood lathe range hits the sweet spot for most home shops because you get enough swing for real bowls and enough DBC for furniture parts without needing a dedicated corner of the garage. This is also where variable speed starts to matter more, because you’ll rough larger blanks at low RPM and then bump speed for finish cuts once the piece runs true.
If you’re building skills, midi size also pairs well with common accessories and training guides, so you can follow setups without constantly adapting for odd spindle threads or tool rest sizes. For background on size categories and what they’re used for, I keep our comparison guide handy: wood lathe.
Full-size capacity and budget
Full-size jet lathes buy you stability and reach, but budget planning has to include the stand, floor space, dust collection, and electrical work if you step up in horsepower. The common mistake is spending big on swing/DBC and then mounting the machine on a flexible floor, which turns roughing into a vibration fight that leaves your hands tingling.
Price ranges vary by size class; as a practical planning number, American Rotary’s beginner lathe guide lists minis around $250–$500, midis $500–$1,500, and full-size $1,000–$5,000 (source: American Rotary – best wood lathe for beginners, accessed January 2026). I treat those as “machine-only” ranges and add a separate line item for chuck, tools, and sharpening.
Here are a few size-appropriate JET options to compare side-by-side.

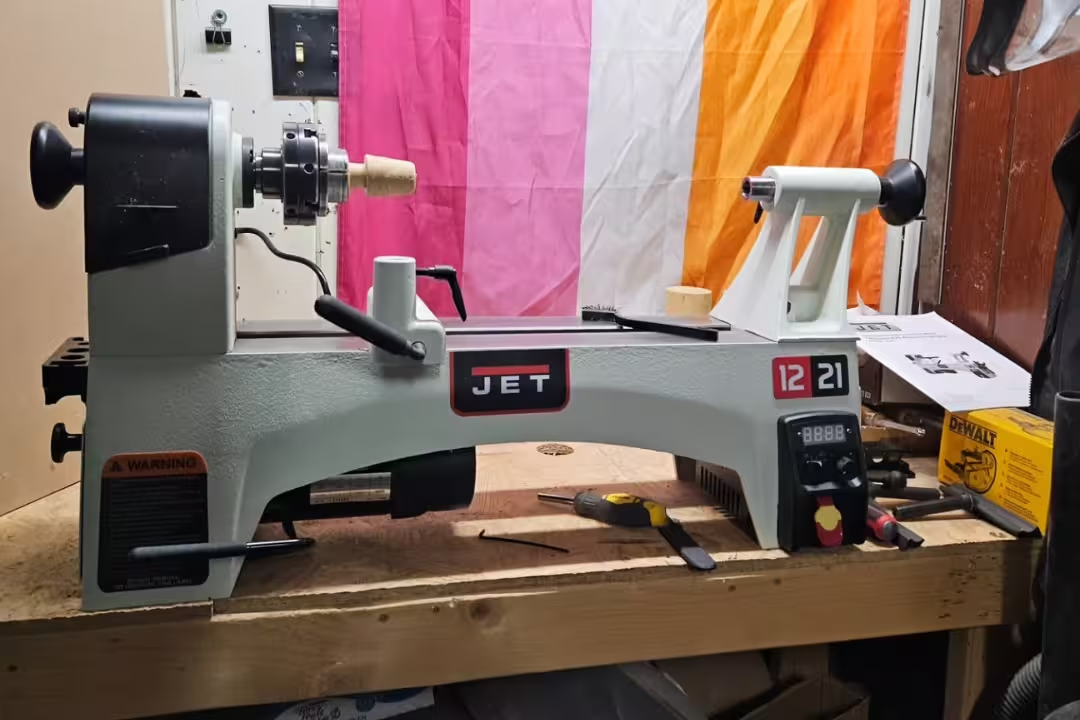
JET 12 inch x 21 inch Variable-Speed Lathe
- Variable-speed control for precise cutting and smooth finish
- 1 HP motor delivers consistent power for most turning projects
- sturdy bed and bearings minimize vibration for cleaner results
- easy tool rest and tailstock adjustments speed setup and use
- ideal for bowls, spindles, and hobby projects

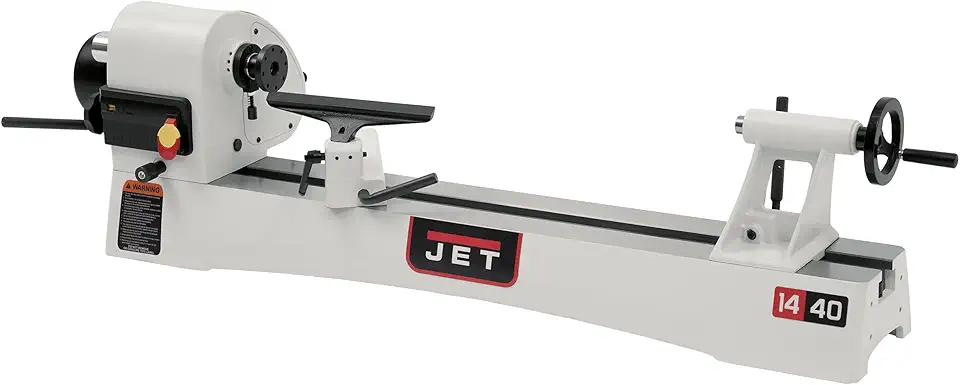
JET 10 inch x 15 inch Benchtop Lathe
- Space-saving benchtop design fits small shops and workbenches
- variable speed for better control across projects
- 1/2 HP motor suited to small to medium turning tasks
- simple setup and secure mounting for stability
- great choice for beginners and hobbyists
Prioritize jet lathe motor power
Motor specs matter less for tiny spindles and a lot more for bowls, wet blanks, and dense hardwoods, where the tool is removing a wide shaving. I watch for torque behavior under load, because a lathe that holds speed during a heavy cut feels calmer and sounds steadier, instead of that rising/falling “bog and surge” noise that telegraphs chatter.
If you’re picking between two similar swings, power is often the better upgrade than a little more capacity. JET’s line-up makes this pretty clear across models and specs (source: JET Tools – woodworking lathes).
Horsepower by size
A jet mini lathe often lands in the 1/4–1/2 HP range, which is fine for pens and light spindle roughing if your tools are sharp and your cuts are clean. Midi machines commonly sit around 1/2–1 HP, which is the range where bowl turning stops feeling like the motor is “asking permission” every time you lean the gouge into end grain.
Full-size machines in the 1–2+ HP range pay off when you rough larger blanks or turn very hard species. A mistake I see is assuming “more HP” fixes poor technique; if you scrape aggressively with a dull tool, extra power can actually make catches more violent.
Torque under load
Torque is what keeps the spindle turning when the cut gets demanding, and you feel it immediately in the tool rest. With good torque, the bevel stays steady and the shaving comes off as a continuous ribbon; with weak torque, the lathe slows and the tool starts to bounce, leaving washboard ripples that you’ll chase later with sandpaper.
One edge case: very low RPM roughing on an unbalanced blank is hard on any setup, even high-power lathes, because imbalance pounds the bearings and stand. I’ll true the blank bandsaw-side first and start slower than my ego wants, then increase RPM only after it stops “thumping” the air.
EVS power examples
Electronic variable speed (EVS) setups are where you’ll notice the best low-speed control because the machine can maintain usable torque without constant belt changes. If you’re stepping into larger bowls or production work, comparing EVS models side-by-side helps you see what 1.5 HP versus 2 HP looks like in the same bed length.
Here are two EVS options that show that jump in capacity and power.

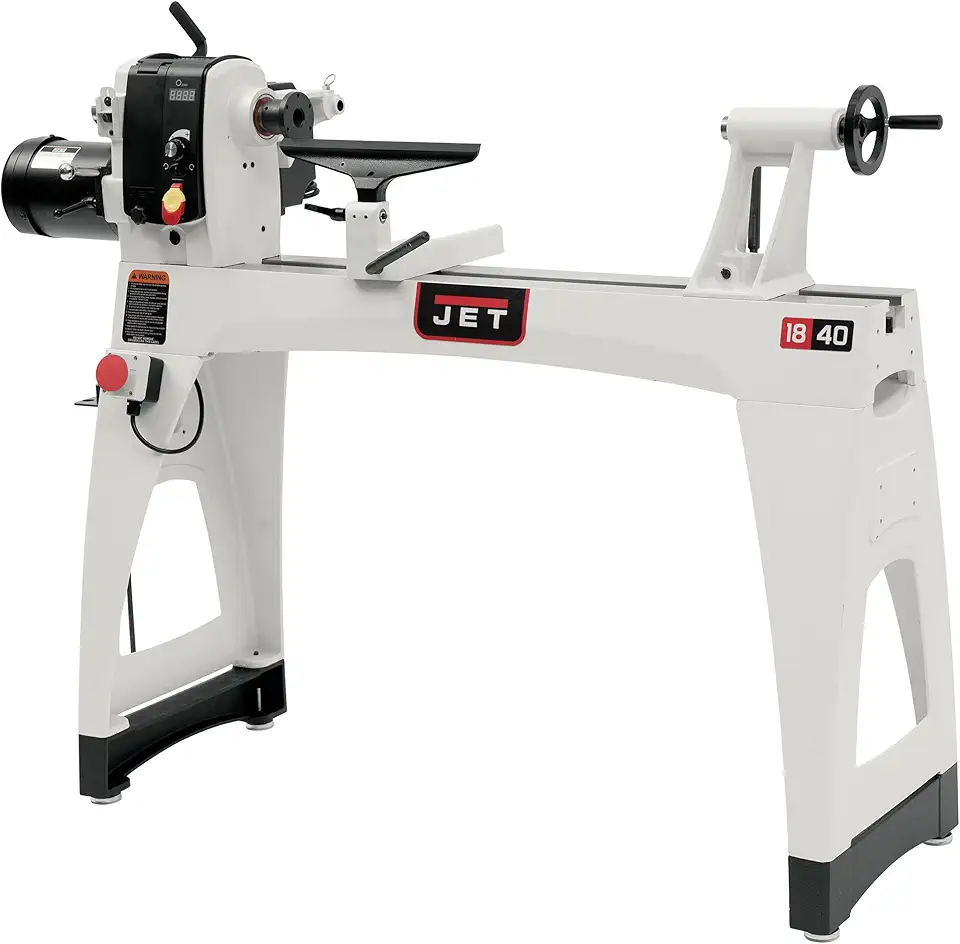
JET 16 inch x 40 inch EVS Reversible Lathe
- EVS variable-speed system offers smooth range and consistent torque
- reversible motor lets you easily change rotation for sanding and finishing
- 1.5 HP motor handles larger blanks and tougher cuts
- long 40 inch bed supports big spindles and bowls
- heavy construction reduces vibration for precise turning
JET 18 inch x 40 inch EVS 2 HP Lathe
- Powerful 2 HP motor for demanding shop work and large blanks
- EVS variable speed tuning for fine control across applications
- reversible operation improves finishing and sanding tasks
- 18 inch swing handles large bowls and platters
- robust frame and components for long term reliability
Choose variable speed for control
Variable speed is what lets you rough safely and finish cleanly without breaking your stance to move belts every few minutes. In practice, I treat speed control as a safety feature as much as a convenience feature, since the “right RPM” changes constantly as a blank becomes more balanced and as diameter changes.
JET’s lathe lineup highlights VS and EVS features across models, including reverse and readouts (source: JET Tools – woodworking lathes, accessed January 2026). If you want a quick visual walkthrough of turning mechanics and what speed changes feel like, this video is a helpful reference point before you buy.
VS vs EVS
On many wood lathes, “VS” is still a variable system but may rely on stepped pulleys plus a variable control, while EVS is typically more consistent across the whole range. The difference shows up when you turn a big bowl: EVS tends to feel smoother when you creep down to roughing speeds, where belt-only systems can feel grabby or underpowered.
With belt-only designs, people often leave the belt in one position out of convenience, then try to compensate with tool pressure, which increases catch risk. Changing belts is fine if it’s easy access and you’re disciplined, but many benchtop setups make it annoying enough that beginners avoid it.
RPM ranges
I look for a low range that supports roughing (often around 100–300 RPM) and a high range that supports clean finish cuts and sanding without burning (often up to ~3,000+ RPM on smaller lathes). Low speed is where you’ll feel the machine “work” through the floor; if the stand is light, the vibration can travel up your forearms and make your grip tense, which makes tool control worse.
High speed has its own trap: beginners sometimes crank RPM to “sand faster” and end up overheating resinous woods or melting hook-and-loop sanding discs. I keep sanding pressure light and let the abrasive do the work, then slow down near edges where heat builds fast.
Digital readout
A digital readout seems minor until you’re repeating a finish process and want the same surface quality on the next blank. It also helps when you’re learning: you can tie “this felt safe and cut clean” to an actual RPM number instead of guessing.
The common mistake is relying on the readout more than the blank. If the piece is out of balance, the “correct” RPM on paper can still be unsafe, so I use the readout as a reference after the blank runs true.
Forward and reverse
Reverse is most useful for sanding because it changes scratch direction, which makes it easier to remove visible sanding lines before finish. It also helps you spot torn grain you missed: the surface sound changes slightly, and you can feel a rough patch “buzz” under the sandpaper when the rotation flips.
Watch the edge case with threaded chucks: reverse can loosen accessories if they aren’t designed for it or if you forget the set screw. I always confirm the chuck is properly seated, and I keep reverse sanding light-pressure to reduce the chance of unthreading.
Avoid belt-only setups
A belt-only lathe can still do good work, but it slows learning because you’re constantly stopping to change speeds, and speed changes are tied to tool control. If you buy belt-only, set a rule: change belts when the blank stage changes (roughing to refining), so you don’t try to make one speed do every job.
If you’re comparing options, our guide to small machines helps sort out what features matter on compact models: mini lathes.
Check build quality and vibration control
A lathe can have great specs and still cut poorly if alignment is off or vibration isn’t controlled. In day-to-day turning, stiffness feels like calm: the tool doesn’t sing, the blank doesn’t “walk” on startup, and the finish comes off the gouge with fewer ridges.
JET publishes model feature sets and construction details that help you compare beds, stands, and accessories from the same brand without guessing (source: JET Tools – woodworking lathes, accessed January 2026). Still, I verify the details that affect cut quality most: mass, bearing feel, and tailstock lock behavior.
Bed and stand mass
Mass is your friend because it damps vibration instead of amplifying it. A heavy bed and stand reduce the “shiver” you feel through the tool handle when the blank hits a hard spot, and that translates into a cleaner surface that needs less sanding.
A common mistake is bolting a benchtop lathe to a lightweight workbench with drawers and expecting stability. If the bench flexes, the lathe flexes; adding sandbags or a lower shelf full of turning blanks can help, but a purpose-built stand is still the cleaner fix.
Bearings and alignment
Good spindle bearings feel smooth when you rotate by hand, without gritty spots or audible scraping. Tailstock alignment matters just as much: if centers don’t meet, long spindles will taper or flex, and you’ll fight a vibration that looks like “bad wood” but is really misalignment.
Before blaming the lathe, I check that the blank is seated correctly (spur drive bites are solid, live center is set), then verify the tailstock is locked down firmly. Beginners often leave the tailstock slightly loose, and the first catch shoves it back a hair, which ruins repeatability.
Tool rest stem size
A larger tool rest stem (often 1-inch on mid/full size machines) resists deflection better than smaller stems, and that shows up when you take a heavier cut. When the rest flexes, the tool edge chatters, and you’ll see tiny ridges that catch your fingernail when you rub the surface.
The workaround is simple but overlooked: keep the tool rest as close as safely possible to the work and adjust often. Reaching “just a bit farther” is how people end up levering the tool into a catch, especially on bowls near the rim.
Reversible headstock
A reversible headstock or motor helps with sanding direction changes and, on some setups, improves body position for certain cuts. This can reduce fatigue because you’re not twisting your shoulders into an awkward stance to reach the far side of a bowl.
One risk: reversing rotation changes which way a catch pulls, so don’t change directions mid-process until you’re comfortable with stance, tool presentation, and secure workholding. If you want to tighten technique, pairing the lathe with the right accessories and sharpening habits matters just as much as machine features, and our guide to lathe tools helps keep purchases focused.
If you want a solid midi reference point with good stability features, this model fits well in many shops.
Pick the right stand and mounting
Mounting can make a good lathe feel bad, or a modest lathe feel surprisingly stable. I aim for rigidity and comfortable height so I’m not hunching, because poor ergonomics leads to shaky tool control and that “white knuckle” grip you can feel in your forearms after ten minutes.
Beginner mistake: “temporary mounting” that becomes permanent, like lag screws into a soft plywood top. A proper stand spreads loads, reduces vibration, and keeps the machine from creeping during startup torque.
Benchtop vs floor setup
A benchtop setup can work great for a jet mini lathe if the bench is heavy and the top doesn’t flex. Floor stands make more sense once you’re roughing bowls or turning longer spindles, because the lathe footprint and mass grow and you’ll want the stability without rebuilding your bench.
If you’re working in a shared space, benchtop also makes cleanup easier because you can position the lathe near dust collection. Floor models often live in one spot, so plan where shavings will pile up and where your body will stand while you work.
Ergonomics and stability
Good height puts the spindle around elbow level for most people, which keeps shoulders relaxed and makes bevel riding smoother. If the lathe is too low, you’ll feel your lower back tighten; if it’s too high, your wrists bend upward and fine control suffers.
Stability is partly weight and partly footprint; narrow stands can rock on uneven concrete. I shim feet or use leveling pads on garage floors, because a slight twist in the stand can show up as alignment drift at the tailstock.
Open stand access
An open stand helps when you need quick access to belt doors, motor housings, and dropout shavings. It also makes it easier to add ballast (sandbags or a shelf of blanks) without blocking vents or controls.
One real annoyance: open stands can collect chips under belts and pulleys if your dust control is weak. I keep a small brush and vacuum at hand and clear buildup before it works its way into moving parts.
Stand budget
Plan a stand as a real line item, not an afterthought, because it changes the turning feel more than many people expect. If you’re weighing “better lathe with no stand” vs “slightly smaller lathe with a proper stand,” the second option often wins for surface quality and comfort.
These JET stands are common pairings for benchtop models.
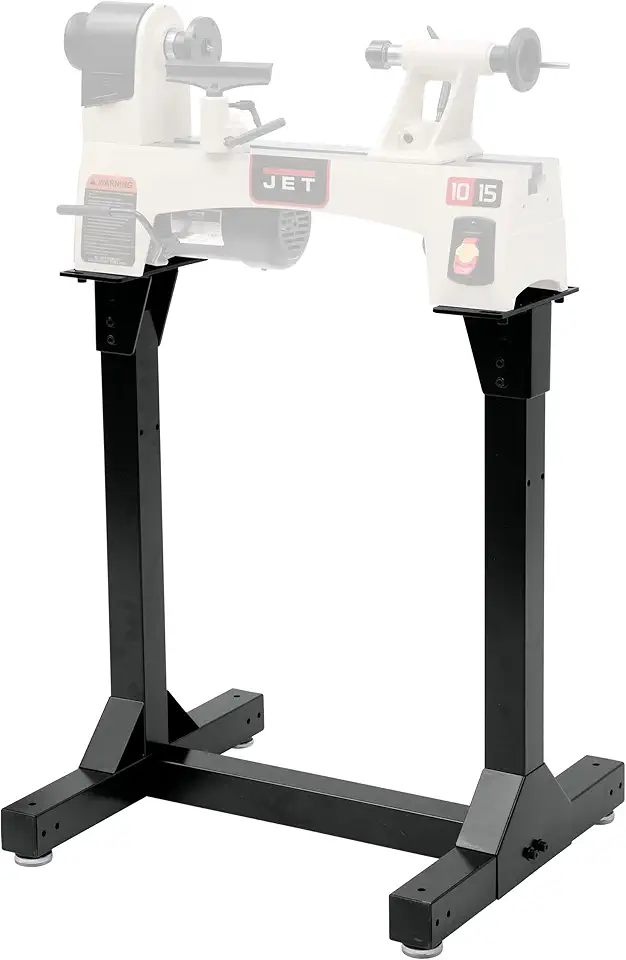
JET Stand for JWL-1015 Lathe
- Designed to securely mount JWL-1015 and JWL-1015VS models for stable operation
- raises lathe to a comfortable working height for better ergonomics
- sturdy construction minimizes vibration during turning
- compact design fits small shops and workbenches
- easy to assemble with included fasteners

JET Stand for JWL-1221VS Lathe
- Custom fit for JWL-1221VS to provide secure mounting and stability
- welded construction reduces vibration and improves turning accuracy
- raises lathe to ergonomic working height for comfort
- compact footprint for efficient shop layout
- straightforward assembly with included hardware
Verify voltage and shop power
Shop power is where purchases get delayed or expensive if you check too late. Before I commit to a bigger jet lathe, I confirm voltage options, breaker size, extension cord limits, and where the outlet sits relative to where the lathe must live.
JET’s product pages and manuals spell out voltage options and wiring requirements for many models (source: JET Tools – woodworking lathes, accessed January 2026). If you’re in a garage with shared circuits, this step prevents nuisance trips that can ruin a cut and startle you mid-pass.
Dual voltage options
Dual voltage (often 115V/230V) gives flexibility: you can start on a standard circuit, then rewire when you upgrade the shop. I still treat 115V as “works, but be careful,” because long extension cords and shared loads can cause voltage drop that feels like weak torque.
If you’re planning 230V, set the outlet location before the lathe arrives. Dragging a heavy lathe around to reach a better outlet is a quick way to tweak stand alignment or pinch a cord under a leveling foot.
Outlet and amperage
Check amperage ratings on the motor plate and compare them to your breaker and wire gauge, then leave room for lights, dust collection, and a shop vac. If your dust collector kicks on at the same time as the lathe, you might trip a breaker right when you’re leaning into a cut.
A workaround that helps in small shops is splitting loads across circuits: lathe on one, dust collection on another. If that’s not possible, at least avoid running a heater or compressor on the same line while turning.
Trip prevention for higher HP
Higher horsepower can mean higher inrush current on startup, so trip prevention is partly electrical and partly technique. Starting at a lower RPM setting, using a balanced blank, and avoiding aggressive tool engagement right after startup can reduce the peak load that causes nuisance trips.
These two 14×40 options are common “shop workhorse” sizes where voltage flexibility matters.

JET 14 inch x 40 inch Lathe with Open Stand
- Dual voltage 115 slash 230V wiring for flexible shop setups
- 1 HP motor balances power and control for versatile projects
- open stand provides comfortable working height and accessibility
- 40 inch bed supports longer spindles and turning projects
- variable speed control for accurate material removal
JET 14 inch x 40 inch Variable-Speed Lathe
- Variable-speed drive for precise cuts and consistent finishes
- 1 HP motor delivers reliable performance for general turning
- dual voltage compatibility for flexible power options
- long 40 inch bed accommodates larger workpieces
- solid construction reduces wobble and improves accuracy
Plan accessories, parts, and support
Accessories decide what you can do on day one, and they also decide how expensive “small upgrades” become later. I pick the workholding plan (spur, faceplate, chuck) before I buy the lathe so the spindle thread and taper compatibility don’t surprise me.
Parts and support matter more than people expect because lathes get used hard: belts wear, switches fail, and beginners crash tools into spinning work. JET publishes parts breakdowns and support paths through their site (source: JET Tools – woodworking lathes, accessed January 2026), which helps when you’re keeping a machine running long-term.
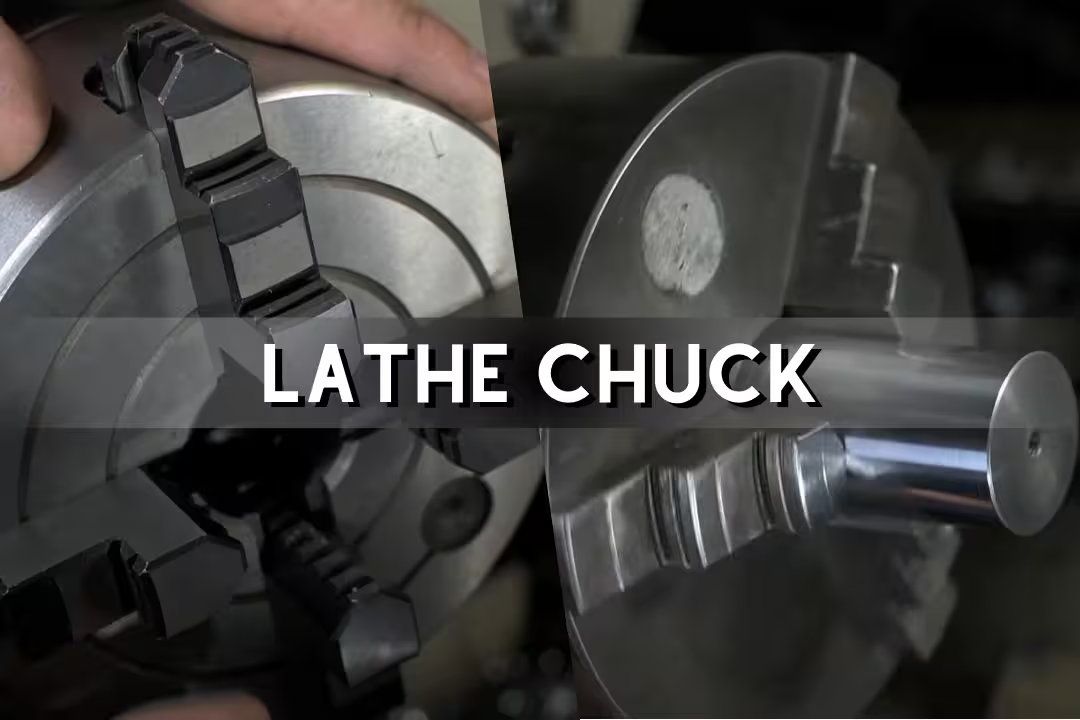
Chuck and spindle thread
Match the chuck to your spindle thread and confirm if you need an adapter, because stacked adapters can increase runout and reduce holding strength. For bowls, a solid chuck grip is what keeps the blank from shifting during a catch, which can feel like the piece suddenly goes “soft” and starts wobbling under the tool.
If you’re also buying turning stock, choose blanks that match your lathe’s real capacity and your current skill, not the biggest blank you can physically mount. Our guide to wood turning blanks helps avoid that mismatch.
Tool rests and add-ons
Add-ons that actually change outcomes are tool rests (different lengths/shapes), a better live center, and a chuck with jaw options. Beginners often buy “more tools” first, but a stable rest and sharp edge improve the surface faster than an extra gouge you don’t yet control.
Sharpening is where results jump quickly; a freshly sharpened edge cuts with less pressure, and you can feel the tool glide instead of skating. If your finish keeps coming off fuzzy, check your abrasive system and stone condition using our sharpening stone guide.
Parts availability and service
Service shows up in small moments, like finding the right belt quickly or getting a replacement switch without weeks of downtime, so I treat parts as part of the purchase. Keep your model number handy and download the exploded parts diagram early so you’re not hunting for it mid-project.
A common mistake is mixing incompatible accessories, then blaming the lathe for runout. If a chuck wobbles, isolate the issue by removing adapters, cleaning threads, and reseating the accessory; dried dust in threads can hold a chuck off-center by a hair, which turns into visible runout at the rim of a bowl.
Used jet lathes value
Used jet lathes can be a good value if you check spindle play, speed control behavior, and tailstock lock function before buying. I also look at what’s included: a used lathe with a chuck, tool rests, and a stand can beat a new one once you price those add-ons.
Don’t ignore noise and feel: when you spin the spindle by hand with the belt off, it should feel smooth; when running, the machine shouldn’t “hum and buzz” in an uneven rhythm. If you want a baseline list of what belongs in a turning kit, use this chuck set as a reference point for compatibility.
Practical Notes From Real-World Use

The biggest surprise for many new owners is how much the lathe’s “feel” changes based on the blank, not the machine. A wet, unbalanced bowl blank can make even a solid midi lathe feel rough on startup, with a repeating thump that you can feel through the floor and into the tool rest until the blank is trued.
Another issue I see is sanding that takes forever because the surface is already torn from dull tools or bad presentation. The workaround is to stop chasing defects with sandpaper, resharpen, and take a few light finishing cuts; you’ll hear the cut get quieter and see longer, cleaner shavings instead of dust.
Speed control can also mislead people: they buy variable speed, then leave it high and “just go gentle.” That’s where catches come from, especially on bowls where the rim speed is high; lower RPM gives you reaction time, and once the piece runs true you can increase speed in small steps.
- Mounting fixes many “bad lathe” complaints: bolt through a rigid top, use washers, and re-tighten after the first hour of turning.
- Keep blanks closer to round before mounting; a quick bandsaw trim reduces vibration more than any accessory.
- Confirm chuck seating often; fine dust in threads causes wobble that looks like warped wood.
- Sharpen sooner than you think; if you’re pushing hard, the edge is already past its best.
FAQs
How Do I Align And Set Up The Tailstock On A Jet Metal Lathe?
Set the tailstock by sliding it along the bed, locking it, and using a test bar or dial indicator to ensure it is concentric with the spindle.
Tap the tailstock barrel or use the adjustment screws to correct small errors, then recheck and tighten clamps. For larger misalignments, shim the tailstock or consult the manual.
What Are The Best Upgrades And Accessories For A Jet Lathe (Digital Readout, Quick-Change Toolpost, Etc.)?
Useful upgrades include a quick-change toolpost (QCTP), a digital readout (DRO), sharper tooling, and a better chuck to improve accuracy and workflow.
Beginners will notice faster, safer setups with a DRO and QCTP; advanced users often add a variable-speed drive, coolant, and sturdier steady rests for heavy or precision work.
How Do I Change The Drive Belts And Adjust Spindle Speeds On A Jet Lathe?
Change drive belts by unplugging the lathe, removing the belt guard, releasing motor tension, swapping in the correct replacement belts, re-tensioning, and replacing the guard.
Adjust spindle speeds by changing belt positions on the stepped pulleys or using the variable-speed control if fitted, then verify alignment and proper belt tension before running the lathe at cutting speeds.
Why Is My Jet Lathe Experiencing Chatter And How Can I Fix It?
Chatter is caused by instability in the tool, workpiece, or machine; reduce it by increasing rigidity, shortening tool overhang, lowering depth of cut, or changing speed.
Use sharper or stiffer tooling, improve workholding with a steady rest or better chuck grip, and check headstock bearings and slideways for play to eliminate machine-sourced vibration.