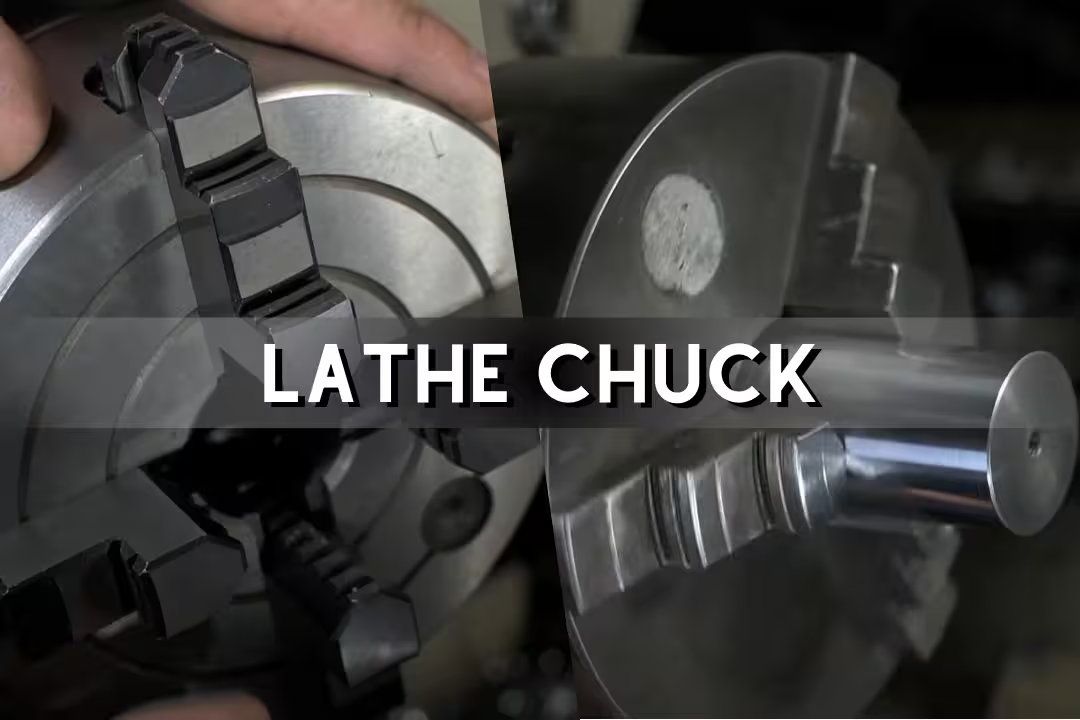
Lathe Chuck Guide: Types, Uses, and Choosing the Right Chuck
A lathe chuck is a workholding device that mounts on the lathe headstock and grips a part so you can turn, face, bore, thread, or drill it safely. It centers (or intentionally offsets) the work by moving jaws, collets, or magnets, which controls runout, grip strength, and surface finish.
Table of Contents
Pick the right chuck based on your material (metal or wood), shape, and how fast you need setups, then match it to your spindle thread or mounting system so it runs true and doesn’t loosen under load.
What a lathe chuck is
A chuck of lathe transfers torque from the spindle into the workpiece while keeping the part aligned to the axis you’re cutting on. In practice, it’s both a clamp and an alignment tool: if it grips well but runs out, you’ll still cut tapers, chatter, and out-of-round features.
Most turning problems I troubleshoot trace back to two things: the chuck isn’t seated cleanly on its mount, or the jaws are gripping on a bad surface (scale, bark, paint, or a short contact band). The fix is rarely “tighten harder”; it’s almost always better jaw contact and cleaner mounting faces.
Chuck of lathe role
The chuck’s job is to create repeatable concentricity (for centered work) or controlled eccentricity (for cams and offset turning). A self-centering chuck gets you “close enough fast,” while an independent jaw chuck lets you dial in near-zero runout with an indicator when the bore or OD matters.
Grip isn’t just about safety; it changes your cut. When the work’s held firmly, you’ll feel steadier tool pressure and hear a smoother, lower-pitch cutting sound. If it’s marginal, the tool starts “singing,” you’ll feel a faint vibration in the cross slide, and the finish turns hazy or rippled from micro-slip.
Core parts
Most chucks share the same anatomy: a body, a scroll or jaw screws, jaws, and a mounting interface (threaded, bolt-on backplate, or camlock). The scroll (on self-centering styles) is what makes all jaws move together, which is why scroll wear shows up as inconsistent repeatability when you re-chuck a part.
Pay attention to jaw faces and jaw steps. Hardened jaws resist burrs, while softer jaws (or removable top jaws) can be machined to match a specific diameter for better contact. That “full-length grip” matters more than people expect; gripping on the jaw tips alone is a fast way to get jaw marks and part pull-out.
- Chuck body (cast iron or steel) carries load and resists distortion
- Jaws (often hardened) provide OD/ID grip and set contact geometry
- Scroll plate (self-centering) or jaw screws (independent) move jaws
- Pinions and key drive transmit torque from your hand to the mechanism
- Backplate/adapter connects chuck to spindle thread or camlock
Common sizes
Chuck size is usually the body diameter: common shop sizes are 3.75″, 4″, 6″, and 8″. Bigger chucks grip larger work and can feel more stable, but they also add rotating mass, which can limit acceleration, increase stopping distance, and make a small lathe feel “heavy” on startups.
As a rough fit check, a mini lathe often lives happily with 3.75″–4″, mid-size machines with 6″, and heavier metal lathes with 8″+. If you’re unsure, match the chuck to the lathe’s swing and spindle bearings; oversizing a chuck can increase vibration and bearing load during interrupted cuts.
Types of lathe chucks
Chucks differ by how they center, how they clamp, and how they mount. The most useful way to sort them in a working shop is by whether they’re fast for repetitive round parts or flexible for odd shapes and high-accuracy setups.
For reference on mainstream chuck categories and typical applications, the overview at Testbook: Lathe chucks matches what you’ll see in most manuals: 3-jaw universal, 4-jaw independent, collet, magnetic, and powered variants.
3-jaw universal
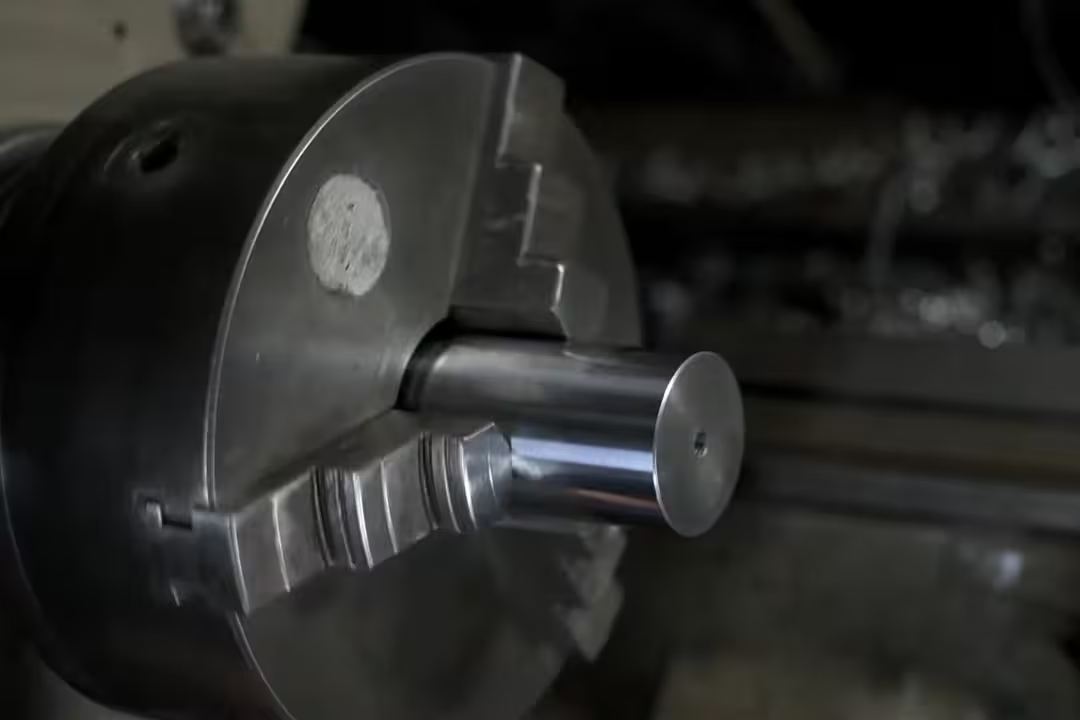
A 3-jaw universal chuck uses a scroll mechanism that moves all three jaws together, automatically centering round or hexagonal work. This makes it the go-to choice for fast setups and repeatable production work where speed matters more than ultimate flexibility.
Setup is quick: drop the part in, tighten once, and you’re cutting. The tradeoff is precision control—because all jaws move as a unit, you can’t correct for out-of-round stock or deliberately offset a part. Concentricity is only as good as the scroll and jaw wear, but for most turning operations, it’s accurate enough and dramatically faster than independent setups.
4-jaw independent

A 4-jaw independent chuck has four jaws that move separately. That independence is why it shines for square, rectangular, or irregular parts, and it’s how you intentionally offset a part for eccentric turning.
Setup is slower because you “walk” the part into center with an indicator, adjusting opposite jaws in small steps. The payoff is control: you can grip on the best surface, avoid thin-wall distortion, and hit tight concentricity targets that a worn scroll chuck can’t hold.
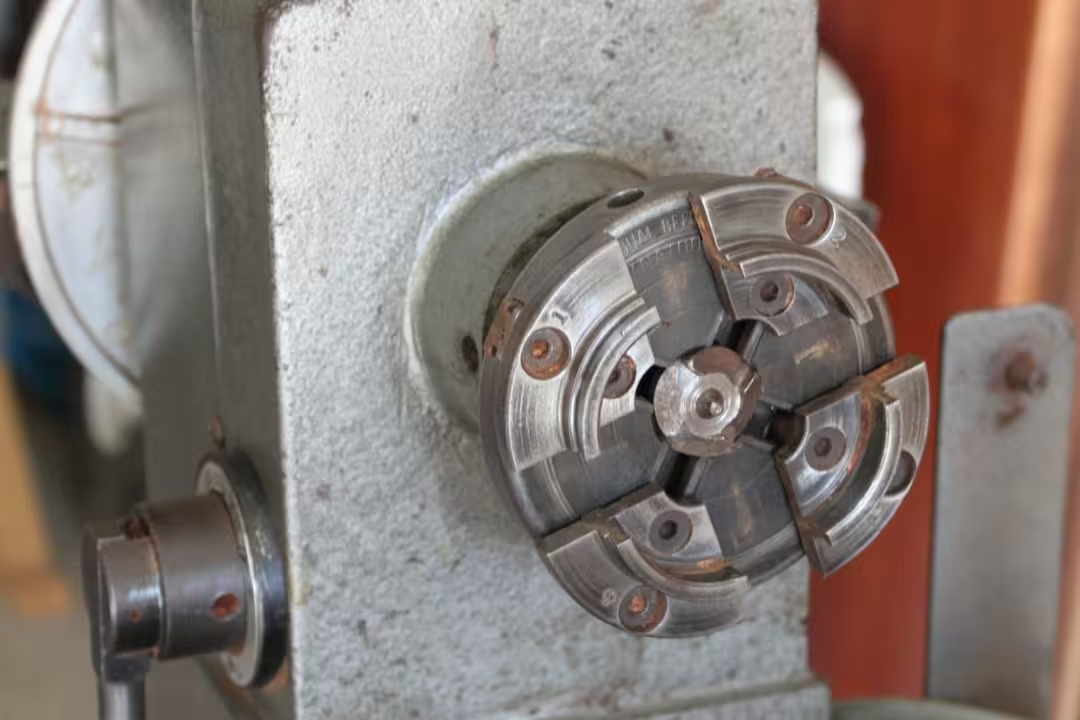
4-jaw self-centering
A 4-jaw self-centering chuck moves all jaws together, like a 3-jaw, but gives four contact points. Woodturners like these because a bowl blank or tenon often benefits from four-point support, and the mechanism stays quick for frequent remounts.
Don’t confuse this with a 4-jaw independent. A self-centering 4-jaw won’t let you “dial in” an off-round part the same way; it will center to the geometry it’s clamping, which can be the wrong axis on rough stock.
Collet chuck
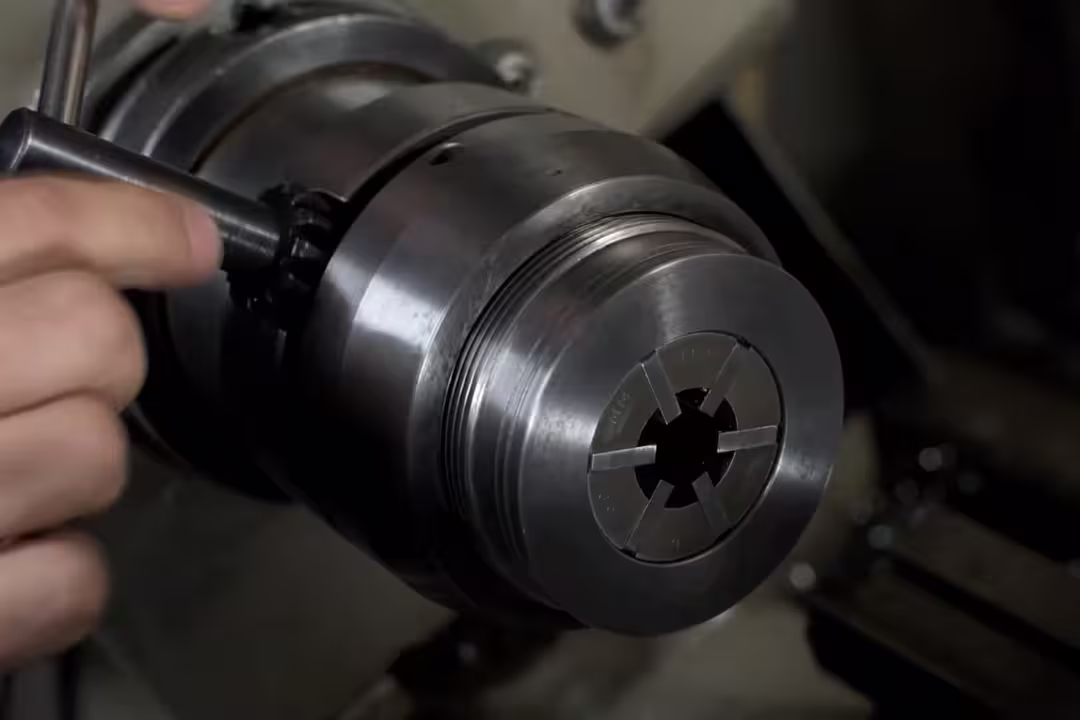
A collet chuck grips small round stock with excellent concentricity by collapsing a slotted collet evenly around the part. It’s my go-to when I need repeatable workholding on small diameters without jaw marks.
The limitation is range: each collet covers only a small diameter window, and odd shapes are out. If you try to “make it work” on oversize stock, you’ll feel it in the drawbar torque, and the collet won’t seat correctly, which can create dangerous partial engagement.
Magnetic chuck
A magnetic chuck holds ferrous work without jaws, which helps on delicate faces and thin parts where clamping distortion ruins accuracy. It’s common in grinding and some turning setups, but it demands clean, flat contact surfaces to get full holding force.
Beginners often assume “magnetic equals secure.” If there’s scale, oil film, or a small contact patch, holding force drops sharply, and interrupted cuts can peel the part loose. I treat magnets as “light-duty unless proven,” then verify by trying to rotate the part by hand before powering up.
Drill chuck
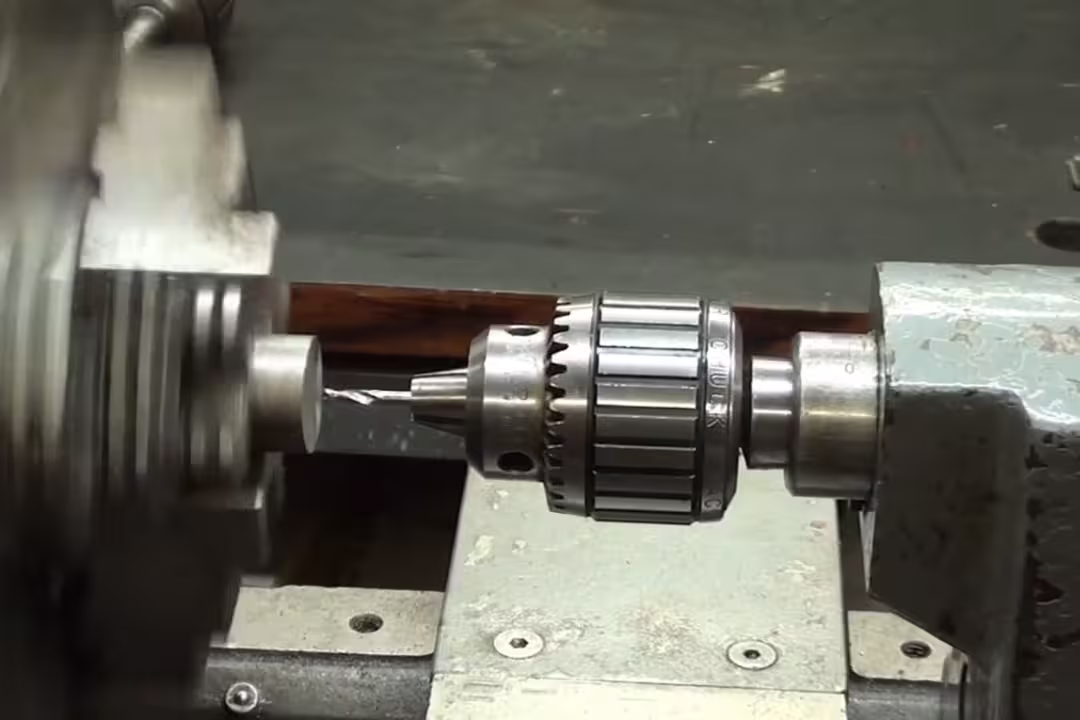
A drill chuck on a lathe is used for tailstock drilling, reaming, and tapping support. It doesn’t replace a main spindle chuck; it holds tools, and the Morse taper (MT) arbor fit is what keeps it aligned under thrust load.
If the tailstock taper has oil or dust, the chuck can spin under load and gall the taper. That slip feels like a sudden “give” in the handwheel and leaves a burnished ring on the arbor—clean both tapers and seat with a firm push to avoid that.
Air/hydraulic chuck
An air/hydraulic chuck clamps with a cylinder instead of a key, which is why CNC lathes use them for fast cycles and consistent clamping force. The practical downside is cost and complexity: you’re adding a chuck actuator, drawtube, plumbing, and safety interlocks.
For small shops, powered chucks pay off when cycle time is money and parts are consistent. For mixed one-off work, manual chucks stay simpler and faster overall because you’re already swapping jaws, measuring, and doing frequent setup changes.
3-jaw lathe chuck essentials
A 3-jaw is the chuck I keep on the spindle for day-to-day turning because it’s quick and predictable. The key is knowing where it’s strong (speed) and where it’s weak (ultimate runout control on imperfect stock).
Best use cases
Use a 3-jaw for round bar, hex bar, bushings, spacers, and any part where you’re turning relative features in one setup. It’s ideal for facing and turning a diameter to size, then threading or drilling on that same axis.
Avoid a 3-jaw for rough flame-cut blanks, out-of-round tubing, or castings when you need a critical bore to run true. In those cases, a 4-jaw independent lets you indicate off the reference surface that matters, not the surface that happens to be easiest to grab.
Setup speed
Setup speed is where a self-centering chuck earns its keep. You drop the part in, snug the key, and it’s close to center immediately, which is why it’s common on production and repair work where you’re doing multiple similar parts back-to-back.
One common mistake is tightening on just one pinion hole (on chucks with multiple pinions). I tighten at two or three points so jaw load balances; you can feel the difference in the key—less “spring” and a more solid stop when the jaws seat evenly.
Clamping range
Clamping range depends on jaw geometry and chuck size. For example, the VEVOR 8-inch 3-jaw lists a 0.16–8 in (4–200 mm) range in its product specs, which covers small stock through larger discs without changing the chuck body.

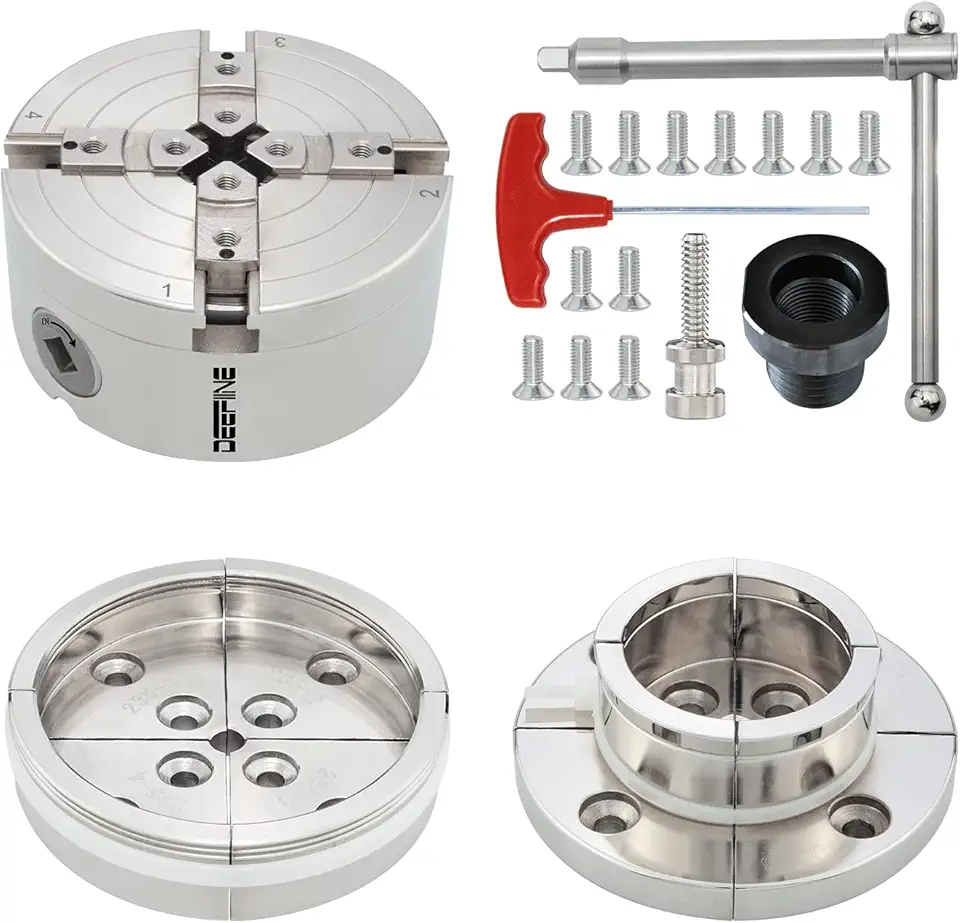
VEVOR 8-inch 3-Jaw Self-Centering Chuck
- Wide 0.16 to 8 inch (4 to 200 mm) clamping range handles small to large workpieces
- Self-centering three jaw design provides fast, accurate alignment
- Includes T-key fixing screws and hex wrench for secure mounting
- Robust construction for heavy duty machining and long life
- Compatible with lathes, milling and drilling machines for versatile use
Watch the edge case where you’re clamping near the extreme ends of travel. Jaws can lose engagement depth in the scroll, which reduces holding power. If you need to grip at the far end often, swap to matching jaws (inside vs outside set) or step up a chuck size so you’re clamping in the middle of the jaw stroke.
4-jaw lathe chuck essentials
A 4-jaw chuck is what I reach for when I care more about control than speed. It’s the easiest way to grip odd shapes, hit tight concentricity, and clamp thin sections without bending them into an oval.
Independent jaws
Independent jaws let you center off a chosen reference—like a bore, a machined boss, or a scribed line. That’s the professional trick: don’t “center the stock,” center the feature you actually care about, then machine everything else to that axis.
The common beginner error is chasing the indicator in circles by moving the wrong jaw first. I adjust opposing jaws in pairs, in small increments, and I keep a consistent indicator contact point so readings don’t change just because the tip is riding over a nick or burr.
Self-centering benefits
A self-centering 4-jaw gives many of the woodworking benefits—fast mounting with four points of contact. It’s especially handy when you’re mounting a tenon or expanding into a recess repeatedly, like when you flip a bowl from outside shaping to hollowing.
That said, self-centering 4-jaws don’t replace a true independent chuck for metal jobs that need near-zero runout. If you’ve got an out-of-round forging or a welded assembly, the self-centering mechanism will follow the wrong geometry and lock you into that error.
Holding strength
Holding strength comes from jaw contact area, jaw engagement depth, and friction at the interface. Four jaws often distribute load better than three, and an independent 4-jaw can “bite” a part more confidently because you can bias pressure where the cut forces will pull.
Watch for vibration-driven loosening, especially on interrupted cuts or aggressive roughing. If you hear a rhythmic thump and then see the witness mark shift on the jaws, stop—don’t try to save the pass. Back off, increase contact length (deeper grip), lower RPM, and take a calmer depth of cut until the setup stays stable.
Durability features
Look for hardened jaws, a smooth key action, and corrosion protection if you’re in a humid shop or turning green wood. Nickel-plated bodies help resist sap, wet sawdust, and sweaty hands, which otherwise create a gritty paste that makes the scroll feel crunchy during tightening.
Don’t ignore maintenance. A chuck that feels “gravelly” when you turn the key usually has packed chips. I strip and clean chucks on a schedule; if you wait too long, chips brinell the scroll and you’ll never get the smooth repeatability back.
3-jaw vs 4-jaw lathe chuck
Choosing between 3-jaw and 4-jaw is about what you optimize: speed or control. I keep both available because almost every shop hits jobs that demand each one.
| Feature | 3-Jaw Chuck | 4-Jaw Chuck |
|---|---|---|
| Centering method | Self-centering scroll | Independent screws or self-centering (model-dependent) |
| Best for shapes | Round and hex stock | Square, rectangular, irregular, eccentric work |
| Centering accuracy | Good, varies with wear | Excellent when indicated (independent type) |
| Setup time | Fast | Slower (fast if self-centering) |
| Typical applications | General turning, repeat parts | Precision truing, odd shapes, wood bowl blanks |
Best for shapes
A 3-jaw is happiest on symmetric stock; it grips evenly without fuss. A 4-jaw independent can clamp almost anything you can fit between the jaws—this is the chuck that saves you when the job is “weird” and nothing is round, parallel, or even flat.
If you’re working from rough sawn timber or natural-edge blanks, jump to the wood section and plan for a wood lathe chuck style that tolerates irregularity without needing perfect geometry.
Centering accuracy
With a 3-jaw, centering accuracy depends on scroll and jaw wear, plus how consistent your clamping diameter is. With a 4-jaw independent, you can dial the work to near-zero runout by indicating the feature and adjusting the jaws until the needle barely moves.
Edge case: thin-walled tubing. A 3-jaw can crush it into a triangle under high torque, which ruins roundness. A 4-jaw lets you use lighter pressure and position jaws to support the wall better, or you can add a sleeve/plug inside the tube for anti-crush support.
Setup time
Setup time is the deciding factor on many jobs. If you’re doing ten similar spacers, a 3-jaw is hard to beat. If you’re repairing a shaft and need the worn journal to run true while you skim it, the extra minutes with a 4-jaw pay back in one clean pass and fewer measurement cycles.
A practical trick is to keep a dedicated backplate for each chuck so swaps are predictable. Constantly changing one backplate between chucks invites chips on the mating faces and creates “mystery runout” that wastes your time.
Typical applications
Use a 3-jaw for general turning, facing, and light production work. Use a 4-jaw independent for truing castings, gripping square blocks, eccentric turning, and any job where you need to reference a bore or a critical surface rather than the outside shape.
If you’re building your shop around woodturning projects, you’ll get more value from a self-centering 4-jaw style chuck and jaw sets for tenons and recesses; see our guide to wood lathe setups for matching the chuck to lathe size and turning style.
Wood lathe chuck selection
A wood lathe chuck has to cope with compressible fibers, changing moisture, and interrupted cuts from knots and bark inclusions. That’s why woodturners often prefer self-centering 4-jaw chucks: you get quick centering plus four-point grip that holds tenons and expands into recesses reliably.
Green wood adds a twist. Sap and wet dust build a sticky slurry that you can feel as drag in the key, and it can bind the scroll. If you turn wet blanks often, plan for more frequent cleaning and pick finishes that resist corrosion and staining.
Bowls and spindles
Bowls usually get held by a tenon (external grip) or a dovetail recess (internal expansion). Spindles can be held in a chuck too, but many spindle jobs still use centers for best alignment over long, slender stock.
Beginners often cut a short, straight tenon and wonder why the blank walks out. Cut a clean shoulder for the jaws to register against, and match the tenon geometry to your jaws (dovetail jaws want a dovetail tenon). That shoulder contact is your real anti-wobble support.
If you’re sourcing stock, start with stable blanks; warped blanks create constant re-truing work. Our guide to wood turning blanks helps you pick species and blank cuts that behave better on the chuck.
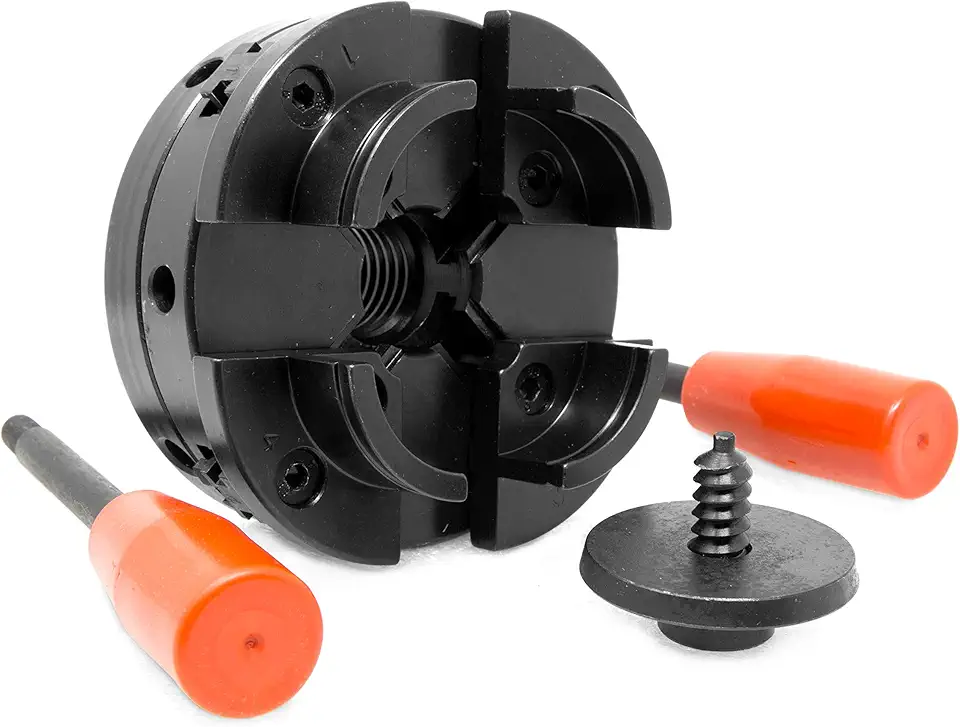
Self-centering 4-jaw fit
A self-centering 4-jaw is the easiest upgrade that makes a wood lathe feel more capable. It speeds up remounting for sanding and finishing, and it reduces the “fiddly” feeling you get when you’re trying to hold an imperfect blank between centers.
Two compact sizes cover a lot of work: 3.75″ for small parts and detail turning, and 4″ for small-to-medium bowls and general use. These listings include common adapters like 1″ x8 TPI and 3/4″ x16 TPI, which frequently solves fit problems on mini and benchtop lathes.

4-inch Self-Centering Wood Lathe Chuck
- Self-centering four jaw design for quick, precise alignment
- Includes one inch x8 TPI thread and three quarter inch x16 TPI adapter for broad fitment
- Nickel plated finish protects against corrosion and wear
- Robust jaws provide secure clamping for safe turning
- User friendly tightening for fast setup and adjustments

3.75-inch 4-Jaw Self-Centering Lathe Chuck
- Self-centering 4-jaw design for fast, accurate alignment
- Includes one inch x8 TPI thread and three quarter inch x16 TPI adapter for broad compatibility
- Nickel plated body resists corrosion and wear for long life
- Compact 3.75-inch size ideal for small projects and detailed turning
- Supplied tightening key and Allen wrench for secure, easy setup
Moisture resistance
Moisture resistance matters more than people expect. A chuck that lives around wet shavings will rust in the scroll and pinions, and that rust turns into a gritty feel and uneven jaw travel, which reduces repeatability.
Nickel-plated finishes help, but cleaning habits matter more. I brush off chips, blow out the keyways, and wipe the jaw slides after wet turning. Then I add a light corrosion inhibitor that won’t gum up (avoid heavy grease that traps dust into a lapping compound).
For more wood-specific chuck behavior and beginner pitfalls, AWI Net: Wood lathe chuck 101 aligns with what I see in the shop—jaw selection and proper tenon/recess geometry prevent most “mystery releases.”
Mounting and compatibility
Mounting is where a great chuck can still perform badly. If the mount doesn’t match your spindle, or the mating faces have a chip trapped, you’ll measure runout that no amount of jaw tightening can fix.
Spindle thread specs
Start by identifying your spindle nose: threaded (common on many wood and smaller metal lathes), camlock, or a bolt-on pattern. Threaded spindles need exact diameter and TPI match; forcing a near-match thread can gall the spindle and permanently ruin the fit.
If you’re shopping for a smaller machine, our mini lathes guide is a good check for common spindle sizes you’ll see on benchtop models, which helps you avoid buying a chuck that needs hard-to-find adapters.
Common TPI standards
Common wood-lathe standards include 1″ x 8 TPI and 3/4″ x 16 TPI, while some heavier setups use 1-1/4″ x 8 TPI. The “x 8” or “x 16” matters as much as the diameter; 1″ x 8 and 1″ x 10 are not interchangeable.
A real failure mode: cross-threading a chuck onto the spindle. It often starts “okay,” then tightens abruptly. If you feel that gritty bind, stop and back off; clean threads, line up carefully, and start again with zero wrench pressure until it spins on smoothly.
Adapters and backplates
Adapters solve compatibility gaps, but each added interface can add runout. For best results, I prefer a dedicated backplate fitted to the spindle and faced true on the lathe, then I mount the chuck to that backplate—this minimizes stack-up error and makes re-chucking more predictable.
Multi-thread kits can be practical when you’re working across machines. For example, this 4″ chuck lists a 1-1/4″ x 8 TPI thread plus a 1″ x 8 TPI adapter, which covers a wide range of common wood-lathe spindles without extra purchases.

4-inch 4-Jaw Chuck with one and a quarter inch Thread
- One and a quarter inch x8 TPI thread with one inch x8 TPI adapter for multi-thread compatibility
- Self-centering four jaw design for reliable concentric gripping
- Nickel plated finish for corrosion resistance and smoother operation
- Includes five jaws to expand clamping options and replacements
- Easy to mount and tighten for fast, secure setups
CAMLOCK fit
CAMLOCK spindles use cam pins for quick changes and solid repeatability when the pins are adjusted correctly. The upside is speed and consistent seating; the downside is you must keep the mating surfaces spotless, because one small chip can tilt the chuck and create measurable runout.
If you’re switching between multiple chucks often, camlock can save time and reduce thread wear. For a deeper review of how chuck types map to conventional and CNC setups, Pinacho CNC: Types of lathe chucks gives a practical overview of mounting options and where powered chucks show up.
Recommended chucks and accessories
This section focuses on common self-centering picks that fit many small and mid-size lathes, plus one add-on that makes tailstock drilling cleaner. Treat these as “shortlist candidates,” then verify spindle type, thread, and the jaw sets you need for your projects.
4-jaw self-centering picks
If you want a quick way to browse popular options, here are several self-centering 4-jaw chucks sized for common wood and light-duty metal setups.
WEN 4-inch 4-Jaw Self-Centering Chuck
- WEN engineered for reliable, repeatable centering on turnings
- One inch x8 TPI thread for standard headstock compatibility
- Hardened jaws hold work securely for safer, cleaner cuts
- Compact 4-inch diameter balances capacity and control for most projects
- Easy to mount and operate for faster setup and fewer adjustments
4-inch 4-Jaw Self-Centering Chuck Set, 2 Jaws
- Nickel plated finish improves durability and reduces rust
- Self-centering four jaw system for consistent concentric grip
- Includes one inch x8 TPI thread and three quarter inch x16 TPI adapter for flexible mounting
- Two-piece jaw set provides spares or extended clamping options
- Simple installation and tightening for quick changeovers

4-inch 4-Jaw Chuck Set with 5 Jaws
- Includes five jaw pieces for extended clamping options and replacements
- Self-centering four jaw mechanism for consistent concentric grip
- Nickel plated surface improves durability and reduces corrosion
- One inch x8 TPI thread for common lathe compatibility
- Easy to install and tighten for quick project transitions

6-inch 4-Jaw Self-Centering Lathe Chuck
- Larger 6-inch diameter offers greater capacity for bowls and big turnings
- Self-centering four jaw system ensures accurate, repeatable centering
- One inch x8 TPI thread for standard headstock mounting
- Heavy duty construction for stable, vibration resistant performance
- Suitable for larger projects while still easy to mount and use

WEN 3.75-inch 4-Jaw Self-Centering Chuck
- Compact 3.75-inch size great for small projects and detailed turning
- Self-centering four jaw system for fast, accurate alignment
- One inch x8 TPI thread for standard lathe mounting
- Hardened jaws hold work securely for safer cutting and cleaner results
- Simple installation and tightening for quick, repeatable setups
Drill chuck add-on
A keyed drill chuck in the tailstock is a small upgrade that saves time when you’re center-drilling, drilling, and reaming. This model lists a 5/8 in capacity and an MT2 arbor, which fits many common tailstocks.
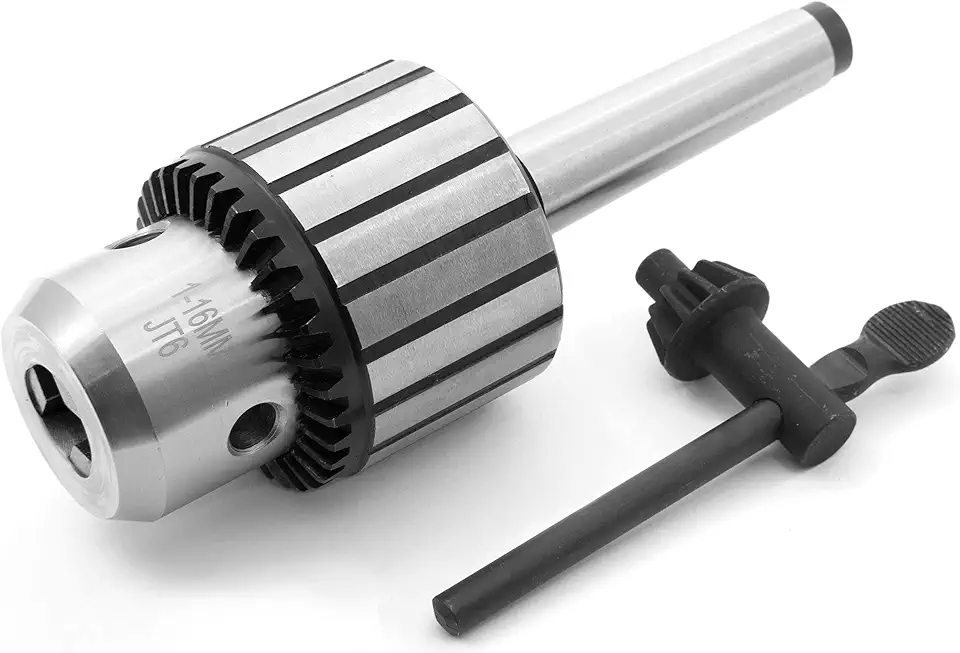
WEN five eighths inch Keyed Drill Chuck with MT2 Arbor
- Holds bits up to five eighths inch for common drilling tasks
- Keyed chuck gives strong, slip free bit grip under load
- MT2 arbor compatibility for easy installation on drill presses and lathes
- Hardened jaws resist wear for long service life
- Simple tightening makes bit changes quick and reliable
Practical Notes From Real-World Use
The biggest surprise for most people is how often “the chuck is accurate” turns into “the setup is inaccurate.” A chuck can be fine and still cut poorly if there’s a single chip on the mounting face; that tiny bump can create visible runout, then you’ll feel a faint pulsing through the tool handle and hear a light ticking as the tool meets a high spot once per revolution.
Another issue that doesn’t show up in spec sheets is jaw slip from vibration. On wood, it happens after a catch or during heavy hollowing; on metal, it happens on interrupted cuts. My workaround is boring but effective: more jaw engagement length, lower RPM, and cuts that don’t hammer the setup—plus I stop and re-tighten after the first roughing passes when fibers compress or burrs settle.
Nickel plating helps with corrosion, but it doesn’t save you from packed debris. The “sticky key” feeling is your warning sign: clean it then, not after it starts scoring the scroll. I also keep a dedicated chuck brush and a rag that smells faintly of light oil—if the chuck feels dry and raspy when you spin the key, a tiny amount of the right lubricant makes the action smooth without turning the inside into a dust magnet.
A final beginner mistake is leaving the chuck key in. It’s still one of the most dangerous habits in the shop because it turns the key into a projectile. Build a routine: key in, tighten, key out, set it down in the same spot every time, then start the machine.
FAQs
How Do I Mount And Align A 3-Jaw Or 4-Jaw Chuck On My Lathe?
Clean the spindle and chuck, then mount the chuck and hand-tighten the mounting screws or drawtube to secure it.
Use a dial indicator on a test bar to check runout and make adjustments by loosening and tapping the chuck body or adjusting individual jaws on a 4-jaw until runout is minimal. Finally, torque the fasteners to the manufacturer’s specifications and recheck alignment.
What’s The Difference Between A Self-Centering 3-Jaw Chuck And An Independent 4-Jaw Chuck And When Should I Use Each?
A 3-jaw self-centering chuck quickly centers round stock, while an independent 4-jaw chuck lets you adjust each jaw individually for precise off-center or irregular work.
Use a 3-jaw for speed and good concentricity on round bar; choose a 4-jaw when you need higher accuracy, to correct runout, or to hold square, odd-shaped, or intentionally offset parts.
How Do I Safely Remove A Stuck Lathe Chuck Without Damaging The Spindle?
Apply penetrating oil and gently tap the mounting faces and screw holes to break corrosion, then use the proper puller or the spindle removal tool per the machine manual.
Avoid hammering the spindle or using excessive force; if the chuck remains stuck, progressively tighten removal bolts in a cross pattern or contact a technician to prevent thread or taper damage.
How Can I Reduce Chuck Runout And Improve Accuracy When Holding Small Parts?
Reduce runout by cleaning mating surfaces, using a precision collet or a properly sized chuck, and inspecting jaw tips for wear.
Support short workpieces, use a dial indicator to measure and correct runout, and consider soft jaws, replacing worn jaws, or switching to a 4-jaw for fine alignment when necessary.