Drum Sander Buying Guide: Choose the Best Drum Sander
A drum sander is a woodworking machine that flattens and smooths boards and panels by feeding them under a rotating, sandpaper-wrapped drum at a controlled height. It shines where planers risk tearout, where hand sanding takes forever, and where you need repeatable thickness across a wide surface.
Table of Contents
If you’re comparing drum sanders for sale, the shortcut is simple: match width and feed control to your projects, then size dust collection to keep the cut cool and the paper clean. The details below cover types, key features, real specs, and the common setup mistakes that cause burns, snipe, and conveyor slip.
What a Drum Sander Does
Core purpose
A drum sander’s core job is thicknessing and flattening wide stock using abrasion instead of knives. I reach for it after glue-ups (tabletops, panels) and for tricky grain where a planer can lift fibers and rip out a chunk you can’t “un-cut.”
It’s also a quiet cheat code for thin work: veneers and inlays that would explode in a planer can pass through safely when you take light cuts. You can run material down around 1/32″ on many machines, but only if the conveyor is clean and the pressure rollers are set so the piece doesn’t stall.
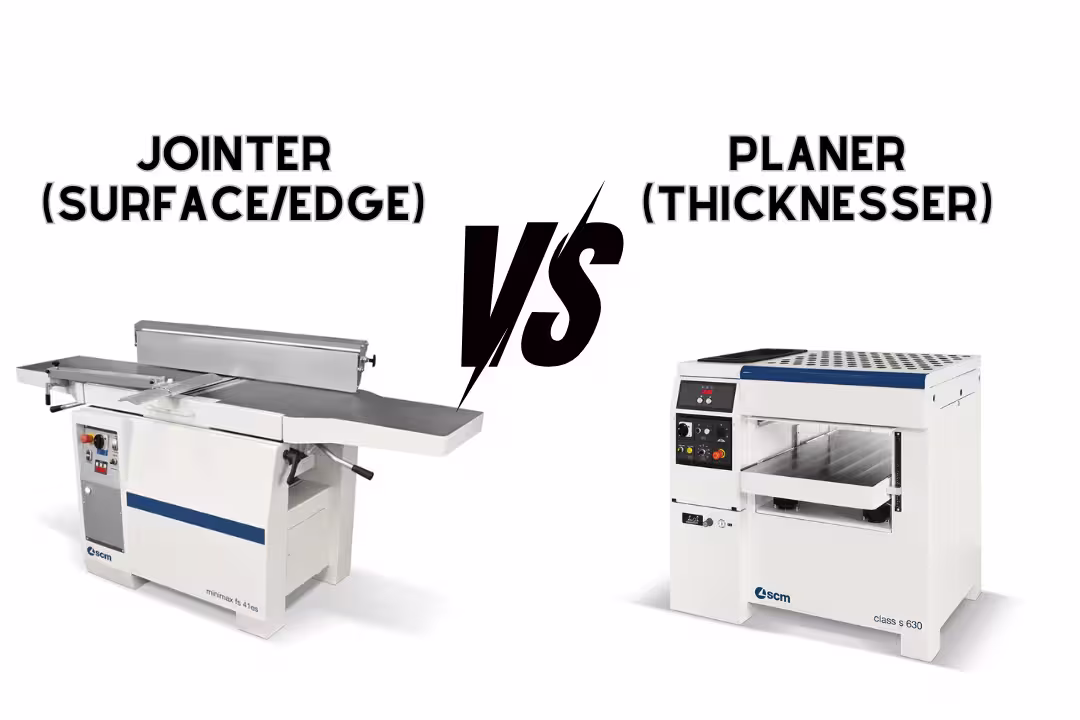
One warning for beginners: a drum sander won’t “fix” a twisted board like a jointer-planer workflow can. If one face isn’t referenced flat first, you’ll make a smooth board that’s still out of truth—this is where a jointer/planer process matters (see jointer vs planer).
How it works
A motor spins the sanding drum while a conveyor belt feeds the work under it at a set rate. You set the drum height (or table height, depending on design), then sneak up on final thickness in tiny steps so the abrasive cuts instead of rubs.
Feed speed and grit decide how the machine behaves. Slow feed with a coarse grit removes stock fast but builds heat; fast feed with too fine a grit can polish resin and glaze the paper. When a sander is dialed in, you can feel the board come out warm—not hot—with a uniform scratch pattern you can “hear” as a steady hiss instead of a chattering rasp.
Dust collection isn’t just cleanliness; it’s cut quality. If dust stays under the hood, it re-grinds and cooks onto the abrasive, which is how you get those shiny burn stripes that smell like toasted lignin. Many 4″ ports really want high airflow; SuperMax calls for around 600 CFM on 4″ systems per the SuperMax 19-38 product specs.
Typical capacities
Most hobby and small-pro units sand 10–25″ in a single pass, with “open-end” sanders able to handle double that in two passes if you flip the work for a second run. Expect max thickness around 3.5–4″ and a short minimum length (often a couple inches) that depends on the infeed/outfeed roller spacing.
Capacity numbers hide a real constraint: wide panels need support. With no outfeed table or roller stand, the leading edge can dip and you’ll sand a taper. For long cabinet parts, I set the stands so the board is dead level with the conveyor bed, then I test with a scrap strip before I touch the “real” panel.
Drum Sander Types
Benchtop drum sanders
A benchtop unit is the best drum sander style for tight shops and smaller work: boxes, drawer fronts, face frames, and edge-sanding small parts with a carrier board. You trade width and mass for portability, so you’ll take lighter passes and pay more attention to keeping the conveyor clean and parallel.
The common mistake is chasing speed: forcing a heavy cut makes the motor bog, heats the paper, and leaves burn marks. The workaround I use is two-step sanding: one “work” pass with 80–120 grit taking a hair of material, then a cleanup pass at the same height with a faster conveyor speed to reduce heat and even the scratch pattern.
Floor drum sanders
Floor models earn their footprint with stability, better tracking, and less vibration under load. That mass matters when you’re sanding wide glue-ups, because chatter shows up as a repeating ripple that you’ll feel with your fingertips when you wipe the surface clean.
They also push you to take dust collection seriously. A 4″ port needs a collector that can keep chips moving; a weak shop vac leaves a haze that clings to your skin and makes the shop smell like hot sawdust. If you’re building out a sanding workflow, it helps to compare machines side-by-side with the rest of your sanding lineup (see machines for sanding).
Drill-mounted drum sand kits
Drill-mounted kits aren’t a replacement for drum sanders, but they’re great for curves, holes, and inside radii. They remove material fast in a small area, which is also why beginners gouge edges or “egg” a hole if they linger in one spot.
The pro move is to treat them like a mini spindle sander: keep the part moving, use light pressure, and step through grits instead of trying to finish with one sleeve. If you do lots of curved work, a dedicated spindle sander gives you better control and less burning (see spindle sander).
Key Drum Sander Features
Motor power
Motor size decides how forgiving the machine feels when you hit dense hardwood or a glue line. For serious use, 1.5–3 HP keeps the drum from slowing down as you load it, which reduces burning and keeps scratch depth more consistent across the pass.
Beginners often misread HP as “I can take deeper cuts.” That’s where you get heat checks, pitch buildup, and paper tearing at the clip. The smarter play is to set a tiny increment (often 1/8–1/4 turn on the handwheel) and let the abrasive do its job with a steady feed.
Conveyor feed
A good conveyor gives stable, repeatable feed rate so the drum sees the same load across the whole board. Variable-speed conveyors help you tune for species: slower for hard maple or wide glue-ups, faster for softer woods or finishing passes where heat is the enemy.
One real failure point: conveyor slippage under heavy sanding loads, especially if the belt has dust packed into the weave or the tension is off. My fix is boring but effective—clean the belt with a gum rubber stick, check tracking, then increase tension in small, equal turns on both sides so it doesn’t drift.
Dust collection
Dust control affects finish quality more than many people expect. When extraction is right, you’ll see a clean “trail” behind the drum and the surface feels dry and crisp; when it’s wrong, the board comes out with dusty stripes and the abrasive looks polished and clogged.
A common mistake is pairing a 4″ port with a restrictive hose run or small collector, then wondering why the paper burns. Keep the hose short, avoid tight bends, and seal leaks so the hood pulls air where the cut happens. For broader shop planning, it helps to map the sander into your full sanding setup (see sanding machine guide).
Adjustments and accuracy
Parallelism is the hidden feature that decides whether a drum sander feels “easy” or cursed. If the drum isn’t parallel to the conveyor, you’ll chase taper across the width, and it shows up fast on a wide panel as one side sanding clean while the other still has milling marks.
Anti-snipe settings matter, too. If your infeed/outfeed pressure or table rollers are wrong, the leading or trailing edge can lift into the drum and get over-sanded. The fix I use is a sacrificial lead board and a “last-pass” routine: send a scrap first, then the workpiece, then another scrap right after it to keep pressure consistent.
Drum and abrasive
The drum’s diameter, wrap system, and paper type decide how fast you can swap grits and how clean the scratch pattern looks. Clip systems hold tight but require correct winding tension; wrap it loose and the paper can creep, creating edge ridges you’ll feel as raised lines.
Grit choice is where many beginners waste money. If you try to remove planer marks with 180 grit, you’ll heat the wood and glaze the sleeve. Start coarser (80–120), then step up, and finish with a ROS or belt sander based on the surface (see belt sander).
Drum Sander Specs Comparison
Spec table
| Model | Drum width | Motor | Conveyor speed | Max thickness | Dust port | Weight |
|---|---|---|---|---|---|---|
| SuperMax 19-38 | 19″ (38″ two-pass) | 1.75 HP | 0–10 FPM | 4″ | 4″ | 286 lb |
| Grizzly G0459 | 12″ | 1.5 HP | 2.5–17.3 FPM | 3.5″ | 2.5″ | N/A |
| JET JWDS-2550 | 25″ | 1.75 HP | 10 FPM | 4″ | 4″ | N/A |
This comparison is useful for shortlisting, but it won’t show the two things you’ll feel on day one: how smoothly the conveyor tracks under load, and how well the machine deals with heat when you sand resinous woods like pine. That’s why I always judge a “best drum sander” by results on a wide glue-up, not by brochure specs alone.
SuperMax 19-38
The SuperMax 19-38 is popular for shops that need wide capacity without jumping to a full industrial wide-belt. The open-end design makes two-pass sanding practical, but you need careful alignment and consistent feed technique so the overlap area doesn’t show as a faint step.
Where it tends to win is load control and feed behavior when you’re close to the limit. With the right airflow and light cuts, burning drops sharply because the paper stays cleaner and the drum doesn’t “dwell” on one spot. For stated airflow and sizing guidance, I stick to the manufacturer listing on Woodcraft’s SuperMax 19-38 page.
Grizzly G0459
The Grizzly G0459 fits the benchtop category where a lot of people start shopping for a drum sander for sale. The 12″ width is great for drawer parts and narrow panels, and the wide conveyor speed range is useful for dialing in heat control.
The trade-off is dust port size and the “lighter machine” reality. A smaller port and lighter chassis can mean more sensitivity to setup and shop vacuum limitations. If you want the official specs in one place, use the Grizzly G0459 listing.
JET JWDS-2550
The JET JWDS-2550 targets the “small pro shop” sweet spot: wide enough for cabinet parts, strong enough for steady throughput, and built around consistent, repeatable thicknessing. A closed stand also helps keep wiring and dust collection tidier than open base designs.
Pay attention to how you stage long stock on the infeed/outfeed. Wide panels act like levers; if the outfeed droops, the last foot can get kissed harder by the drum. For the baseline details, JET posts specs on the JET JWDS-2550 page.
Best Drum Sander Picks 2026
Best benchtop drum sander
If you need a compact machine for small panels and edge work, a benchtop unit is often the best value. Plan on lighter passes, keep a crepe cleaning stick at the machine, and avoid sanding glue squeeze-out directly—dried glue loads paper fast and can create hard streaks that telegraph into the surface.
JET 10 inch Benchtop Drum Sander, 1 HP
- Compact benchtop footprint ideal for small shops and hobbyists
- 10 inch drum width handles small panels and edge work efficiently
- 1 HP motor balances power and control for smooth finishes
- adjustable sanding depth for fine-tuning material removal
- dust port reduces cleanup for a neater workspace

VEVOR 10 inch Benchtop Drum Sander, 1 HP
- Space saving 10 inch benchtop design fits small shops and workbenches
- 1 HP dual motor delivers steady sanding power for fine work
- variable speed conveyor belt gives controlled feed rates for different woods
- 4 inch dust collection port reduces mess for cleaner finishing
- quick belt changes speed up project setup
Best mid-size floor drum sanders
Mid-size floor models hit the balance of throughput and footprint. They’re the upgrade that makes big glue-ups feel routine, but they also punish sloppy setup—if the conveyor is out of parallel, you’ll waste time sanding the same spot trying to “fix” a tapered panel.

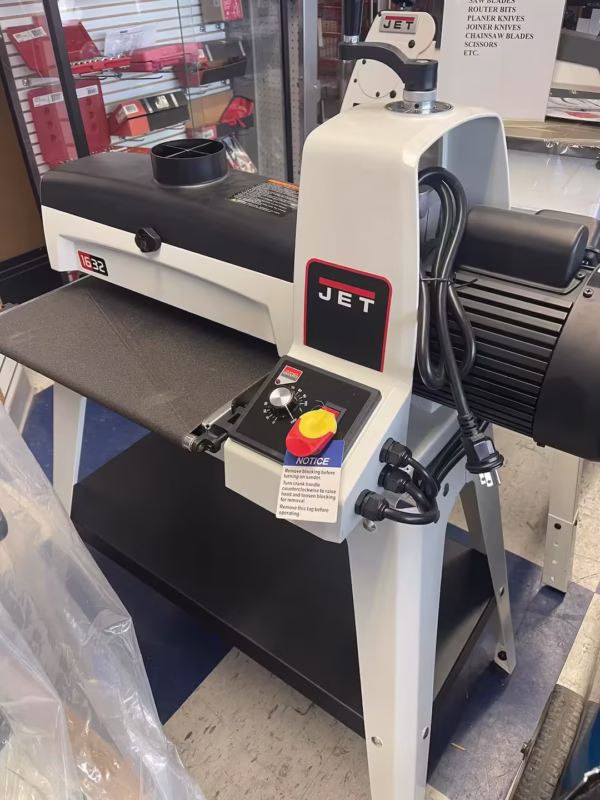
JET 16 inch Drum Sander, 1.5 HP
- Wide 16 inch sanding surface for large boards and panels
- 1.5 HP motor delivers strong stock removal for faster sanding
- open stand design adds stability during heavy use
- adjustable table and depth control for precise, consistent results
- 4 inch dust port helps keep your workspace clean

VEVOR 16 inch Drum Sander, Dual Motor
- Dual motor design for reliable performance and consistent sanding
- 16 inch bed with extension tables supports larger cabinet and furniture pieces
- variable speed conveyor belt offers controlled feed rates for different woods
- sturdy stand improves stability and workflow
- 4 inch dust collection port helps contain dust and debris
Best wide-capacity drum sander
If you routinely sand panels that push past 16″, wide capacity saves time and helps keep parts consistent across a build. The key is pairing the machine with real airflow and a sane bite per pass; wide sanding at aggressive depth is the fastest path to conveyor slip and scorched paper.

VEVOR 22 inch Drum Sander, Dual Motor
- Generous 22 inch sanding width for wide panels and large projects
- 1.75 HP dual motor setup for powerful, consistent sanding
- variable speed conveyor for precise feed control across materials
- extension tables support long workpieces and improve accuracy
- 4 inch dust port helps manage dust during heavy use
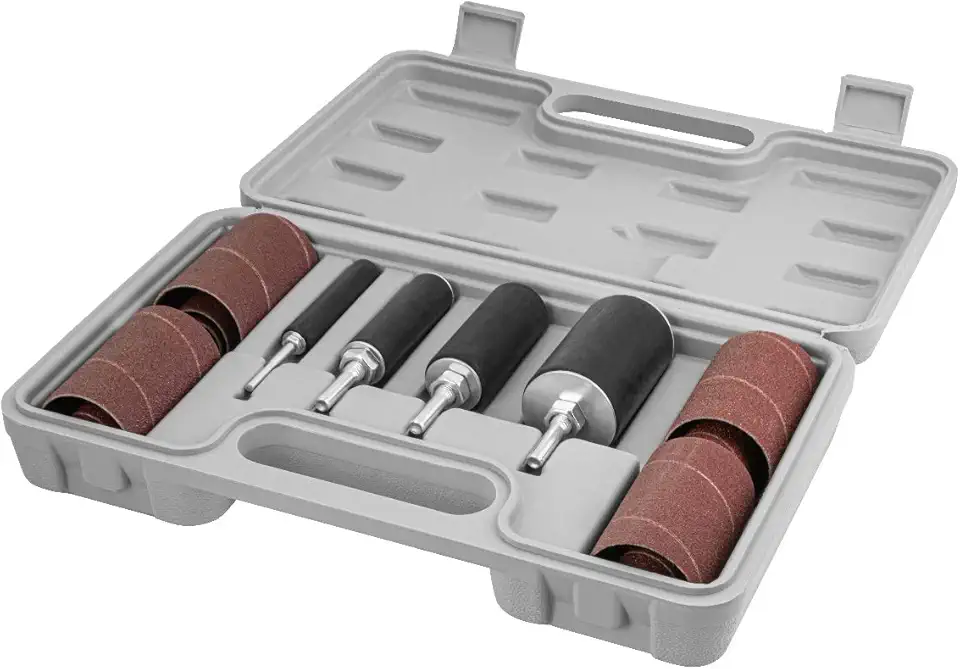
Drum Sand Attachments and Kits
Best sanding drum kits
For quick drum sand work on curves, holes, and profiles, these sanding drum kits cover a wide range of diameters and grits in one grab-and-go set.

187 Piece Sanding Drum Kit for Drills
- Comprehensive 187 piece set covers a wide range of sanding tasks and applications
- includes 2 inch sleeves and multiple rubber drums for versatile use
- 1/4 inch shank fits standard drills and many drill presses
- organized storage box keeps accessories sorted and portable
- ideal for shaping, smoothing, and finishing small parts

LINE10 16pc Sanding Drum Set, 2 inch
- Sixteen piece set with extra long 2 inch sleeves for extended sanding surface
- 1/4 inch shank fits most drills and drill presses for fast setup
- ideal for contour sanding and smoothing curved edges
- durable abrasive provides consistent finishing life
- compact set stores easily in a workshop drawer
POWERTEC 20pc Drill Press Sanding Drum Kit
- Twenty piece kit includes spindle sleeves and two shank sizes for broad compatibility
- 1/4 inch and 1/8 inch shanks adapt to many drill presses and hand drills
- sleeves cover multiple diameters for varied sanding profiles
- durable construction for consistent sanding results
- handy carrying case keeps components organized
When kits beat drum sanders
Kits win when you need access, not flatness: inside a handle cutout, on a cabriole leg transition, or for smoothing the inside wall of a drilled hole. A full-size drum sander needs a flat reference face and a predictable feed path; a drill drum goes where the machine can’t.
The risk is control. A handheld drill can “grab” and chatter, leaving scallops you’ll see under finish. My workaround is a drill press whenever possible, plus a simple fence to keep the part from rotating. If you want a purpose-built option between drills and big machines, an oscillating drum sander is usually safer and leaves fewer heat marks.
How to Choose the Best Drum Sander
Size and capacity
Start with your most common parts, then buy for the next size up. If you build cabinets, a 16–22″ class machine feels natural; if you do small boxes and furniture details, a 10–12″ benchtop can be the right fit and still produce clean panels with multiple passes.
Plan for support gear. Long boards need infeed/outfeed stands, and wide panels need careful two-pass technique on open-end machines. The first time you do it right, you’ll feel the overlap disappear under your hand—no ridge, just a uniform “grainy” scratch that sands out quickly.
- Match drum width to your widest common panel, not the rare “once a year” project.
- Pick variable feed if you sand mixed species or resinous softwoods.
- Budget for outfeed support and extra abrasive rolls from day one.
Budget and value
Expect benchtop machines around $500–$1,200, and floor models commonly from $2,000 up into the $4,000 range depending on width and features. If you’re shopping drum sanders for sale, the best value often comes from buying the machine that matches your dust collector and electrical circuit—upgrading either later can cost more than stepping up one model today.
Don’t ignore consumables. Abrasive wraps, conveyor belts, and cleaning sticks become part of your weekly rhythm. If you buy too small to “save,” you can end up spending that savings in paper and time because you’re forced into slower, hotter sanding passes.
Dust and airflow needs
Airflow needs scale with width and how aggressively you sand. A 4″ hood that’s starving for air leaves dust in the cut, which acts like insulation and drives up heat. That’s when you get a hot, sharp smell and a board that feels slightly tacky from warmed resin.
One practical rule: treat dust collection like part of the cutting system. Keep the run short, use smooth-wall pipe where you can, and seal joints so the hood keeps suction at the drum. For deeper sanding workflow planning across machines, I keep a quick reference in my shop notes that mirrors what we cover in machines for sanding.
Anti-snipe setup
Snipe on a drum sander usually comes from pressure changes at the start or end of the board. You’ll spot it as a slightly lighter band or a shallow dip that catches light at a low angle. The fix is setup: roller height, consistent support, and a leader board strategy.
Dial-in routine that saves time: set conveyor tracking first, then verify drum-to-bed parallelism, then test snipe with two scraps back-to-back. If you can sand both scraps without a visible transition, your workpieces will behave too.
Fixing common issues
Most problems come from heat, alignment, or feed. Start by naming the symptom: burning, lines, stall, or taper. Then fix the cause, not the surface result.
- Burning or shiny stripes: speed up the conveyor, take a smaller bite, improve dust collection, and clean or replace the abrasive.
- Conveyor slip or stalling: clean the belt, re-tension evenly, reduce depth of cut, and check that the workpiece isn’t rocking.
- Parallel sanding issues: adjust drum/table parallelism, then confirm with a wide scrap pass and measure both edges.
- Chatter marks: check abrasive wrap tension, drum balance, and stand stability; reduce feed rate spikes by avoiding forced entry into the drum.
- End snipe: add a lead/follow board, verify support stands, and re-check roller settings after any major adjustment.
One beginner trap: trying to sand end grain flush on small parts without a carrier board. The part can tip, then the drum grabs and the piece shoots forward. Use a flat sled with sandpaper or PSA on the bottom for grip, keep fingers well away from the infeed, and let the conveyor do the feeding for safer control.
Practical Notes From Real-World Use
What surprised me early on was how often “more sanding” made the surface worse. If dust collection is marginal, extra passes build heat, glaze the paper, and leave a surface that looks smooth but finishes blotchy because the pores are packed. The fix was fewer passes with cleaner cutting: better airflow, fresh abrasive, and lighter height changes.
Conveyor behavior also fooled me. A belt can track fine empty, then drift once a wide panel loads it. You’ll hear a soft rub as the belt kisses a side wall, then you’ll see the stock start to skew. My workaround is to do a quick “loaded tracking check” with a wide scrap panel and adjust in tiny steps, waiting a full rotation or two for the belt to respond.
Noise and vibration matter more than people admit. A sander that’s slightly out of level will walk under load, and you’ll feel a buzz in your palms when you steady long stock. Putting the stand on a solid floor, leveling it, then tightening the frame fasteners stops most of that. If your shop floor is uneven, shim it—don’t trust the casters to hold a stable plane.
Finally, don’t expect a drum sander to replace every other sander. It produces a consistent scratch pattern, but you’ll still blend with a ROS for finish-ready work, especially on figured woods where cross-grain scratches show under raking light. I keep the handoff simple: drum sand to flat and near-thickness, then finish with the methods covered in our sanding machine overview.
FAQs
What Is A Drum Sander Used For?
A drum sander is used to quickly remove stock and smooth large wooden surfaces to a consistent thickness and flatness.
It’s ideal for sanding tabletops, doors, and wide boards where a handheld sander is too slow or uneven. Beginners should test settings on scrap wood to avoid gouging and use progressively finer grits for a clean finish.
Is A Drum Sander Better Than A Planer For Flattening Boards?
Neither tool is strictly better for flattening; a planer removes material quickly and flattens rough lumber, while a drum sander produces a smoother surface and precise thickness control.
Use a planer (with a jointer) to get stock flat then a drum sander for final thickness and surface quality. Consider snipe and take light passes to avoid marks.
How Much CFM Do I Need For A Drum Sander Dust Port?
Most stationary drum sanders work best with 500–1,000 CFM, while benchtop models can often run acceptably on 300–500 CFM systems.
Check the manufacturer’s recommended CFM and port size, and use short, straight duct runs with a good static-pressure-capable collector for the best dust pickup. A proper hood and filter improve performance and safety.
What Size Drum Sander Should I Buy For A Small Shop?
For a small shop, a 12–24 inch drum sander usually balances capacity and footprint, with 12–16 inches fine for narrow boards and 20–24 inches better for panels and furniture parts.
Prioritize motor horsepower, table quality, and dust collection when choosing size. If space is tight, a benchtop 12–16 inch model offers portability and cost savings for hobby use.
Are Benchtop Drum Sanders Worth It?
Yes — benchtop drum sanders are worth it for hobbyists and small shops that need consistent, flat sanding on narrow workpieces without the cost and footprint of a full-size machine.
They have limits in width, power, and production speed, so they’re ideal for occasional use and small projects; serious production work benefits from larger floor models.