Thickness Planer Guide: How It Works and How to Choose One
Table of Contents
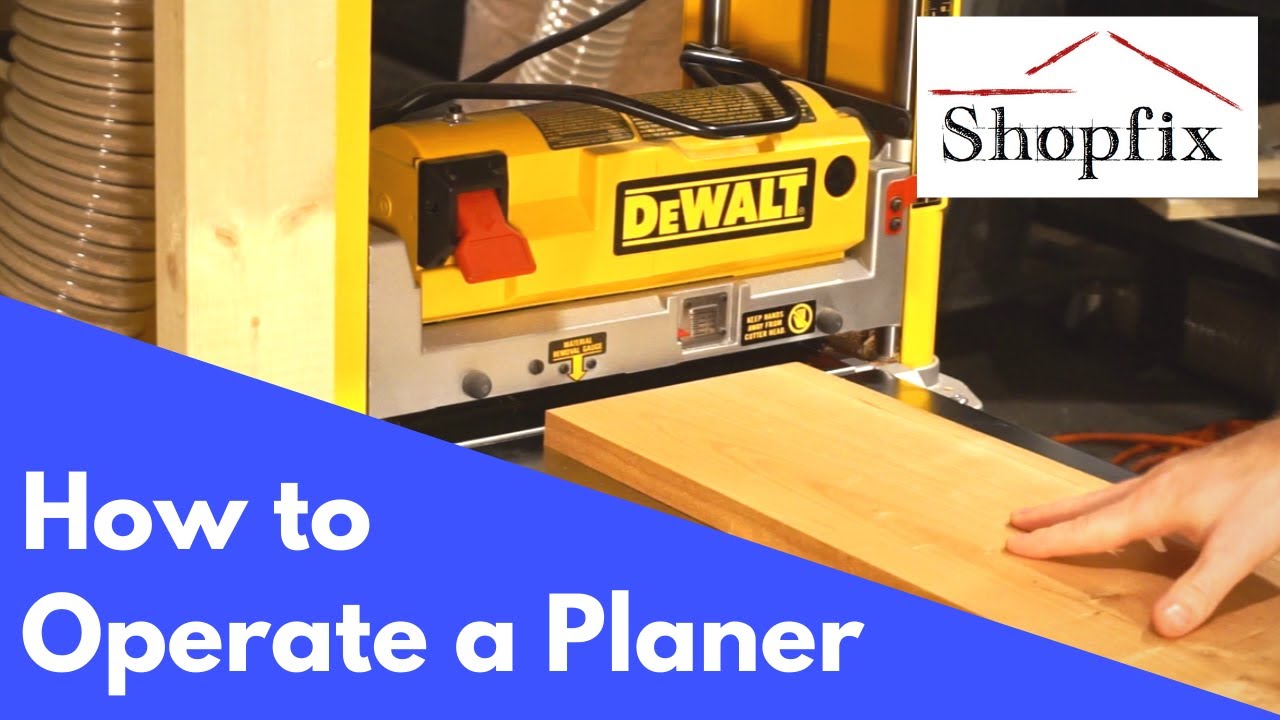
A thickness planer is a woodworking machine that feeds a board through rotating cutters to make it a consistent thickness with two faces that are parallel. It smooths and sizes lumber fast, but it won’t flatten a twisted or cupped board by itself—you need a flat reference face first.
If you’ve ever pushed rough sawn lumber across a bench and felt the high spots catch your palm like tiny speed bumps, a planer is the tool that turns that grabby, ridged surface into a clean, even glide in a few passes with repeatable thickness.
What a Thickness Planer Is
Woodworking planer basics
A thickness planer (often called a woodworking planer or “thicknesser”) pulls stock through with feed rollers and shaves the top face to match the height you set. Most benchtop units are 13-inch machines with a 15-amp motor, which is enough to mill common hardwoods if you keep passes reasonable.
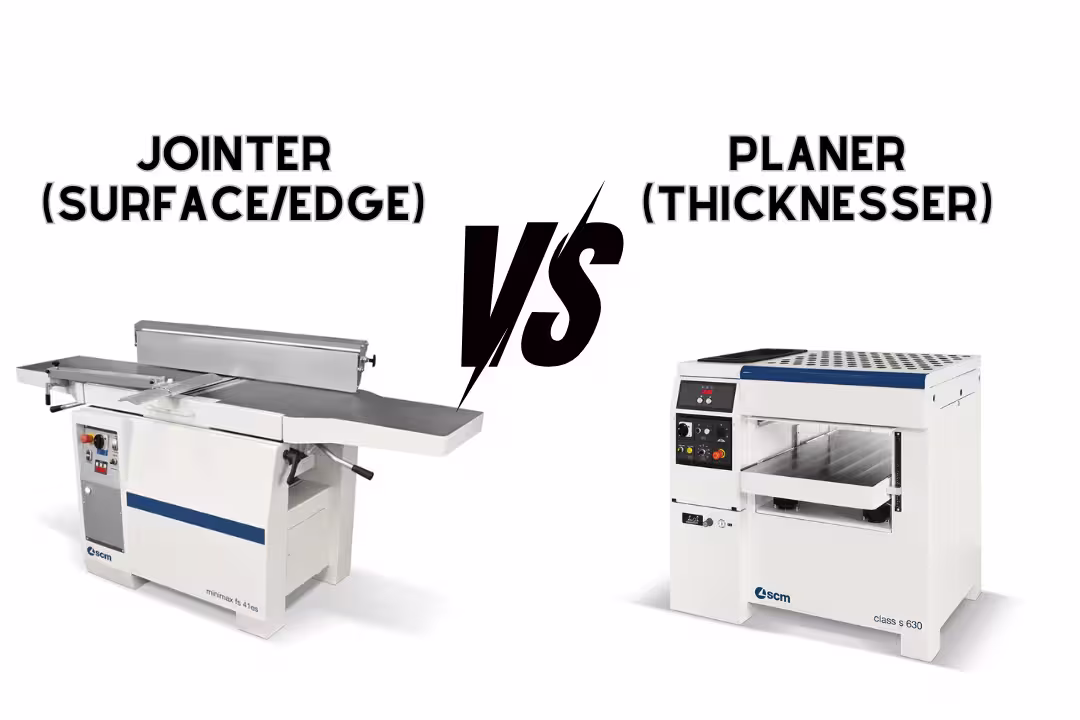
If you’re new to milling, it helps to separate tool roles: a planer makes faces parallel; a jointer makes a face flat. That “parallel vs flat” detail is why two boards can come out of a planer perfectly even in thickness yet still rock on a table if they started out twisted.
For a deeper overview of planer types and where they fit in a small shop, this guide on the planer tool breaks down the common machine categories without skipping the practical limits.
What it does (and doesn’t)
A thickness planer does three jobs extremely well: it brings rough lumber down to a target size, it makes multiple boards match within tight tolerance, and it leaves a surface that’s usually ready for light finish sanding. The main thing it doesn’t do is correct warp by itself, because the board is pressed down by rollers and will “spring back” after the cut.
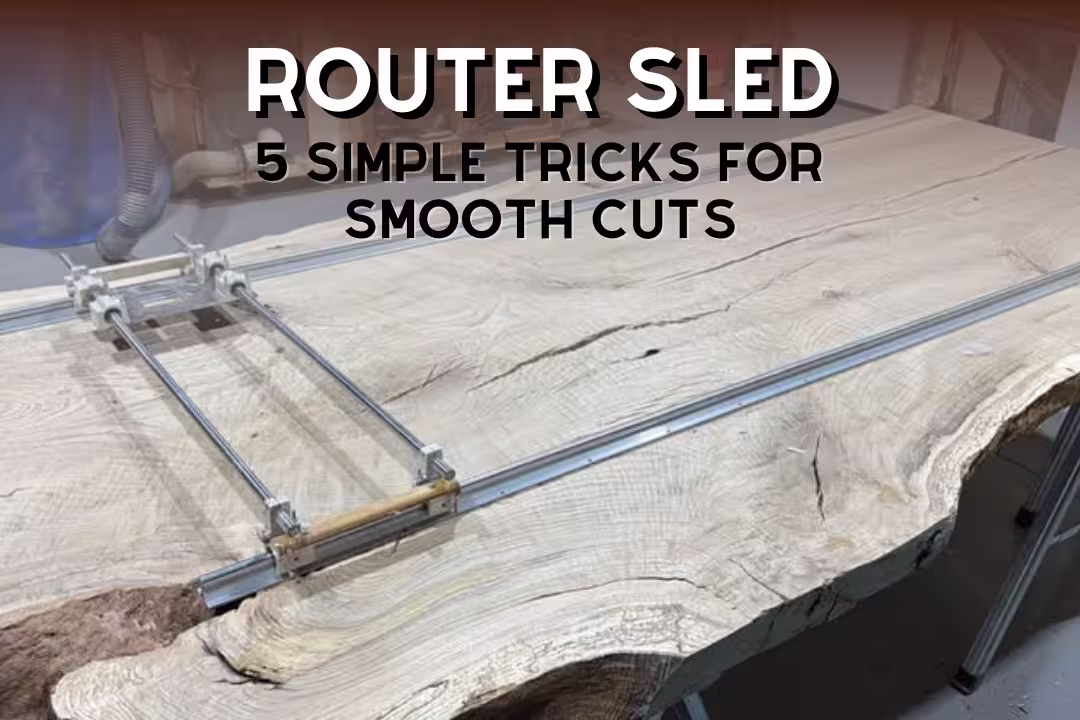
Beginners often expect a planer to fix cupping. What usually happens is the board exits looking great, then you set it down and the same cup is still there—just thinner. The workaround is to joint one face first, or use a planer sled with shims so the machine cuts true flatness instead of copying the bend.
A planer makes one face parallel to the other; it doesn’t automatically create a flat reference face.
BCcampus: Woodworking Machinery (Planer)
Core components
Most thickness planers share the same essential parts: an adjustable bed/table, infeed and outfeed rollers, a cutterhead (straight knives or spiral inserts), and a height adjustment mechanism with a scale. On benchtop units, chip ejection and the dust hood matter more than people think because packed chips can cause surface dents and feed slips.
- Bed/table: supports the board and sets finished thickness via height adjustment
- Feed rollers: grip and move stock at a set feet-per-minute rate
- Cutterhead: removes material; knife style affects finish and tearout
- Pressure bar/chipbreaker (varies by model): helps reduce chatter and lifting
- Dust hood/port: directs chips; poor airflow often shows up as clogging and snipe
How Does a Thickness Planer Work
Bed height control
The planer sets thickness by changing the distance between the bed and the cutterhead. On most benchtop machines, a handwheel raises or lowers the bed; you creep up on the final number because removing too much in one shot can stall the feed, spike noise, and leave scallops you can feel as fine ripples under your fingertips.
A common mistake is trusting the scale blindly. Scales drift from blade swaps and vibration. I set thickness using a caliper or a setup block, then “sneak up” with final passes around 1/64-inch so the last cut is light and consistent across the full width.
Feed rollers and tables
Feed rollers pull the board through at a constant rate, which is why planers are so fast for batch work. On many machines, the infeed roller is serrated for grip and the outfeed roller is smoother to protect the finished surface; if the serrations are dirty with pitch, you’ll see feed hesitation and sometimes roller marks.
Long stock is where reality hits. A board that droops off the infeed or outfeed side acts like a lever, lifting into the cutterhead and creating snipe. Extension tables help, but I still support long pieces with roller stands and keep gentle upward hand pressure right at the bed line rather than at the far end.
Cutterhead action
The cutterhead spins at high speed and shears fibers as the board passes underneath. Straight-knife cutterheads can leave a glassy surface on straight grain, but they tend to yank up fibers on reversing grain; spiral/helical heads take smaller bites with many inserts, which usually means less tearout and a softer “hiss” instead of a sharp bark.
Watch grain direction. Feeding “with the grain” often reduces tearout, but figured woods don’t always have a clear direction. For curly maple or knotty pine, I drop cut depth, switch to a slower finish feed if available, and accept that a follow-up sanding step may still be needed.
Feed speed and RPM
Two numbers shape your result: cutterhead RPM and feed speed (feet per minute). Higher feed speed removes stock faster, but it leaves more “knife marks” per inch; slower feed makes a tighter pattern that feels smoother under your hand. This is why a two-speed machine like a DeWalt thickness planer can rough at the fast setting, then switch to the slower setting for cleaner finish passes.
| Setting/Choice | What you’ll notice | Best use |
|---|---|---|
| Deeper pass (up to ~1/8″) | More load, louder cut, higher stall risk | Early thicknessing on stable, straight-grain stock |
| Light pass (1/64″–1/32″) | Smoother feel, fewer defects revealed | Final sizing and finish passes |
| Fast feed | More scallop pattern | Dimensioning and bulk removal |
| Slow feed | Finer surface, less tearout risk | Figured grain and final face quality |
Dust collection
A planer makes chips, not dust—thick, hot curls that can pile up fast and choke the cutterhead area. If you run without suction, chips bounce inside the hood and get pressed into the wood as little dents that only show up later under stain. A shop vac works for short sessions, but a dust collector moves more air and keeps chip ejection stable.
Don’t ignore resin buildup. Pine and some kiln-dried construction lumber can leave pitch on rollers and the bed, which increases friction and causes inconsistent feed. A quick wipe with mineral spirits (machine unplugged, cutters stopped) and a thin coat of paste wax on the bed makes boards slide with a clean, slick feel.
Thickness Planer vs Jointer
What a jointer does
A jointer flattens one face and makes an edge square to that face. It’s the tool that removes twist, cup, and bow by creating a true reference surface. Without that reference, your planer may produce consistent thickness but still keep the board’s original warp.
If you want a step-by-step comparison with photos of common defects, this jointer vs planer breakdown pairs well with the workflow in this section.
What a planer does
A thickness planer takes the jointed face (flat side down) and cuts the top until it’s parallel, then you flip and clean up the reference face if you want. In practice, the planer is the production machine—set it once and you can run a whole stack of parts that all read the same on calipers, which saves you from fussy fitting later.
A beginner trap is planing a twisted board “because it feeds.” It will feed, and it will come out shiny, and it will still be twisted. If you don’t own a jointer, a planer sled with hot-glue blocks and wedges can create a temporary flat reference face.
Jointer then planer order
The standard order is: joint one face flat, joint one edge square, plane to thickness, then rip to final width and clean up the edge if needed. That sequence prevents you from “locking in” defects with parallel faces and gives the planer a stable reference so feed pressure doesn’t bend the board unpredictably.
Combo machines can save space, but they add changeover time. If you’re weighing that trade-off, this guide on a jointer planer combo helps you decide based on workflow, not hype.
Common stock defects
Most milling problems come from starting stock defects and choosing the wrong fix. A planer can hide a problem until assembly, when joints open or panels rock. Spot defects early by sighting down the board like a pool cue and by setting it on a known flat surface to see daylight gaps.
- Cup: edges high, center low (or the reverse); joint first or sled
- Bow: curve along the length; joint in stages, then plane
- Twist: corners don’t sit flat; use winding sticks, then joint/sled
- Snipe: deeper cut at ends; tune tables and support stock
- Tearout: fibers rip out; reduce depth, slow feed, consider spiral head
For a concise explanation of why each machine behaves this way during milling, Thickness Planer vs Jointer lays out the “flat vs parallel” distinction clearly.
Thickness Planer Uses and Benefits
Dimensioning rough lumber
Rough lumber is where a thickness planer pays for itself. You can take sawmill boards from fuzzy and oversized to project-ready parts that glue up tight. If you buy S4S boards sometimes and rough boards other times, it also helps to know your starting thickness ranges; this article on sawmill lumber dimensions makes that planning much easier.
Watch moisture. Planing wood that’s still acclimating often leads to movement after milling, which can ruin door frames and tabletops. I like to rough mill, let parts rest with stickers, then finish mill once the wood stops changing size.
Batch thickness matching
The planer shines when you need many parts at the same thickness: cabinet sides, face-frame rails, drawer parts, or panel glue-ups. Set the final height, take equal last passes on every board, and you’ll get pieces that clamp up without fighting each other. The tactile giveaway is how evenly boards “kiss” when stacked—no rocking, no teeter, just flat contact.
One pro trick: don’t plane each board to final thickness one at a time. Rotate through the stack, taking the same pass depth on each board. That keeps heat and cutter wear consistent, so the last board looks and measures like the first.
Surface quality gains
A tuned planer can leave a surface that sands quickly. On straight-grain hardwood, the face can come out glossy enough that you can feel the grain lines but not the ridges between them. Still, planed surfaces can show compressed fibers, so I finish-sand lightly to open the grain before staining or applying water-based finish.
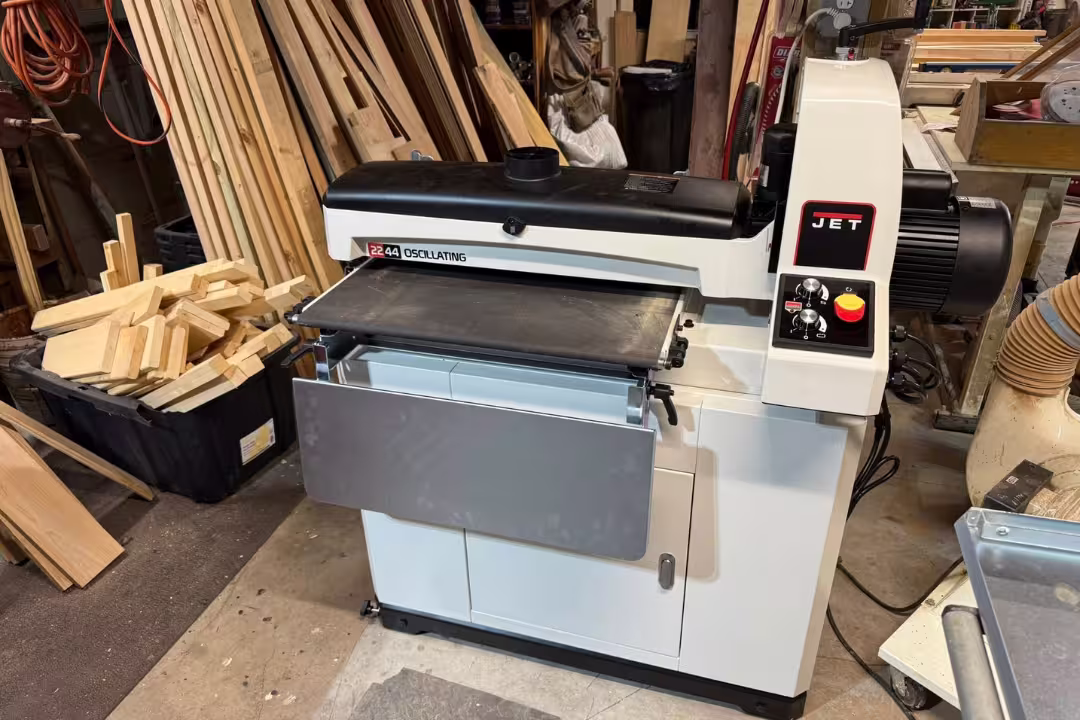
Don’t chase “perfect” straight off the machine. Over-planing to erase tiny marks can push you under target thickness fast. If you’ll run parts through a sander, stop planing once the board is clean and consistent, then switch tools; this guide on a drum sander explains where sanding beats extra planing.
Benchtop shop fit
Benchtop thickness planers make sense in small shops because they store easily and still handle most furniture stock. The trade-off is noise and shorter infeed/outfeed support. Hearing protection isn’t optional—these machines have a sharp, high-pitched bite that can fatigue you fast, especially with straight knives.
Plan for chip handling. A planer can fill a bag fast, and a clogged hose will start “spitting” chips back at you. You’ll feel it as gritty blowback on your hands when you guide the board, which is a sign to stop and clear the system before it mars the surface.
Key Features When Buying Thickness Planers
Cutterhead types
Straight-knife heads cost less and can leave a very clean surface on friendly grain, but they’re louder and more prone to tearout on figured wood. Spiral/helical heads use small carbide inserts; they cost more up front, yet they tend to nick less dramatically (you rotate one insert instead of changing a whole knife). For many shops, the real win is tearout control when grain reverses.
A hidden gotcha: spiral results depend on insert geometry and alignment. Cheap inserts can leave faint tracks that show under raking light. If you’re building show surfaces, buy quality inserts and keep a torque wrench handy so every screw seats consistently.
Motor and speed
Most benchtop units run a 15-amp universal motor. That’s plenty, but only if you manage cut depth. If you try to take heavy passes on wide hardwood, the sound shifts from a clean whir to a strained growl and you’ll risk breaker trips or burned patches on the board.
Two-speed feed is more useful than people expect. I rough stock at the faster feed to save time, then switch to the slower feed to tighten the cut pattern for final sizing. That split workflow gives you speed without giving up finish quality.
Capacity and size
Capacity is more than “13-inch width.” Look at maximum depth of cut per pass, maximum thickness, and how well the machine supports long boards. A smaller planer with great infeed/outfeed support can beat a wider planer that constantly snipes your work. If you buy a lot of pre-milled boards, compare them to S4S lumber thicknesses so your planer has headroom for cleanup passes.
Weight matters if you move tools often. Lighter units are easier to store, but they can walk on the bench under load. Bolting the planer to a heavy top or a planer stand reduces vibration, and the cut sounds less “tinny,” which usually means a steadier finish.
Dust and maintenance
Chip ejection design is a buying feature, not an afterthought. A good hood keeps chips moving so they don’t re-cut and leave scratches. Budget machines often work fine, but they’re less forgiving when knives dull; you’ll see fuzzy grain and feel extra drag across the bed as friction rises.
Blade maintenance is where new owners stumble. Running dull knives causes heat, burn marks, and more tearout. Keep a spare knife set (or inserts) on hand so you can swap quickly instead of “pushing through,” which often leads to a ruined face that needs heavy sanding to recover.
For a practical checklist on what to look for in a planer purchase, Cutech Tools’ planer buying tips covers common selection points without overcomplicating it.
Recommended Thickness Planers
Here are popular thickness planers that fit most small to mid-size shops, with options that can prioritize surface quality, budget, or cutting speed:

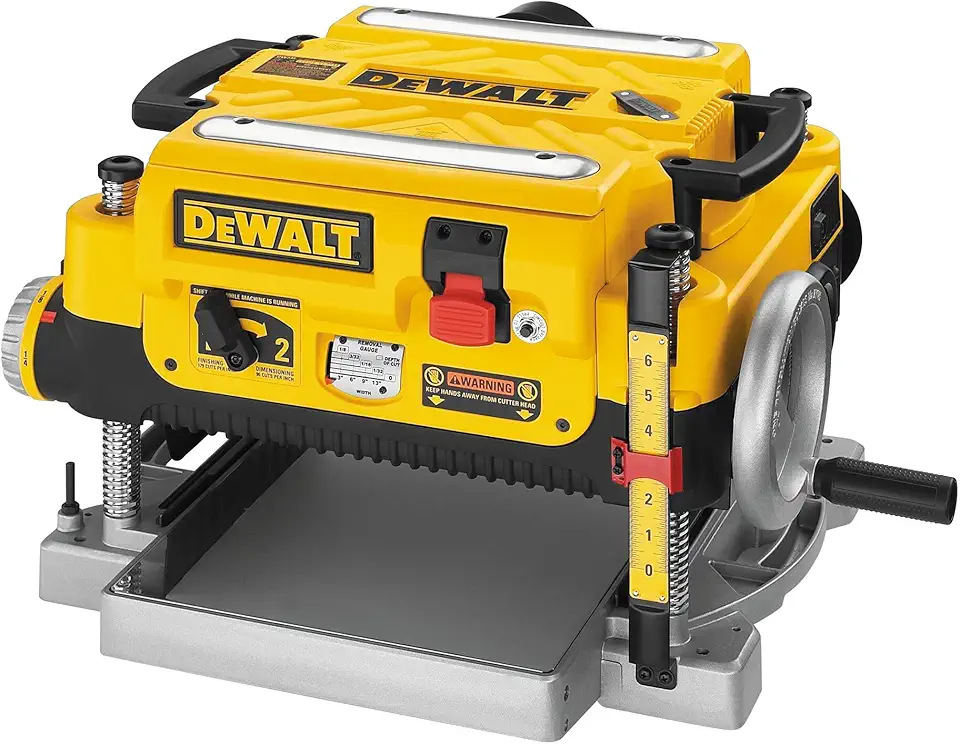
DEWALT 13 inch Two-Speed Planer
- Two-speed gearbox for faster stock removal or finer finishing
- three-knife cutterhead delivers smooth, consistent surfaces
- 15 amp motor provides reliable power for tough jobs
- clear depth adjustments for repeatable thicknessing
- robust build with easy chip ejection and dust port

Craftsman 15 amp Benchtop Planer
- Powerful 15 amp motor for steady material removal
- solid steel two knife cutter head for long life and consistent cuts
- precise depth adjustment for accurate thickness control
- compact benchtop design for easy workshop use
- straightforward blade change and basic dust collection compatibility

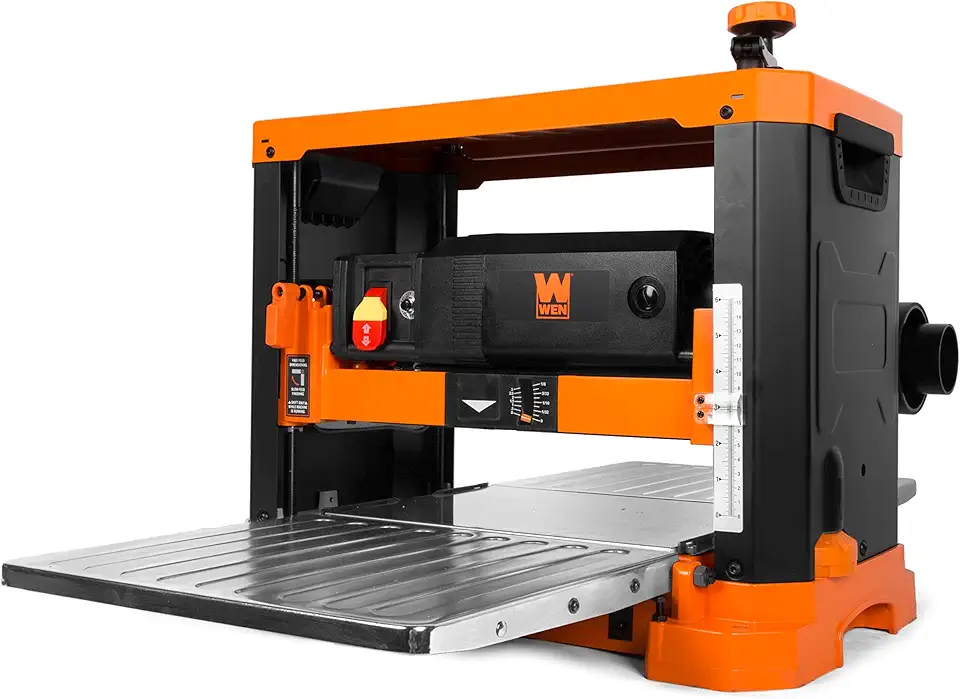
WEN 13 inch Three-Blade Planer
- 15 amp motor balances power and affordability
- three-blade cutterhead yields smooth results
- compact benchtop footprint for small shops
- simple depth control for consistent passes
- user-friendly maintenance and blade changes
WEN 13 inch Spiral Blade Planer
- Spiral cutterhead reduces tear out and produces a fine finish
- 15 amp motor supports steady, uniform cuts
- quieter operation compared to traditional knives
- easy access for cutter maintenance and replacements
- precise thickness adjustments for accurate planing
DeWalt thickness planer highlights
A DeWalt thickness planer with two-speed feed is a smart pick if you alternate between rough dimensioning and finish passes. In daily use, that speed change shows up as fewer visible lines on the final face without giving up throughput when you’re hogging down thickness. The trade-off is that universal motors are loud; plan to run hearing protection and keep the chip path clear so you don’t get chip dents.
Common mistake: trying to take wide, deep cuts to “use the motor.” That’s when cut quality drops and snipe becomes more noticeable. The workaround is to take one extra pass at a lighter setting and use the slower feed for the last two passes for a cleaner finish.
Ridgid thickness planer considerations
A Ridgid thickness planer is often chosen for value and availability, but pay attention to setup and support. Some units benefit from careful table and roller alignment to minimize snipe, and I’ve found they respond well to adding infeed/outfeed support right away rather than waiting for problems to show up on project parts.
Check blade-change convenience before you buy. If access is tight, you’ll procrastinate on maintenance, and dull blades are the fastest path to tearout and burning. Keep a “swap kit” ready (spare set, correct wrench, small brush) so blade changes stay a 10-minute job.
WEN vs Craftsman fit
WEN and Craftsman models can fit hobby shops well, especially if you want acceptable results without paying for premium features. If you work with figured woods, the WEN spiral option can cut tearout risk and reduce the harsh slap of straight knives into more of a steady, lower “rush” sound. If your work is mostly straight-grain pine and poplar, a standard knife head can still do great work if you keep blades sharp and take light finish passes.
Budget-planer pitfall: expecting perfect dust handling with a shop vac and a long hose run. If chips start packing, shorten the hose, avoid tight elbows, and empty the vac before it’s full. Better airflow keeps the cut area clear and reduces mystery scratches that show up right after planing.
Thickness Planer Tips and Maintenance
Snipe prevention
Snipe is that annoying deeper cut at the first and last few inches of a board. You’ll feel it when you slide two “finished” boards together and the ends don’t sit flush. The fastest fixes are proper support (stands or extension tables), taking lighter passes, and feeding boards back-to-back so the rollers stay loaded.
Pro workaround: keep a couple of sacrificial lead-in/lead-out boards of the same thickness. Run them before and after your workpiece so any snipe lands on the sacrificial pieces. This trick saves time when you can’t afford to lose length on final parts.
Tearout reduction
Tearout happens when the cutter lifts fibers faster than they can shear cleanly. You’ll see it as rough craters that catch a fingernail. Reduce it by taking lighter cuts, using a slower feed speed if your planer has it, and feeding in the direction that keeps the grain “laying down” under the cutter.
A practical edge case: knot clusters and reversing grain can tear no matter what. When that happens, I stop chasing it with deeper passes. I plane close to final size, then switch to sanding to avoid thinning a piece too far while still failing to fix the torn fibers.
Pass depth best practices
For most benchtop thickness planers, frequent light passes beat fewer heavy passes. Heavy cuts raise the chances of stalling, burning, and chatter. I keep a rhythm: heavier passes early on stable stock, then progressively lighter passes as I get close to final thickness.
Another mistake is planing one face to perfection, then flipping and trying to “fix” the other face with heavy cuts. Keep the board balanced—alternate faces during milling when possible so internal stress relief doesn’t turn a straight board into a banana after you hit the target thickness.
Blade and insert care
Dull knives show up as shiny burn tracks, fuzzy grain, and increased feed effort. If the machine sound shifts from a crisp cut to a higher squeal, stop and check edges. Keeping blades sharp is safer, too, because forcing stock through a dull cutter invites slips and unstable feeding.
With spiral heads, rotate inserts at the first sign of lines or tearout spikes. Keep the seats clean—one tiny chip under an insert can leave a raised corner that prints a repeating line down the board. A nylon brush and compressed air (away from bearings) keeps those seats chip-free.
Alignment and lubrication
Alignment issues show up as taper (thicker on one side) or persistent snipe no matter how you support boards. Check that the bed is parallel to the cutterhead and that extension tables are co-planar. When the bed height mechanism gets dry, you’ll feel it as a gritty, tight handwheel, and thickness adjustments become less predictable.
Lubricate lift screws and gears lightly and keep the bed waxed. Avoid greasy lubricants on areas where chips land, since they turn into a sticky paste. A clean machine runs quieter, feeds smoother, and leaves fewer random marks that force you into extra sanding.
Practical Notes From Real-World Use
The biggest surprise for many people is how much a planer behaves like a system: tool setup, stock prep, and dust flow all affect the result. I’ve had days where a planer “suddenly” started leaving scuffs, and the fix wasn’t knives—it was chips recutting because the hose had a hidden clog. Clearing the clog and rewaxing the bed brought back that smooth, steady feed where the board glides in with a consistent pull.
Another real constraint is noise and vibration in a small space. Straight knives on a benchtop unit can be so loud that you’ll rush, and rushing causes mistakes like feeding short pieces unsafely or taking too deep a pass. I schedule planing in short sessions, stage boards by thickness, and use a “two-pass finish rule” (two light final passes) so I don’t fall into the trap of chasing a perfect surface with aggressive cuts.
Finally, wood movement can make your milling look wrong when the machine is fine. Boards that were flat at the start can move after you remove one face heavily. When a board starts to cup right after planing, I sticker it for a few hours, then take light cleanup passes. That extra wait often saves more thickness than trying to force a board flat in one go, and it prevents glue-ups that feel flat on the clamps but spring into a subtle wave once released.
FAQs
What Does A Thickness Planer Do That A Jointer Doesn’t?
A thickness planer accurately reduces a board’s thickness while keeping the opposite face parallel to the reference face.
It creates consistent thickness across the entire board and is used after the jointer has flattened one face. Unlike a jointer, it cannot flatten edges or remove twists from a single pass.
How Does A Thickness Planer Work Step By Step?
A thickness planer works by feeding a board over a rotating cutterhead while a fixed bed and adjustable top roller set the depth of cut.
Typically you joint one face flat, set the planer to the desired thickness, feed the board face-down, and make multiple light passes until you reach the target. Always check grain direction and secure loose boards.
Do You Need A Jointer Before A Thickness Planer?
Yes — a jointer is recommended before a thickness planer to create one flat reference face.
The planer relies on that flat face to produce a parallel opposite face; without it you may get uneven thickness or tearout. Some workshops use a sled or planing jig as an alternative for severely warped boards.
How Do I Prevent Snipe On A Benchtop Thickness Planer?
Prevent snipe by supporting the board at the infeed and outfeed ends and making shallow final passes.
Use a sacrificial fence, roller support, or feed a longer sacrificial board to minimize unsupported ends. Also check table alignment, reduce cutter depth per pass, and maintain a steady feed speed.
Is A Spiral Cutterhead Worth It On A Thickness Planer?
Yes — a spiral cutterhead is often worth the investment for its quieter operation and cleaner, tearout-resistant cuts.
It uses many small carbide inserts to shear fibers, producing a smoother surface and longer tool life, though it costs more upfront and can be slightly slower to replace inserts. For frequent hardwood or finish work it’s usually beneficial.
Craftsman 15 amp Benchtop Planer
- Powerful 15 amp motor for steady material removal
- solid steel two knife cutter head for long life and consistent cuts
- precise depth adjustment for accurate thickness control
- compact benchtop design for easy workshop use
- straightforward blade change and basic dust collection compatibility
DEWALT 13 inch Two-Speed Planer
- Two-speed gearbox for faster stock removal or finer finishing
- three-knife cutterhead delivers smooth, consistent surfaces
- 15 amp motor provides reliable power for tough jobs
- clear depth adjustments for repeatable thicknessing
- robust build with easy chip ejection and dust port
WEN 13 inch Three-Blade Planer
- 15 amp motor balances power and affordability
- three-blade cutterhead yields smooth results
- compact benchtop footprint for small shops
- simple depth control for consistent passes
- user-friendly maintenance and blade changes
WEN 13 inch Spiral Blade Planer
- Spiral cutterhead reduces tear out and produces a fine finish
- 15 amp motor supports steady, uniform cuts
- quieter operation compared to traditional knives
- easy access for cutter maintenance and replacements
- precise thickness adjustments for accurate planing
DEWALT Heavy-Duty 13 inch Planer
- Commercial-style construction for demanding workshop use
- three-knife cutterhead handles larger cuts smoothly
- two-speed options let you choose between speed and finish
- strong motor keeps performance consistent under load
- efficient chip ejection and straightforward depth controls
WEN Dual-Speed Spiral Planer 13 inch
- Two speed settings for heavy stock removal or fine finishing
- spiral blade design minimizes splintering and improves surface quality
- benchtop form factor fits small shops
- easy blade access for fast maintenance
- reliable dust collection port for cleaner work

VEVOR 13 inch Two-Blade Planer
- Powerful 2000W motor for efficient material removal
- two-blade cutterhead for balanced performance
- extended infeed table improves feeding stability
- lower noise design for more comfortable operation
- overload protection helps prevent motor damage

VEVOR 13 inch High-Speed Spiral Planer
- High RPM spiral cutterhead for exceptionally smooth finishes
- 2000W motor delivers strong, consistent power
- single-speed simplicity for straightforward use
- designed for both hard and soft wood workpieces
- compact benchtop design with easy maintenance

DEWALT 12 and a half inch Benchtop Planer
- Compact benchtop design for tight workshop spaces
- 15 amp motor provides reliable cutting power
- three-knife cutterhead produces smooth surfaces quickly
- precise depth adjustment for repeatable thicknessing
- robust construction built for regular use

13 inch Dual-Blade Planer with Extra Blades
- All copper motor for improved durability and heat handling
- dual-blade cutterhead with included extra blades for longer runtime
- clear height indicator for accurate thickness control
- overload protection for safer operation
- suitable for both hard and soft wood applications