
Sawmill Lumber Dimensions Guide: Rough-Cut, Finished Sizes, and Allowances

Sawmill lumber dimensions change as wood moves from a green rough cut through drying and surfacing. A rough-sawn 2×4 may measure 2 × 4 inches, while standardized surfaced-dry construction lumber commonly measures 1½ × 3½ inches.
Table of Contents
Sawmill Lumber Dimensions at a Glance
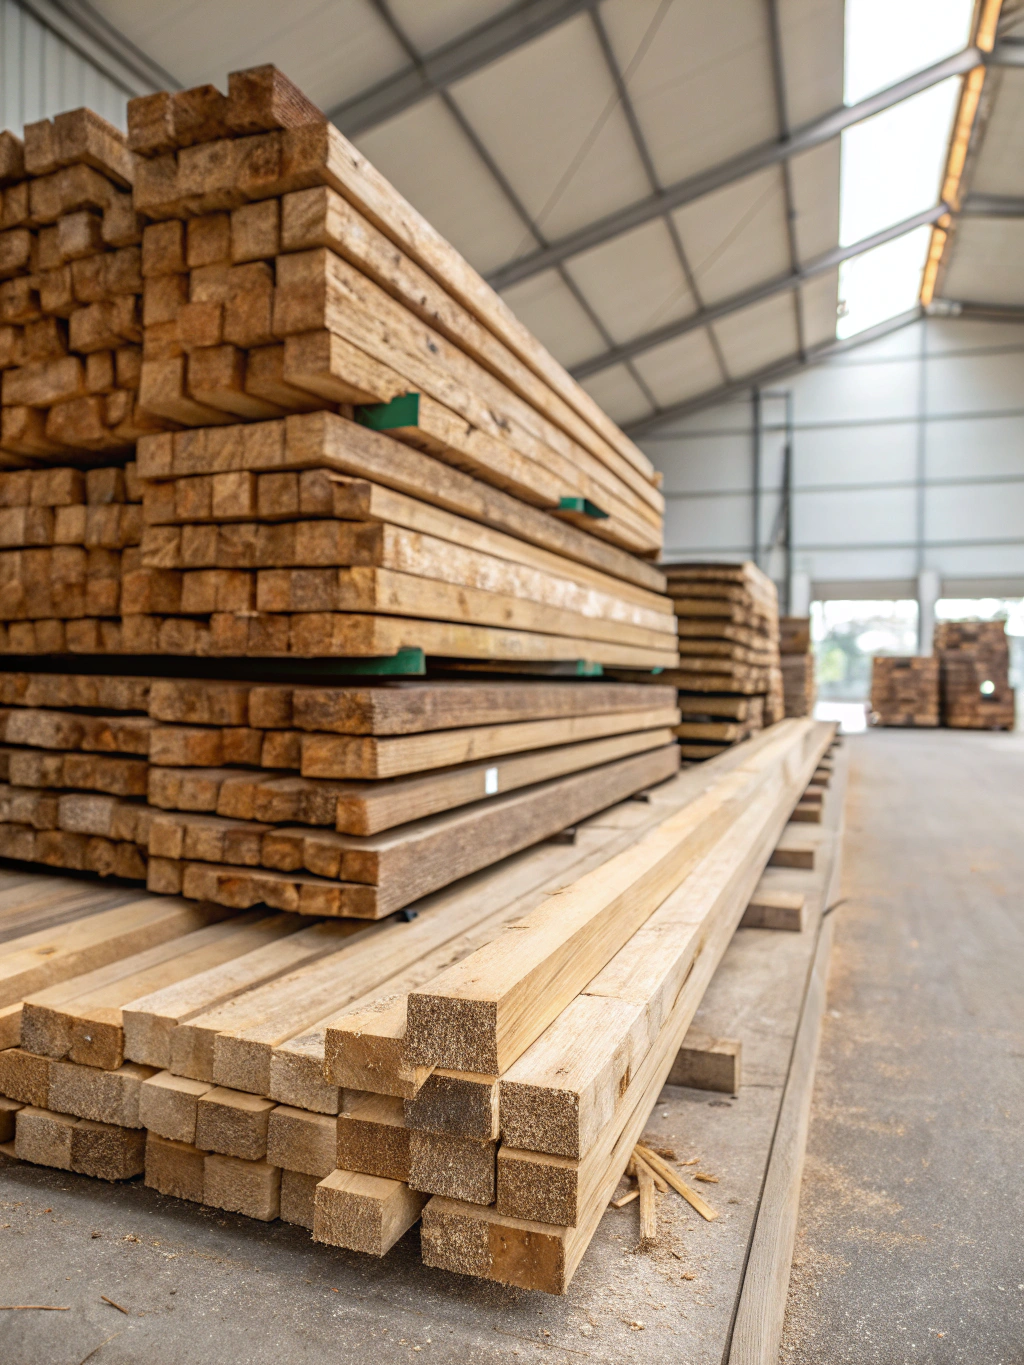
A board can have several valid measurements during production. Its green rough size changes through moisture loss, flattening, edging, and planing, so every order should state the measurement stage.
Nominal and Actual Sizes

Nominal size is a product name or size category. Actual size is the thickness and width measured with a rule, tape, or caliper at a stated moisture and processing condition.
A retail 2×4 commonly measures 1½ × 3½ inches because it has been dried and surfaced. Rough-cut lumber dimensions aren’t fixed by the name alone, so a sawyer’s “2×4” could be full-sized, oversized for later machining, or slightly undersized.
Green Through Surfaced Stages
Green lumber feels cool and sometimes damp against the palm. Fresh saw marks can leave a ridged face, loose fibers along the edge, and a resinous or earthy smell that fades during drying.
| Production stage | What changes | Measurement risk |
|---|---|---|
| Green rough | Board has just left the saw | Moisture and saw variation remain high |
| Dry rough | Thickness and width have shrunk | Cup, twist, and checks may reduce usable size |
| Jointed and planed | Faces become flat and parallel | Low areas determine final thickness |
| Finished | Edges and ends reach project size | No extra stock remains for correction |
Full-dimensional lumber is intentionally sold at or near its named size. A full-dimensional 2×4 is meant to be about 2 × 4 inches, subject to the stated tolerance; “rough-sawn” describes surface condition and doesn’t promise that measurement.
Surfacing codes identify which sides have been machined: S1S means one side, S2S usually means both faces, S3S adds one edge, and S4S covers all four longitudinal surfaces. Read our guide to S4S lumber for a closer look at finished stock.
- Rough: no face intentionally surfaced smooth.
- S1S: one face or side surfaced.
- S2S: two surfaces machined, commonly the broad faces.
- S3S: two faces and one edge surfaced.
- S4S: both faces and both edges surfaced.
Beginners often assume S2S or S4S guarantees one finished dimension. The safer workaround is to specify both processing and minimum size, such as “kiln-dried, S2S, minimum 13⁄16 inch thick.”
Nominal and Actual Lumber Size Charts

Standard softwood charts show common surfaced-dry sizes, not universal rough-sawmill targets. The actual 2×4 size is commonly 1½ × 3½ inches, and 1 inch equals exactly 25.4 millimeters.
One-Inch Board Sizes
| Nominal size | Common surfaced-dry actual size | Metric actual size |
|---|---|---|
| 1×2 | ¾ × 1½ in. | 19.1 × 38.1 mm |
| 1×3 | ¾ × 2½ in. | 19.1 × 63.5 mm |
| 1×4 | ¾ × 3½ in. | 19.1 × 88.9 mm |
| 1×6 | ¾ × 5½ in. | 19.1 × 139.7 mm |
| 1×8 | ¾ × 7¼ in. | 19.1 × 184.2 mm |
| 1×10 | ¾ × 9¼ in. | 19.1 × 235.0 mm |
| 1×12 | ¾ × 11¼ in. | 19.1 × 285.8 mm |
The common 1×3 size is ¾ × 2½ inches, while the usual 1×12 width is 11¼ inches. Wider boards don’t lose the same fixed amount as narrow boards, and custom-milled, reclaimed, or appearance lumber may follow another specification.
Two-Inch Lumber Sizes
| Nominal size | Common surfaced-dry actual size | Metric actual size |
|---|---|---|
| 2×2 | 1½ × 1½ in. | 38.1 × 38.1 mm |
| 2×3 | 1½ × 2½ in. | 38.1 × 63.5 mm |
| 2×4 | 1½ × 3½ in. | 38.1 × 88.9 mm |
| 2×6 | 1½ × 5½ in. | 38.1 × 139.7 mm |
| 2×8 | 1½ × 7¼ in. | 38.1 × 184.2 mm |
| 2×10 | 1½ × 9¼ in. | 38.1 × 235.0 mm |
| 2×12 | 1½ × 11¼ in. | 38.1 × 285.8 mm |
A 2×3 lumber actual size is 1½ × 2½ inches. The common 2×8 real dimensions are 1½ × 7¼ inches, and 2×10 actual dimensions are 1½ × 9¼ inches.
2×4 nominal versus actual: the 2×4 name refers to its size category before standardized drying and surfacing reductions. Custom rough stock can differ, so measure the board rather than relying on the stamp or invoice description.
Posts and timbers need separate confirmation. Common surfaced sizes include 4×4 at 3½ × 3½ inches, 4×6 at 3½ × 5½ inches, 6×6 near 5½ × 5½ inches, and 6×8 near 5½ × 7½ inches.
Heavy, appearance, and full-sawn timbers may retain larger measurements. Review the supplier’s specification and compare the intended use with this guide to timber wood rather than extending a 2×4 chart to beams.
Hardwood quarter thicknesses describe rough thickness categories. Four-quarter is written 4/4 and pronounced “four-quarter”; it names nominal one-inch rough stock rather than a guaranteed dry finished thickness.
| Hardwood designation | Nominal rough thickness |
|---|---|
| 4/4 | 1 in. |
| 5/4 | 1¼ in. |
| 6/4 | 1½ in. |
| 8/4 | 2 in. |
| 10/4 | 2½ in. |
| 12/4 | 3 in. |
| 16/4 | 4 in. |
Surfaced 4/4 hardwood may finish near 13⁄16 or ¾ inch, yet drying distortion can require deeper cuts. Random widths and lengths are common in hardwood sales, and the NHLA Rules provide industry measurement and grading context.
Softwood and hardwood use different conventions. Construction softwood commonly uses nominal thickness and width, while hardwood is often described by quarter thickness, random width, board-foot volume, and surface condition.
Choosing the Correct Sawmill Cutting Size
Choose a sawmill cutting size by working backward from the required dry, surfaced dimension. Add measured losses for drying, machining, and variation rather than setting the mill to the nominal product name.
Final-Dimension Inputs
Record the final thickness, width, moisture target, species, grain orientation, drying method, planing allowance, and the mill’s measured cutting spread. The minimum usable dimension matters more than the average because one thin stripe can prevent a board from cleaning up.
- Required dry thickness and width
- Final moisture content
- Species and expected shrinkage
- Flatsawn, riftsawn, or quartersawn orientation
- Jointing, edging, and planing removal
- Measured sawmill variation
Green-Size Formula
Required green rough size = final dimension + drying allowance + surfacing allowance + accuracy allowance
Sawmill planning formula
For percentage-based shrinkage, use green target ≈ (final dimension + total machining removal) ÷ (1 − expected shrinkage rate). Calculate thickness and width separately because growth-ring direction changes movement.
Thickness and width allowances shouldn’t be copied from one species or sawing pattern to another. A flatsawn board can lose more width than a quartersawn board from the same log, while thickness movement depends on how the growth rings cross the board.
For a worked thickness example, suppose the goal is a 1½-inch finished board, expected thickness shrinkage is 4%, and flattening plus planing will remove ⅛ inch. The calculation is (1.500 + 0.125) ÷ 0.96 = 1.693 inches.
A practical initial setting would be about 1¹¹⁄₁₆ to 1¾ inches, depending on the mill’s increments and cut control. This is an illustration; replace 4% with species, grain, and moisture figures suited to the job.
Cutting variation allowance protects the lowest point. If boards intended as one inch measure from 15⁄16 to 1¹⁄16 inches, the total spread is ⅛ inch, and the setting must account for the 15⁄16-inch low area.
Measure both ends, the center, and both edges on several consecutive boards. This real-world test exposes sawhead drift, cant movement, scale errors, and blade behavior that a single measurement hides.
Drying Shrinkage and Moisture Content
Wood starts shrinking meaningfully after moisture falls below its fiber saturation point, often approximated near 30% moisture content. It shrinks far more across the grain than along its length.
Fiber Saturation Point
Above fiber saturation, moisture leaves cell cavities with limited dimensional change. Below that point, bound water leaves the cell walls, causing measurable contraction described in the USDA Wood Handbook.
Broad green-to-oven-dry ranges are roughly 6–12% tangential, 3–6% radial, and 0.1–0.3% longitudinal in normal wood. Species, juvenile wood, reaction wood, and log position can move results outside those broad bands.
Radial and Tangential Shrinkage
Tangential shrinkage follows the growth-ring arc and is usually greater than radial movement across the rings. This difference causes cup: a flat board’s edges can curl, leaving a shallow hollow that feels obvious when a straightedge rocks across the face.
Flatsawn versus quartersawn stock behaves differently. Flatsawn boards commonly move more across their width, while quartersawn boards tend to remain flatter and show less width change; see quarter-sawn oak for a practical grain example.
Moisture designations describe condition at surfacing or grading. S-GRN commonly indicates above 19% moisture, S-DRY and KD commonly indicate 19% or less, and MC15 or KD15 indicates 15% or less under the applicable rule.
Furniture lumber is often dried below framing moisture levels. Read about kiln-dried wood before choosing allowances for indoor cabinetry, where another few percentage points of moisture loss can reveal fresh cup or twist.
Dimension-preserving drying starts with a flat base and dry stickers of uniform thickness. Place stickers in vertical columns, usually 16–24 inches apart, with closer spacing for thin, warp-prone boards.
- Support the stack on level, closely spaced foundations.
- Align each sticker directly above the one below.
- Weight or restrain the upper courses.
- Seal freshly cut ends to slow checking.
- Protect the stack from rain and harsh direct sun.
- Allow airflow through every sticker course.
- Wait for stable moisture before final planing.
A common beginner mistake is leaving one sticker crooked or thicker than its neighbors. The resulting pressure ridge can set a bend into every board above it, so sort stickers by thickness before building the stack.
Kerf, Measurement, and Cutting Accuracy
Kerf is the slot removed by the cutting teeth, and it directly reduces lumber yield. Cutting accuracy must cover thickness, taper, squareness, flatness, and the lowest point on each face.
Typical Kerf Ranges
| Mill type | Common qualified range | Main variable |
|---|---|---|
| Thin-kerf bandsaw mill | About 1⁄16–⅛ in. | Blade set and condition |
| Circular sawmill | Often ¼ in. or more | Tooth geometry |
| Chainsaw mill | About ¼–⅜ in. | Chain, bar, and sharpening |
Measure the actual slot or use the blade maker’s specification. Blade-body thickness alone understates kerf because tooth set or carbide tips project beyond the body.
Kerf-Loss Formula
Total kerf loss = number of cuts × measured kerf width
Board-recovery calculation
Eight cuts with a ⅛-inch kerf consume one full inch of cant thickness. Eight cuts at ¼ inch consume two inches before edging, trimming, defects, wane, and taper are counted.
In a simplified board recovery example, a 10-inch cant can yield nine one-inch boards separated by eight ⅛-inch kerfs: 9 + 1 = 10 inches. With a ¼-inch kerf, eight boards plus seven kerfs use 9¾ inches.
Thickness and width should be checked at both ends and at the midpoint. On wide boards, measure near both edges because a wandering blade can create washboarding on one side while the opposite side appears accurate.
Measure length from the shortest usable squared end. Logs are often bucked 4–8 inches longer than the required board to leave room for end checks, uneven starts, and final trimming; this is a working allowance, not a universal standard.
Squareness and flatness matter as much as average size. Check edge-to-face squareness, bow, crook, cup, twist, and thickness variation before deciding that a board will finish to its planned dimension.
Progressive thickness errors often point to faulty scale indexing, debris on the track, cant movement, sawhead movement, or failure to account for kerf. Number several boards in cutting order and chart their end measurements to reveal a pattern.
Wavy cuts often come from a dull blade, excessive feed speed, weak tension, damaged tooth set, misaligned guides, frozen wood, or dense knots. Slow the feed before changing several adjustments at once, then make a short test cut.
A tapered board may come from uneven bunks, an out-of-parallel sawhead, shifting clamps, or blade lead. Measure both ends, reverse a test cant, and compare the bed-to-blade distance at several track positions.
Undersized finished boards usually trace back to low green targets, unexpected shrinkage, deep cup, lower final moisture, or rough boards that were thin before drying. Don’t average away a low spot; the planer must reach it to produce a clean face.
First-face errors transfer through the log because later cuts reference that plane. A sagging ladder, loose rail, or twisted slab can make every following board wedge-shaped, so test the first surface with a straightedge and winding sticks.
Board Feet, Log Scales, and Pricing
One board foot equals 144 cubic inches. For rough lumber, calculate it as thickness in inches × width in inches × length in feet ÷ 12, using the measurement basis agreed by buyer and seller.
Board-Foot Formula
Board feet = thickness in inches × width in inches × length in feet ÷ 12
Standard volume formula
A full rough 2 × 6 × 10-foot board contains 10 board feet: 2 × 6 × 10 ÷ 12 = 10. A rough 1 × 8 × 12-foot board contains 8 board feet.
Don’t confuse board length with framing product labels. A 10-foot precut stud length isn’t a universal category; common precut wall studs are shortened for standard wall assemblies, while a nominal 10-foot board may be sold at the stated length.
Actual vs. Nominal Tally
Tally basis must appear on the quote or invoice. Hardwood may be invoiced through an accepted rough or pre-surfacing convention rather than the final S2S measurement, so substituting finished dimensions can produce a false total.
Doyle, Scribner, and International ¼-Inch are log-scale rules that estimate potential board-foot output. They don’t measure the boards eventually stacked, and their estimates can differ sharply on smaller logs.
Sawmill pricing methods include board foot, linear foot, piece, log, machine hour, or thousand board feet. A useful quote states species, grade, moisture, surface condition, size basis, minimum charge, and who owns offcuts and slabs.
- Log loading and handling
- Metal-detection or damaged-blade charges
- Edging and trimming
- Stickering and stack preparation
- Air or kiln drying
- Jointing and planing
- Structural grading or inspection
- Loading and delivery
Recovery controls cost more than the advertised hourly rate alone. Wide kerf, hidden rot, sweep, metal, taper, heavy wane, and deep surfacing can turn inexpensive milling into costly finished lumber.
Structural Use of Sawmill Lumber
Dimensional size alone doesn’t establish structural capacity. Load-bearing sawmill lumber may need a recognized grade, species identification, moisture designation, grading-agency mark, and mill identification accepted by the local authority.
Grade Marks and Approval
A grade mark links the board to published strength values and inspection rules. The American Lumber Standard Committee oversees accredited softwood grading agencies and grade-marking programs in the United States.
Ungraded local lumber may still be accepted through an approved grader, inspection certificate, engineer’s design, local native-lumber provision, or written building-official approval. Requirements differ by jurisdiction, so obtain acceptance before milling an entire framing package.
Standards and Grading Entities
Relevant references include NIST PS 20, the National Design Specification, International Residential Code, NHLA rules, and regional agencies such as SPIB, WWPA, WCLIB, and NELMA. The applicable local code controls approval, not a dimension chart found online.
Boards, dimension lumber, and timbers are size classes used by standards and grading rules. Boards are commonly under 2 inches nominal thickness, dimension lumber is commonly 2 inches through under 5 inches, and timbers are commonly at least 5 inches in both directions.
A beginner may assume a full 2 × 4 rough stud is stronger merely because it contains more wood. Extra size can help, but knots, slope of grain, checks, species, moisture, and connection details still control structural performance; see related guidance on construction wood.
Sawmill Capacity and Dimension-Control Tools
A mill’s maximum log diameter isn’t its maximum board width. Blade-guide clearance, clamps, bunks, slab removal, log shape, and head travel reduce the usable cutting envelope.
Log and Cant Capacity
Compare maximum log diameter, width of cut, cant width, and finished board width as separate specifications. A mill that accepts a 22-inch log may cut boards narrower than 22 inches after clearance and slab losses.
Board width and thickness can also be restricted by guide position, clamp height, remaining cant height, taper, and safe clearance. Test unusual 10–12-inch slabs against every obstruction through the full head travel.
Bed and cutting length aren’t always identical. Leave space for the sawhead to enter and exit, check whether an extension adds its full advertised length, and include final end-trimming allowance.
First-Cut Rail Systems
A rigid first-cut rail establishes a flat reference plane on a round log. Before cutting, sight along the rail at knee height; a small bow becomes easier to see as the far edge appears to rise and fall.

VEVOR Chainsaw Mill Rail System
- Combines a chainsaw mill with rail guide
- Fits guide bars from 14 to 36 inches
- Nine foot aluminum rail aids straight cuts
- Helps create flat reference slabs
- Portable setup for log milling projects
 Buy on Amazon
Secure the rail near each end and add intermediate support where it flexes. The expert workaround is to place paired winding sticks across the rail before the first cut; misaligned top edges reveal twist that a tape measure misses.
Adjustable thickness mills control the gap between the guide surface and chainsaw bar. Scale markings provide a starting point, but bar flex, chain sharpness, rail sag, vibration, and operator pressure can change the board’s measured thickness.
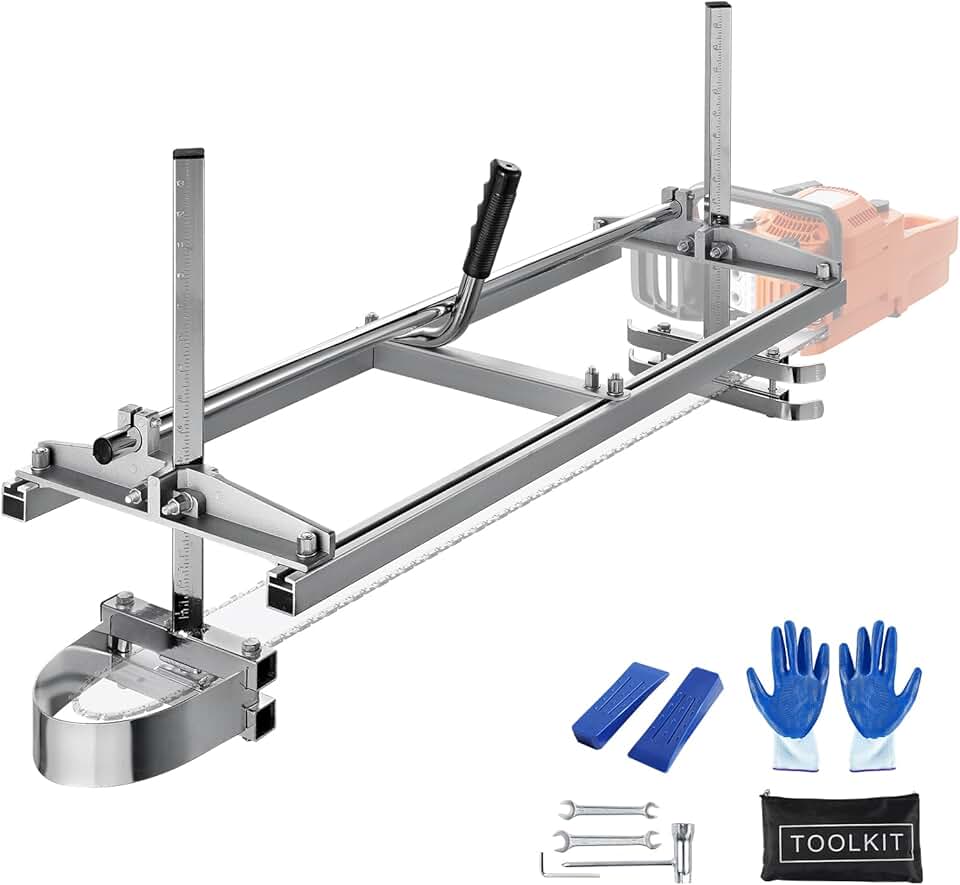
VEVOR 36 Inch Chainsaw Planking Mill
- Fits chainsaw bars from 14 to 36 inches
- Adjustable cutting thickness from 0.2 to 11.81 inches
- Galvanized steel construction for durability
- Helps turn logs into usable lumber
- Portable option for jobsite milling
Buy on Amazon
Make one test slab, let the chain stop, and measure the cut at six points before starting production. Fine dry dust instead of coarse chips, rising engine pitch, and a hot-oil smell signal poor chain performance that can lead to waviness.
Kerf and repeat-cut scales reduce indexing errors only when their markings match the actual blade and cutting direction. Measure a fresh kerf, verify the scale over several steps, and mark which edge of each graduation controls the setting.

Circle Mill Magnetic Kerf Scale
- Magnetic scale mounts to circular sawmills
- Quarter-inch kerf reference aids layout
- Helps plan consistent board thicknesses
- Removable ruler for flexible positioning
- Useful for repeatable lumber sizing
Buy on Amazon
Practical notes from real-world use: write the target, measured kerf, and first-board readings directly on the cant end with lumber crayon. This simple record prevents mental indexing mistakes after refueling, blade changes, log turning, or interruptions.
Keep a short setup log listing blade hours, tension, guide clearance, feed behavior, and end-to-end taper. Over several logs, those measurement records show whether variation follows the blade, operator, track position, species, or clamping method.
FAQs
What Are The Actual Dimensions Of Rough-Cut Lumber?
Rough-cut lumber is usually close to its nominal size, but its exact dimensions vary by sawmill and species. A rough-sawn 2×4 may measure about 2 inches by 4 inches before drying and planing. Expect boards to shrink as they dry, especially across their width.
Is A Rough-Sawn 2×4 Actually 2 Inches By 4 Inches?
Yes, a rough-sawn 2×4 is often cut close to a full 2 inches by 4 inches. However, saw kerf, uneven surfaces, drying shrinkage, and mill practices can make the finished rough dimensions slightly different. Planing it smooth will reduce both measurements further.
How Much Oversize Should Lumber Be Cut For Drying?
Lumber should usually be cut about 1/8 to 1/4 inch oversize in thickness and width for drying and final planing. The right allowance depends on wood species, board width, moisture content, and the desired finished size. Wider boards and wood that moves more may need extra allowance.
How Do You Calculate Board Feet From Sawmill Lumber?
Calculate board feet by multiplying thickness in inches by width in inches by length in feet, then dividing by 12. For example, a 2-inch-thick, 6-inch-wide, 8-foot board contains 8 board feet. Use the lumber’s actual rough dimensions when buying or selling sawmill stock.
Can Rough-Sawn Lumber Be Used For Structural Framing?
Rough-sawn lumber can be used for structural framing when it is properly graded, adequately dried, and allowed by local building codes. Its larger dimensions can be useful, but uneven surfaces may complicate connections and finishing. Check with your building authority or a structural professional before using ungraded lumber for load-bearing work.
Affiliate Disclosure: Some links in this post are affiliate links. If you make a purchase through these links, we may earn a small commission at no extra cost to you. We only recommend products we genuinely believe in.