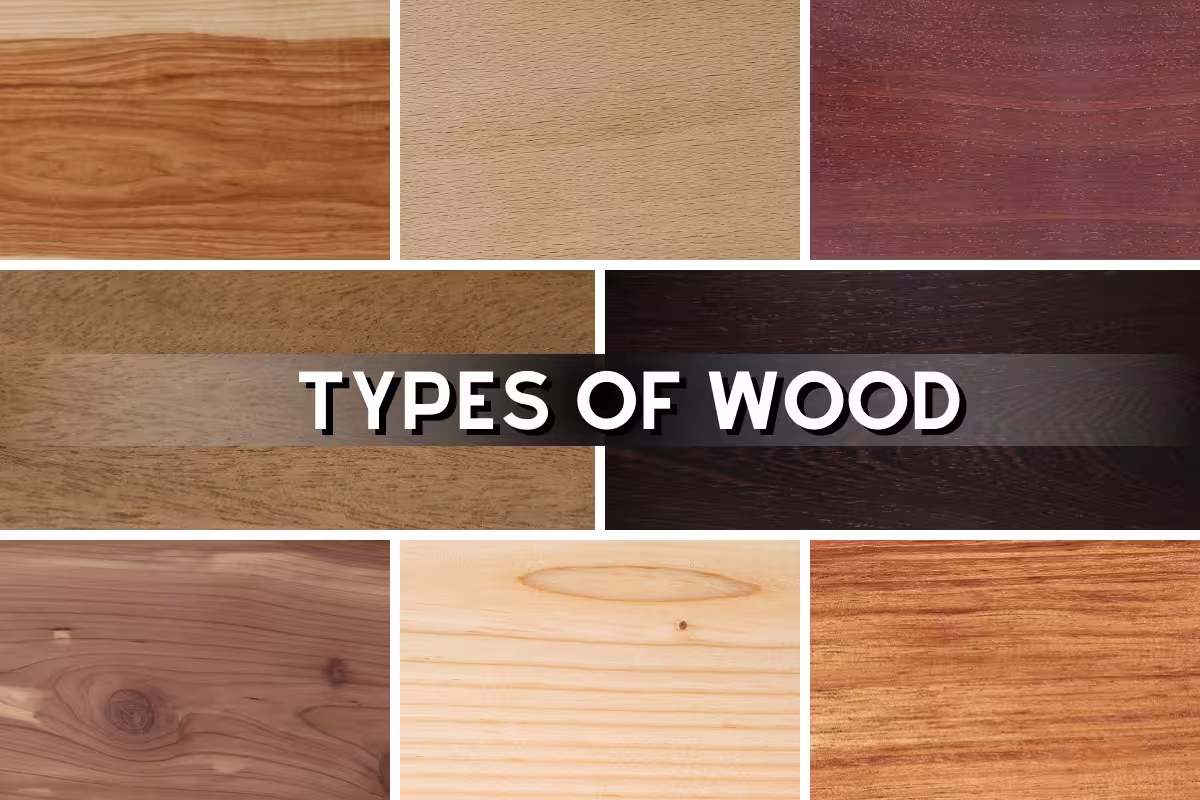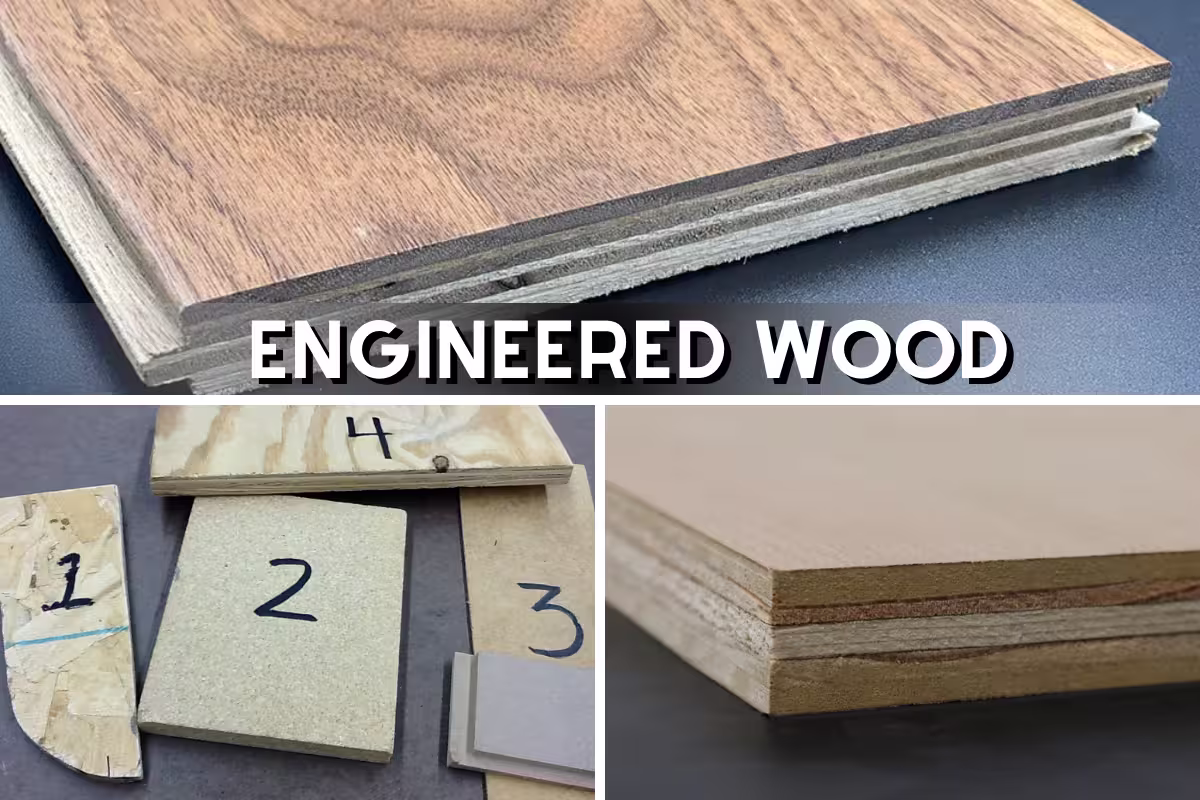
Engineered Wood: The Definitive Guide to Engineered Hardwood Flooring
Engineered wood (engineered hardwood flooring) is a real-wood floor made from a genuine hardwood veneer bonded to a stable core like plywood or HDF, plus a backing layer. It looks like solid hardwood, but it moves less with humidity and temperature, so it works better over concrete slabs, radiant heat, and many below-grade spaces.
Table of Contents
You’ll get the best results by matching veneer thickness, core type, and installation method to your rooms, subfloor, and indoor humidity. This guide breaks down how it’s built, where it works, what it costs in 2026, and the real refinishing limits that catch many homeowners off guard.
What Is Engineered Wood?
Key takeaways for this section:
- Engineered wood flooring has a real hardwood top layer glued to a stable core.
- It’s picked for stability on concrete, in variable humidity, and on radiant heat.
- “Engineered” doesn’t mean “fake”—the surface you see and touch is actual wood.
Quick definition
What is engineered wood in flooring terms? It’s a layered plank with a thin-to-thick hardwood veneer on top (oak, maple, walnut, etc.), a cross-oriented core (often plywood or HDF), and a bottom balance layer that helps the plank stay flat.
That layered build is why engineered boards usually feel less “springy” than soft vinyl underfoot, yet they also avoid the dramatic seasonal gaps you’ll see in some solid floors. When you walk barefoot, the surface still has that wood grain texture and mild warmth compared to tile, since your skin is contacting real wood and finish.
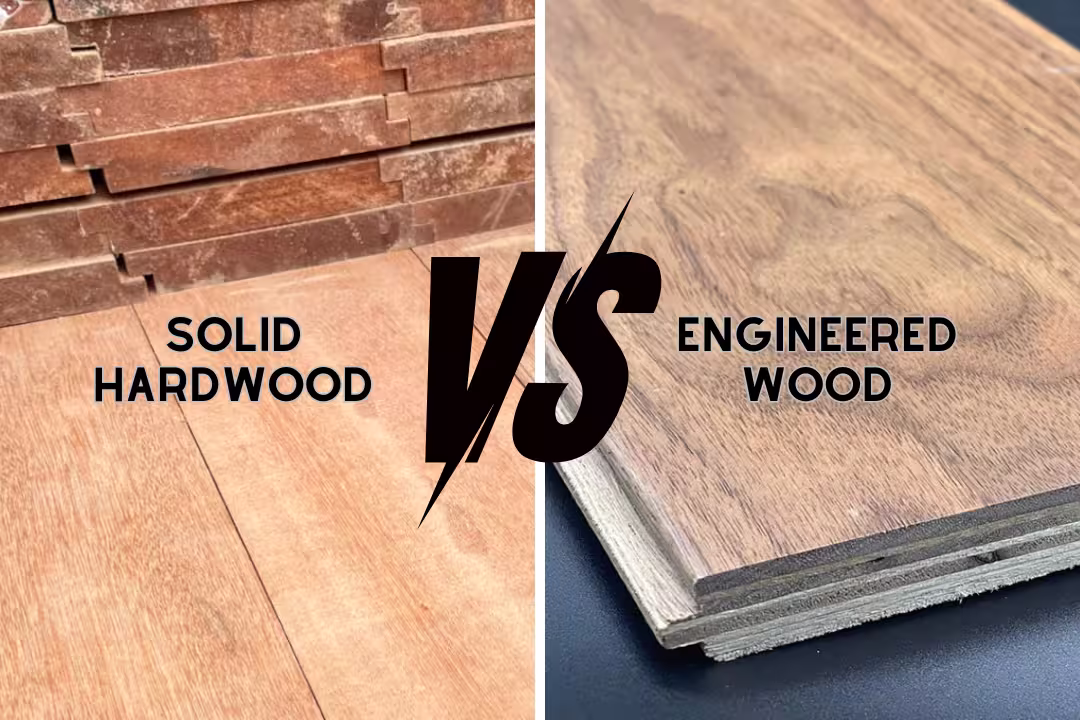
Engineered vs solid basics
Solid hardwood is one piece of wood, so its width changes more as indoor humidity rises and falls. Engineered wood spreads those forces across cross-grain layers, so the plank fights cupping and wide gapping—especially on long runs and wide planks.
Thickness is another tell: many engineered products are 3/8″ to 9/16″ total, while solid is commonly 3/4″. That matters at stair noses, door clearances, and when you’re trying to meet tile height without a big reducer.
Engineered Wood Construction and Layers
Key takeaways for this section:
- Veneer thickness controls refinishing potential and dent tolerance.
- Core choice (plywood vs HDF) affects moisture behavior and fastener holding.
- The balance layer reduces warp and edge lift over time.
Wear layer veneer
The wear layer is a real hardwood slice on top of the plank. Thin veneers can look perfect new, but they hit a hard limit later: too much sanding risks cutting through the face veneer, exposing the core and permanently ruining the board.
You can often spot a thick-veneer product at a vent cut or stair nose: the wood layer is visibly deeper, and the bevel edge doesn’t look “paper thin.” Thick veneers also take dents a bit better because there’s more wood fiber above the glue line.
Core materials
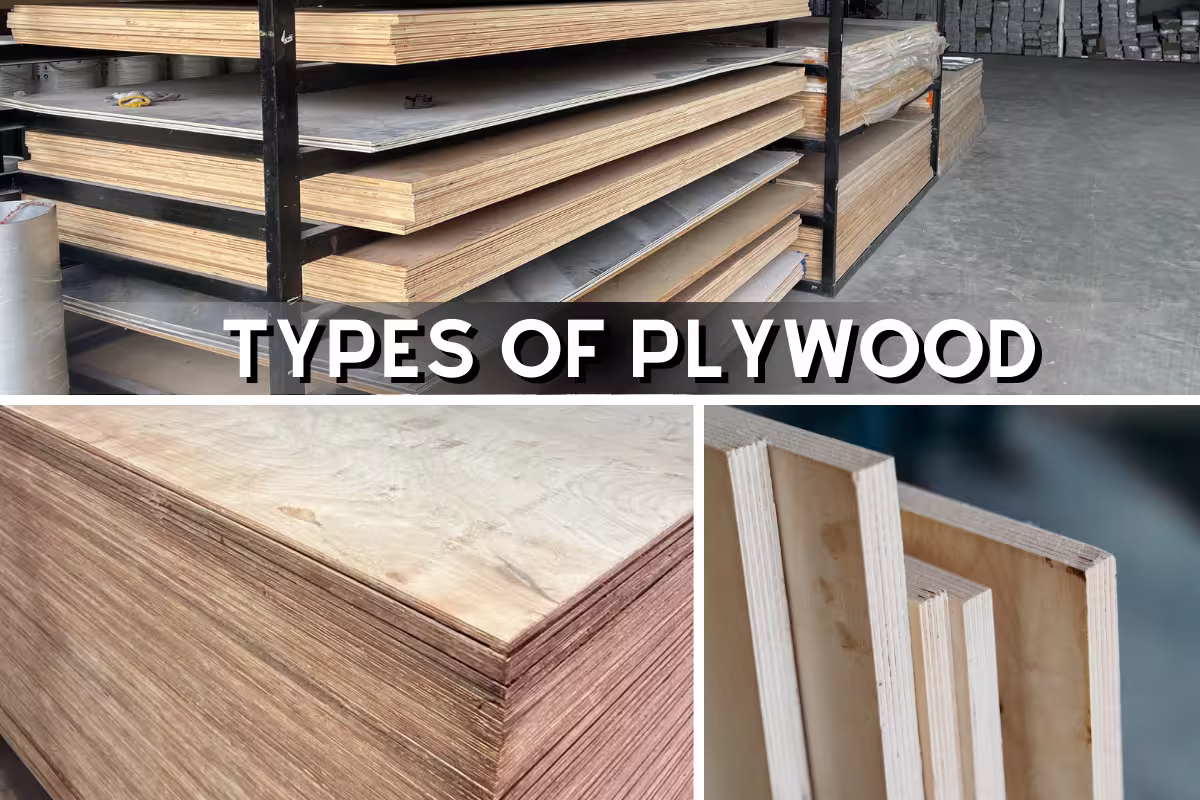
Most engineered hardwood uses either a multi-ply plywood core or an HDF core. Plywood cores use cross-laminated layers, which handle minor wetting events better when seams are sealed and the slab moisture is controlled. If you want a deeper primer on core options, see types of plywood and how high-density fiberboard behaves in flooring builds.
HDF feels very dense and can machine clean click-lock profiles, but it can swell if it stays wet. In real homes, this shows up as peaked seams near a dishwasher leak, pet bowl zone, or an ice maker drip that went unnoticed overnight.
Plywood quality varies widely. Products using stable cores like Baltic birch styles (or similar multi-ply builds) tend to stay flatter than low-ply cores with voids that telegraph as hollow spots after a season of HVAC swings.
Balance layer
The bottom layer is easy to ignore until it fails. A good balance layer counters tension from the veneer and finish, helping the plank resist edge curl and “smile” warping after glue cure or after a dry winter run of forced air.
| Layer | What it does | What can go wrong |
|---|---|---|
| Hardwood veneer (wear layer) | Provides real wood grain, color, and refinish surface | Sanding through veneer; denting at glue line |
| Core (plywood or HDF) | Improves dimensional stability and plank strength | HDF swelling; plywood voids causing hollow spots |
| Balance layer (backing) | Reduces warp by balancing stresses | Cupping/edge lift; long-term plank distortion |
Hardwood Engineered Wood Options
Key takeaways for this section:
- Hardwood engineered wood often means a thicker veneer build that behaves more like solid on top.
- Wider and longer planks look premium, but they raise the bar for flat subfloors.
- Species choice affects denting, color change, and the look of wear.
Thick veneer builds
“Hardwood engineered wood” often points to products with a thick wear layer (commonly around 3/32″ and up). These can tolerate full sanding more safely and age with a more believable patina because you’re wearing into real wood texture, not just scuffing finish.
Watch the marketing terms: “sawn face” and “reclaimed look” can still sit on a thin veneer. Ask for the actual wear layer measurement, not the total thickness of the board.
Plank sizes
Engineered flooring makes wide planks easier because the layered core stays steadier. You’ll see widths up to about 10 inches, but wide boards magnify subfloor humps; even a slight ridge can create a click-squeak line you’ll feel under socks as a faint “zip” at the seam.
Long planks also need better layout planning. If you ignore stagger rules, you can create repeating H-joints that scream “installed fast,” and those aligned seams can become stress points when humidity drops.
Species and looks
Species affects denting and how scratches show. Oak hides wear with open grain and busy cathedral patterns, while maple can show dark scuffs more clearly because the grain is tighter and more uniform. Walnut looks rich, but it’s softer, so chair legs can leave compression marks sooner.
Finish choice matters as much as species. Matte and wire-brushed surfaces mask micro-scratches, while glossy finishes can show swirl marks from improper mopping within weeks in sunny hallways.
Engineered Wood vs Solid Hardwood
Key takeaways for this section:
- Engineered wins on stability in humidity swings and over concrete.
- Solid wins on refinish runway and long-term renewability.
- Visual differences shrink to near-zero with thick veneer builds.
Stability and movement
Solid wood expands and contracts across its width with humidity changes. Engineered wood’s cross-grain structure limits that movement, which is why it behaves better in homes where humidity bounces between winter heat and summer AC. Real-world tell: solid floors can develop seasonal gaps you can catch with a sock toe, while engineered typically shows smaller changes when the indoor climate stays controlled.
That stability also helps in multi-level homes where the basement is cooler and the upper floors run warmer. Different temperatures can pull a solid floor in opposite directions room-to-room, raising the odds of crown/cup patterns.
Durability and lifespan
Engineered wood commonly lands in the 20–40 year range, depending on veneer thickness, finish quality, and whether the subfloor stays dry and flat. Solid can go much longer because you can sand it repeatedly, but only if you avoid chronic moisture and you don’t let pets or grit chew through the finish every season.
Factory finishes on engineered boards are often very hard and consistent. That can mean fewer traffic-lane wear spots than some site-finished solids, yet once a deep gouge hits through veneer, repair gets tricky and localized board replacement becomes the clean fix.
Visual differences
From standing height, engineered and solid can look identical. Differences show up at transitions and floor registers where you can see the layered edge on engineered products. With thick veneer, even that becomes harder to notice unless you’re inspecting the end grain up close.
Color change (UV ambering) still happens because the top is real wood. Expect sunlit areas to shift over time, particularly on natural finishes and lighter stains.
Cost comparison
In 2026, engineered hardwood materials often run about $4.50–$16 per sq ft, while solid hardwood can run about $5–$28 per sq ft depending on species, grade, and milling. Installed engineered commonly lands around $8–$15 per sq ft, while installed solid often lands around $12–$20 per sq ft, driven by jobsite sanding/finishing and stricter subfloor demands.
Pricing depends heavily on the build. A thick-veneer, multi-ply product can cost more than entry-level solid, yet still save money if it avoids slab prep, moisture remediation, or a failed install.
Engineered hardwood is often chosen for modern homes because its layered construction improves stability compared to solid wood, especially with humidity or temperature changes.
BuildDirect: Solid Wood vs Engineered Hardwood

Dark Oak Engineered Hardwood Planks 20-Pack
- Rich dark oak finish adds warm, elegant appeal to any room
- Multi-ply construction resists warping and improves dimensional stability
- Tongue and groove design for secure, tight installation
- Each pack covers 24.49 square foot for quick estimating
- Durable surface is easy to clean and maintain
Performance in Moisture-Prone Areas
Key takeaways for this section:
- Engineered wood can work where solid struggles, but it’s still wood, not a waterproof material.
- Concrete moisture testing and a vapor plan decide success in basements.
- Bathrooms need either strict controls or hybrid products built for water.
Basements and concrete
Engineered wood is popular over slabs because you can float it or glue it, and the core resists movement better than solid. The real risk is hidden slab moisture that drives swelling, adhesive failure, or a musty odor trapped under underlayment.
Don’t guess—test. Use appropriate concrete moisture testing methods and follow the flooring and adhesive limits. If you skip this step, the first sign can be edge lift a few months later, right when the room is fully furnished and repairs become expensive.
Kitchens and mudrooms
Kitchens work well with engineered wood if spills are handled fast and seams are protected. A common failure starts at the dishwasher: a slow leak wicks under boards, and you see darkened joints before you notice swelling.
Mudrooms add grit and water. Grit acts like sandpaper under shoes, grinding the finish and creating that dull, chalky look in a traffic cone near the door. Use a two-mat system (outside scraper + inside absorbent) and felt pads that don’t trap grit.
Bathrooms and hybrids
Standard engineered hardwood is a risky pick for full bathrooms. Steam, wet bath mats, and tiny overflows can push moisture into joints and under the finish. If a client insists on wood look in a bathroom, I look at waterproof engineered hybrids or switch the space to a resilient surface and keep hardwood outside the wet zone.
If you still proceed, keep expectations realistic: you need tight humidity control, sealed perimeter detailing, and fast response to water. Miss one detail and you can end up with cupped edges that never fully relax.
Engineered Wood Installation Methods
Key takeaways for this section:
- Floating is fast, glue-down feels more monolithic, and nail-down needs the right subfloor.
- Subfloor flatness stops squeaks more than any underlayment upgrade.
- Acclimation is about moisture balance, not a timer.
Floating installation
Floating floors use click-lock joints and sit over underlayment without being fastened to the subfloor. They’re great for concrete and fast remodels, but they can sound more “hollow” if the underlayment is too soft or the slab has dips. You’ll hear it as a drum tap in quiet rooms at night.
Common beginner mistake: trying to “fix” hollow sounds by stacking thick foam. That often makes joints flex more and can cause joint failure. The better fix is flattening the subfloor and using the underlayment approved for that click system.
Glue-down installation
Glue-down bonds the floor to concrete or plywood with a rated adhesive. When it’s done right, it feels solid underfoot and reduces movement noise. When it’s done wrong, you get telegraphing ridges where trowel lines didn’t collapse or where the slab had high spots.
Trade-off: adhesive choice matters as much as the wood. Use the manufacturer-approved trowel and spread rate. If you “save money” with the wrong glue, you can end up with bond failure that shows as loose, clicking boards weeks later.
Nail or staple install
Nail/staple installs are common over plywood subfloors. They can be very quiet and serviceable, yet they demand correct fastener length and spacing. If the core is too dense or the staples are wrong, you’ll get micro-peaking along rows or cracked tongues that fail later.
Engineered boards with thin wear layers can also show face splintering near knots if you overdrive fasteners. Dial pressure carefully and keep a cleanup plan for damaged boards before they get buried in the layout.
Acclimation requirements
Acclimation is about getting the wood’s moisture content closer to the site conditions. A “7–14 day” rule isn’t reliable if the HVAC isn’t running yet or if materials were stored in a garage. The boards should be in the living space, cartons opened if allowed, with stable temperature and humidity so the core and veneer can settle.
Skipping acclimation can look fine on day one and fail after the first seasonal swing. The first signs are often tight joints that crush, then later gapping, or edges that lift as internal stresses release.
Engineered Wood on Radiant Heat
Key takeaways for this section:
- Keep surface temps under the product’s limit (commonly 85°F).
- Use approved adhesives/underlayments that tolerate thermal cycling.
- Expect seasonal gaps if indoor humidity drops too low.
Temperature limits
Radiant heat creates steady warmth from below, which engineered wood usually handles better than solid. Most systems still need a maximum floor surface temperature—often around 85°F—to protect the adhesive, finish, and moisture balance inside the plank.
A common mistake is cranking the heat after a vacation. That rapid change can dry the boards unevenly and cause checking (fine surface cracks) in drier species or in boards with stressed grain.
Underlayment and glue
Pick underlayment and adhesive systems rated for radiant heat. Some foam products compress differently when warm and can lead to “click” noise at joints. With glue-down, the wrong adhesive can become brittle, leading to debonding you’ll hear as sharp ticks near seams.
If you want to compare engineered wood to resilient options that many homeowners consider for radiant zones, see Glamorwood blog guides that cover installation constraints across materials in plain language.
Seasonal movement
Radiant systems often dry the air. If your interior humidity drops under about 35–40%, you can still see micro-gaps even with engineered flooring, especially on wide planks. A whole-home humidifier, or at least targeted humidification in winter, reduces gapping and keeps the floor feeling tighter underfoot.
Don’t block expansion at the perimeter. Baseboards, heavy kitchen islands, and tight door jambs can trap the floor and cause buckling when humidity rises again.
Cost of Engineered Wood Flooring
Key takeaways for this section:
- Material prices rise with veneer thickness, core quality, and finish systems.
- Installed price depends on subfloor prep and moisture work.
- Value comes from fewer failures in difficult spaces, not just the lowest bid.

Bruce Natural Statement 3-inch Wide Engineered Flooring
- Three inch wide planks with a durable finish for a classic look
- Click-lock engineered design for fast, floating installation
- Three eighths inch thickness offers stability and strength
- Low maintenance surface resists everyday wear and scuffs
- Each case covers twenty two square foot for easy planning
Material pricing
In 2026, engineered wood flooring materials commonly sit around $4.50–$16 per sq ft. Entry products often use thinner veneers and simpler cores; premium products raise cost with thicker veneer, better plywood layups, longer/wider boards, and upgraded factory coatings.
Species affects price and waste. For example, character oak can be cost-effective because knots and color variation are accepted, while cleaner grades cost more and can increase cut waste during layout.
Installed pricing
Installed engineered hardwood commonly lands around $8–$15 per sq ft in 2026 for many markets, with the swing driven by subfloor flattening, demo, baseboard work, and moisture mitigation. Glue-down jobs can cost more than float installs when slab prep is extensive.
Watch the proposal details. “Install price” sometimes excludes leveling compound, moisture barrier systems, and transition trims, which can change the total meaningfully on open-concept homes.
Value over lifespan
Value comes from matching the right product to the right room. A slightly more expensive multi-ply core can be the cheaper choice if it prevents a slab-related failure. When engineered wood lasts 25–35 years, the cost-per-year can beat a floor that’s cheaper upfront but requires replacement after water swelling or chronic gapping.
| Cost driver | What increases cost | When it’s worth paying for |
|---|---|---|
| Veneer thickness | 3/32″+ wear layers, thicker builds | Homes where refinishing later matters |
| Core construction | Multi-ply, fewer core voids | Wide planks, longer runs, variable humidity |
| Finish system | Higher-end factory coatings | Pets, kids, heavy traffic lanes |
| Install method | Glue-down + slab prep | Concrete, sound control needs, firmer feel |
Maintenance and Daily Care
Key takeaways for this section:
- Most damage comes from grit and standing water, not “wear” alone.
- Use cleaners made for hardwood; avoid steam and heavy wet mopping.
- Small habits (pads, mats, humidity control) protect the finish for years.
Cleaning routines
Sweep or vacuum with a soft-floor head often enough that grit doesn’t build up. Grit is what gives floors that gray haze in hallways by micro-scratching the finish. For weekly cleaning, use a damp (not wet) microfiber mop and a hardwood-safe cleaner.
Skip steam mops. Heat plus moisture can stress seams and finishes, and on some engineered products, it can contribute to finish whitening or edge swell where steam lingers.
Scratch and spill protection
Felt pads help, but only if you keep them clean. Pads that trap grit act like sandpaper; you’ll see crescent scratches under dining chairs. Use larger pads, replace them on a schedule, and switch to smooth rubber casters on rolling furniture.
For spills, wipe fast and dry the area. Even thick veneer products can stain at seams if water sits long enough to migrate through a micro-gap, especially on open-grain species like oak.
Long-term durability
Expect finish wear in traffic lanes first. If the floor starts looking dull but the wood isn’t damaged, a professional screen-and-recoat can add years without aggressive sanding. The win is preserving veneer thickness for a future full refinish if your product allows it.
Humidity control is part of durability. Keep indoor RH in a comfortable band (often around 40–60%) so the floor doesn’t cycle into stress movement that loosens joints and creates noise.

Aunt Fannie's Plant-Based Hardwood Cleaner 32 ounce
- Ultra concentrated, plant derived formula for effective cleaning
- Vinegar free formula safe for sealed hardwood finishes
- Bright lemon scent leaves floors smelling fresh after mopping
- Dilutes easily to save product and reduce waste
- Biodegradable and gentle for regular maintenance
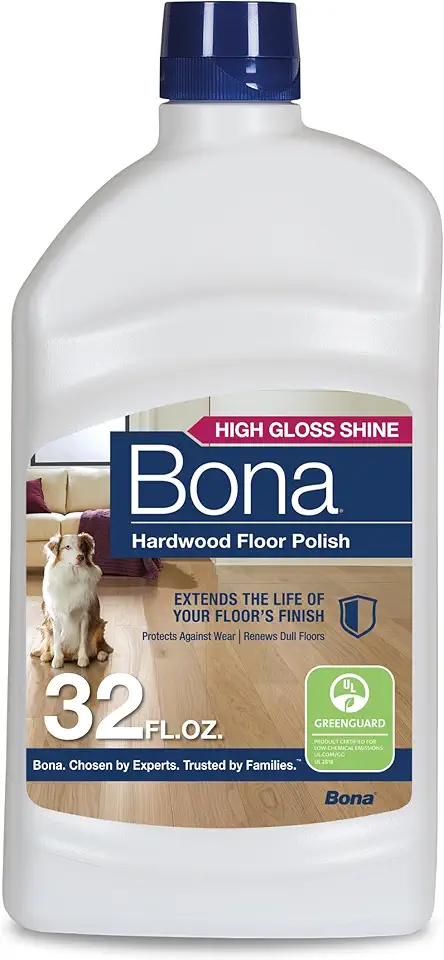
Bona High Gloss Hardwood Floor Polish 32 ounce
- Delivers a high gloss, professional shine to sealed wood floors
- Protects and renews dull surfaces without heavy buildup
- Covers up to five hundred square foot per bottle for economical use
- Easy to apply and buff for uniform results
- Dries clear and resists yellowing over time
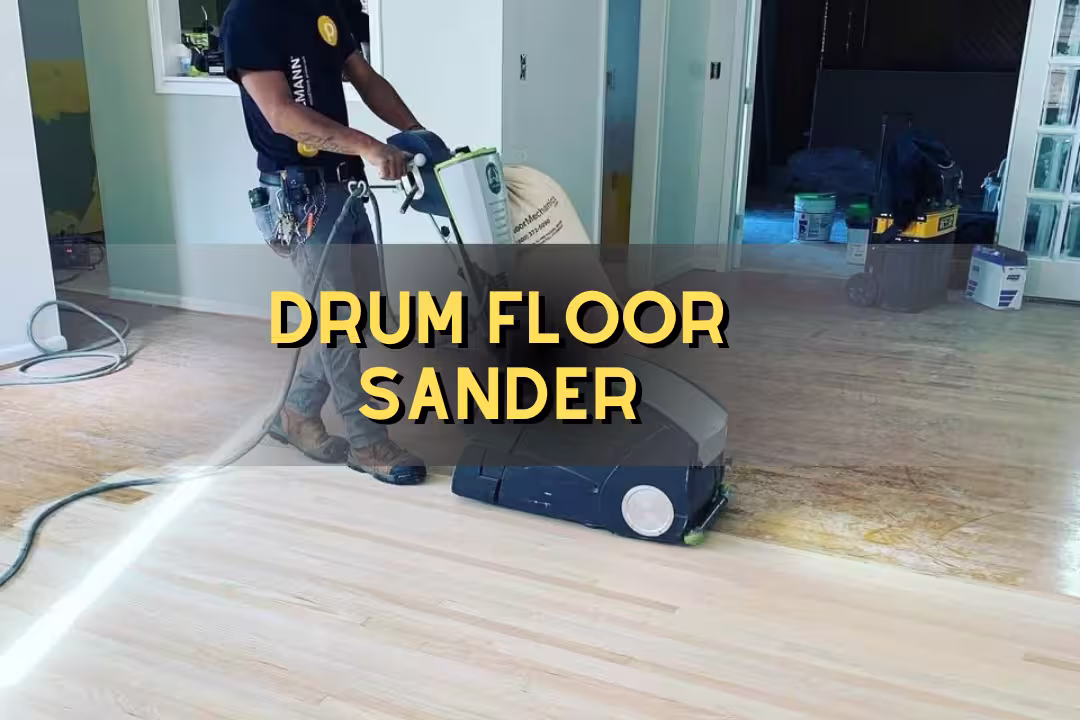
Can You Refinish Engineered Wood?
Key takeaways for this section:
- Can you refinish engineered wood? Yes sometimes, but it depends on veneer thickness.
- Screen-and-recoat is safer than full sanding on many products.
- Top risks are sanding through veneer and heat-related delamination.
Veneer thickness limits
Veneer thickness is the decision point. Thin veneer products (often around 1/16″ or less) may only tolerate screening, not full sanding. Products around 3/32″ and thicker may allow one or more full sand/refinish cycles if the floor is flat and the operator is careful.
The practical test is at a floor vent or threshold where you can see the edge profile. If you can’t verify thickness, assume conservative limits. Guessing wrong can turn a “refresh” into a core exposure disaster.
| Wear layer thickness | Typical safe approach | Real risk to watch |
|---|---|---|
| < 1/16″ | Clean + screen-and-recoat only | Sand-through at bevels and high spots |
| ~1/16″ to under 3/32″ | Very light sanding by a specialist, or screen | Veneer thinning that shortens future options |
| 3/32″ and up | Full sand/refinish may be possible | Heat/pressure causing delamination |
Sanding vs screening
Sanding removes wood to flatten and erase deeper damage. Screening (abrasion) scuffs the existing finish so a new coat bonds. On engineered floors, screening is often the smarter first move because it preserves wear layer while restoring sheen and protection.
A common mistake is trying to spot-sand pet stains or deep scratches. That creates a dish-shaped area that catches light differently and can look like a permanent halo. Board replacement or a full-process refinish is usually cleaner than surgery in the middle of a room.
Risks and failure modes
The big failure is sanding through the veneer at bevels, seams, or any high spot. You’ll see the color change instantly—like a pale stripe or blotch—and you can feel an abrupt texture change under your fingertips. Another risk is heat: aggressive sanding or the wrong pad can soften glue and trigger veneer lift later.
Coating failures happen too. If a floor has wax, silicone, or cleaner residue, the new finish can fisheye or peel. The workaround is a proper bond test in a closet and a deep-clean step that matches the existing finish chemistry.
When to replace instead
Replace boards or the floor when damage reaches the veneer’s limits: deep gouges, swelling at multiple seams, pet urine that penetrated to the core, or widespread delamination. If the plank edges have risen and stayed that way, refinishing won’t flatten it; it’ll just lock in a wavy reflection across the room.
If you’re deciding between repair and replacement, check whether your product is still available in the same batch and finish. Mixed batches can create color mismatch that looks worse than the original scratch.
Sustainability and Certifications
Key takeaways for this section:
- Engineered products can use less slow-growth hardwood by using a thin veneer over a core.
- Look for FSC certification and low-emission finishes.
- Indoor air quality depends on adhesives and coatings, not just wood species.
Material efficiency
Engineered wood is often more material-efficient because the visible hardwood is a veneer, while the core can be fast-growing or composite. That can reduce demand on slow-growth hardwood logs while still delivering an authentic surface that can be repaired and recoated.
Material efficiency doesn’t automatically mean “green.” If a product uses poor adhesives or fails early, its footprint gets worse. Longevity matters as much as the bill of materials.
FSC-certified options
If sustainability is a priority, ask for chain-of-custody documentation and choose FSC-certified options where available. The FSC database and standards are explained by the Forest Stewardship Council (FSC).
Be careful with vague claims like “eco-friendly core.” Verify the core type and suppliers. If you’re comparing sheet goods used in related build-outs (stairs, cabinetry, built-ins), see cabinet grade plywood and black MDF to understand how different panels behave and off-gas.
Low-VOC finishes
Low-VOC finishes and adhesives matter for smell and comfort right after install. A well-finished engineered floor usually has a mild odor that fades quickly, while a poor product can keep a sharp chemical smell lingering in closed rooms. Ask for emissions documentation and keep ventilation running during cure.
A pro workaround for sensitive households is staging: install room-by-room where possible, keep doors closed, and run filtration so the living areas stay comfortable while the finish and adhesive off-gassing drops.
Misconceptions and Common Mistakes
Key takeaways for this section:
- Engineered wood is real wood on top, but it’s still moisture-sensitive.
- Refinishing depends on veneer thickness, not the label.
- Most failures trace back to moisture, flatness, and humidity control.
“Engineered isn’t real wood”
This misconception leads people to treat engineered floors like vinyl. The surface is real hardwood, which means it can scratch, dent, and change color in sunlight. It also means you can often recoat it and, on some builds, sand it.
If you want a material that shrugs off standing water, engineered hardwood isn’t that. Confusing “engineered” with “waterproof” is a fast path to swollen seams.
“All engineered can be refinished”
Some engineered floors refinish well; others don’t tolerate sanding at all. Product listings often highlight total thickness, which is misleading. The only measurement that answers refinishing is wear layer thickness.
A workaround is choosing a thick-veneer build upfront in main living areas, then using a thinner, budget-friendly product in low-impact rooms where replacement would be painless later.
Skipping acclimation
Skipping acclimation is the silent failure that shows up months later. Boards installed too wet can shrink and gap; boards installed too dry can swell and pinch. People often blame the product when the real cause is site conditions and rushed scheduling.
If your HVAC isn’t operational yet, delay installation. A short delay beats a floor that starts making clicking sounds as joints compress and release across seasons.
Humidity control mistakes
Many homes run too dry in winter and too humid in summer. Either extreme stresses wood. Low humidity can cause gaps and splintery edges; high humidity can cause edge swell and compression at joints.
The fix is boring but effective: measure indoor RH, keep it stable, and treat the building envelope (bath fans, dehumidification, humidifier) as part of the flooring system.
Lessons Learned From Real-World Use
Key takeaways for this section:
- Most “bad flooring” stories are really moisture and flatness stories.
- Quiet floors come from prep, not thicker foam.
- Plan for repairs: extra cartons and smart transitions reduce panic later.
The most common surprise is how sensitive engineered wood is to subfloor flatness. A slab that looks “pretty good” can still create a line of flex that you feel as a faint bounce, then you hear a tick as the click joint moves. Leveling fixes noise faster than swapping underlayment three times.
Another friction point is moisture that isn’t obvious. I’ve seen basements that felt dry but failed because a dehumidifier wasn’t used in summer, and the floor picked up moisture from below. The first symptom was a subtle raised bevel you could see when light hit the floor at a low angle in the evening.
Refinishing expectations cause conflict. Homeowners hear “engineered can be refinished,” then assume it’s the same as solid. When a thin-veneer product can’t be sanded, the better solution is often a screen-and-recoat plus a few board swaps. Keeping spare planks from the original batch saves the day because matching sheen and color years later can be tough.
Transitions solve edge cases. Under kitchen islands, near patio sliders, and at mudroom entries, details matter. A discreet transition or perimeter gap hidden by trim can prevent pinch points that lead to buckling when humidity spikes after a stormy week.
Material selection fixes many pain points. In homes with big humidity swings, I favor better plywood cores and thicker veneers in main areas, then match sheet goods in built-ins so expansion behavior is predictable. If you’re working on adjacent carpentry, references like laminated wood, plywood dimensions, and plywood weight help avoid mismatched transitions and sagging thresholds.
Strategic Outlook and New Trends
Key takeaways for this section:
- Water-resistant and waterproof-positioned hybrids are growing fast.
- Wider planks look great but demand better prep and climate control.
- Future gains come from better cores, finishes, and locking profiles.
Waterproof engineered hybrids
A big trend is engineered “hybrids” that pair a wood veneer with water-resistant cores and tighter joint systems. They’re aimed at kitchens, basements, and busy entries where standard hardwood struggles. Even here, read the fine print: many “waterproof” claims depend on fast cleanup and correct perimeter detailing, not unlimited standing water.
If you’re comparing these to vinyl, keep the surface reality in mind: veneer is still real wood, so scratch repair and dent behavior differ from LVP. For a deeper comparison that buyers often make, see Engineered Hardwood vs LVP.
Wider plank demand
Wider planks remain popular because they reduce seams and read as calmer and more modern. That look comes with constraints: wide boards need flatter subfloors and steadier indoor RH. If you want wide planks without problems, budget time for floor prep and pick a core designed for width.
Design-wise, wide matte finishes hide daily wear better than glossy. In homes with big windows, a high-gloss wide plank can show light streaks and micro-scratches quickly in afternoon sun.
What to watch next
Watch for better click systems that reduce joint flex, improved low-emission adhesives, and tougher factory finishes that keep a natural look. Core innovation will matter too—expect more options that borrow from advanced plywood builds like phenolic plywood and specialty materials that prioritize stability.
If you’re planning a whole-home remodel, map flooring decisions to adjacent wood materials so everything moves predictably. Guides like types of wood for furniture and construction wood help keep your built-ins, stairs, and thresholds consistent with the floor’s performance.
FAQs
What Is Engineered Wood Flooring Made Of?
Engineered wood flooring is made of a thin hardwood veneer bonded to multiple layers of plywood or high-density fiberboard (HDF).
The hardwood top layer gives the floor its appearance, while the cross-layered core adds strength and moisture resistance, reducing movement compared with solid planks and allowing installation over many substrates.
Engineered Wood Vs Solid Hardwood: Which Lasts Longer?
Solid hardwood generally lasts longer because it uses full-thickness planks that can be sanded and refinished many times.
Engineered wood can last decades too, especially with a thick veneer and proper care, but its refinishing potential is limited by veneer thickness. Choose solid for maximum longevity and refinishing, or engineered for greater dimensional stability in moisture-prone areas.
Can You Refinish Engineered Wood Floors Without Sanding?
Yes — many engineered floors can be refreshed without sanding using screen-and-recoat methods or topical restorative products.
If the veneer is very thin or worn through, full sanding may not be possible; in those cases, targeted repairs or replacement are better. Always check veneer thickness and the manufacturer’s guidelines before refinishing.
Is Engineered Hardwood Good For Basements Or Over Concrete?
Yes, engineered hardwood is generally suitable for basements and installations over concrete when correctly installed.
Its layered core resists moisture-related movement better than solid wood, and it can be floated, glued, or installed with an approved underlayment or moisture barrier. Always test and address moisture levels and follow manufacturer instructions to avoid failures.
What Veneer Thickness Do I Need To Refinish Engineered Wood?
You typically need at least 2–3 millimeters of hardwood veneer to sand and refinish engineered flooring safely.
Thicker veneers (3mm+) allow multiple refinishes over the floor’s life, while veneers under 2mm are usually limited to light screening and refinishing only. Confirm the exact veneer depth with the manufacturer before refinishing to avoid damaging the core.
Affiliate Disclosure: Some links in this post are affiliate links. If you make a purchase through these links, we may earn a small commission at no extra cost to you. We only recommend products we genuinely believe in.