Wood Engraving Equipment Guide: Choose the Right Tool or Machine
Table of Contents
Wood engraving equipment includes handheld engraving pens, rotary tools, pyrography pens, CNC routers, diode lasers, and CO₂ lasers used to mark, burn, carve, or cut designs into wood. The right choice depends on depth, repeatability, budget, safety setup, software comfort, and the kind of wood you plan to use.
Practical notes from real use: the tool that looks fastest on a product page often slows down once you add clamping, masking, smoke control, cleanup, and test cuts. Freshly engraved maple gives off a warm toasted smell, rotary burrs leave a dry gritty dust on your fingers, and a poorly focused laser leaves soft brown edges instead of crisp dark lines.
What Wood Engraving Equipment Includes

Wood engraving equipment covers hand tools, heated tools, motorized cutters, computer-controlled routers, and wood laser engraving equipment. Beginners often buy the wrong tool because “engraving” gets used for shallow marking, burned artwork, deep carving, and full cutting, yet each process behaves differently on grain, glue layers, knots, and finishes.
Engraving vs Etching
Engraving removes material or burns below the surface enough to create a visible recess, while etching is usually a lighter surface mark. On wood, a laser may technically burn or ablate the surface, but buyers still call the machine a wood engraving machine because the result looks engraved after sanding or oiling.
Burning vs Carving
Burning darkens fibers with heat from a pyrography pen or laser beam, while carving removes wood with a burr, bit, knife, or router cutter. Burning works well for lettering and shaded art; carving works better when you want your fingertip to feel a groove, raised border, or deep relief pattern.
Cutting vs Marking
Cutting separates wood all the way through, while marking changes only the surface color or texture. A laser engraver for wood can often cut thin basswood or plywood, but cutting thick hardwood takes more power, better focus, air assist, and several slow passes that can char the edge.
Tool Categories
Tool categories matter because each one solves a different problem. Use this quick list before comparing brands, since a $30 rotary tool and a $3,000 CO₂ laser can both engrave wood but serve very different shops.
- Handheld engraving pens for names, initials, tags, and simple craft marks.
- Rotary tools for deeper lines, relief texture, sanding, shaping, and manual carving.
- Pyrography pens for slow, artistic burned shading and rustic detail.
- Diode laser engravers for repeatable digital artwork, coasters, ornaments, and signs.
- CO₂ laser engravers for faster wood engraving, cutting, and small business production.
- CNC routers for deep carving, V-carved signs, plaques, panels, and dimensional work.
Main Wood Engraving Equipment Types
Main equipment types range from simple pens to production machines. The trade-off is control versus repeatability: hand tools feel direct and flexible, while laser and CNC systems repeat a file accurately after you tune the setup.
Handheld Engraving Pens
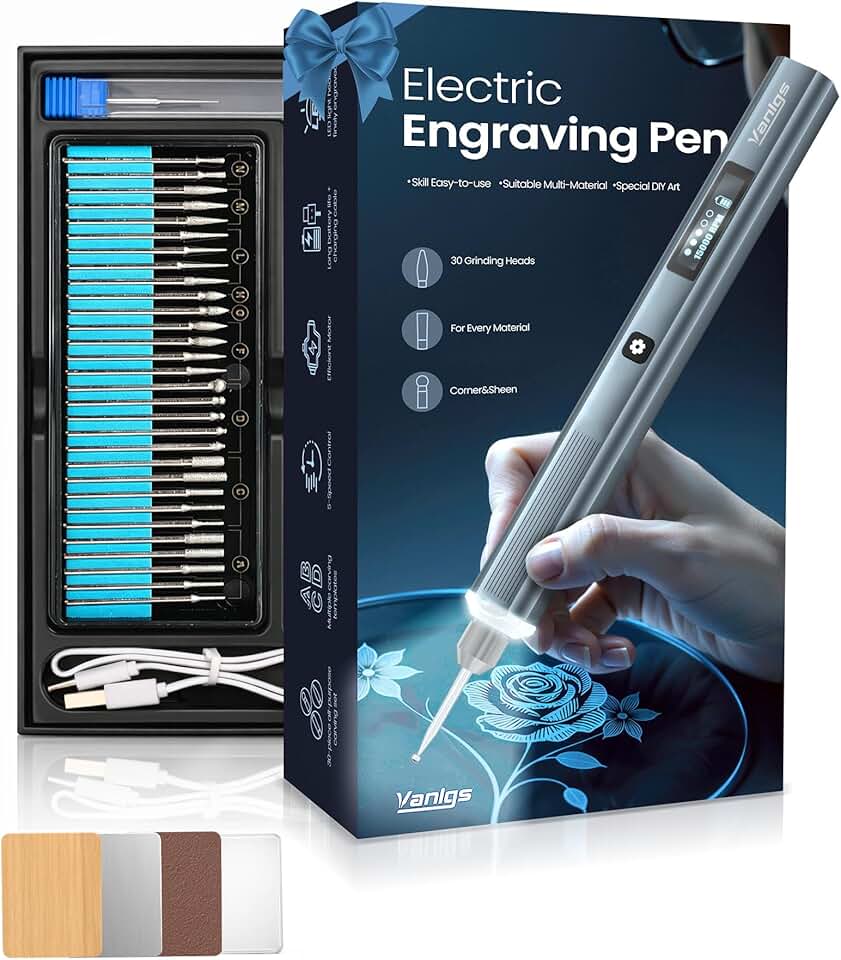
Handheld engraving pens are low-cost tools for simple personalization on wood, glass, leather, plastic, and light metal work. They usually cost about $10–$50 and suit beginners who want a portable handheld wood engraver without software, ventilation ducts, or a workbench full of accessories.
The main risk is bit walking, where the tip skates along the grain before it bites. A good workaround is to trace the design with a pencil, score the first pass lightly, clamp the piece, and support your wrist on the table instead of hovering over the wood.
Rotary Tools
Rotary tools are more versatile than basic engraving pens because they accept burrs, sanding drums, cutters, polishing wheels, and small routing bits. A rotary tool for wood engraving can create deeper grooves, but it creates fine dust and can chatter if the bit is dull, the speed is wrong, or the board isn’t clamped hard enough.
Use light pressure and let the bit cut rather than forcing it. If the tool screams, grabs, or leaves washboard marks, switch to a sharper carbide burr, reduce pressure, and practice on the same wood species before touching the finished blank.
Pyrography Pens
Pyrography pens burn lines and shading into wood with a heated tip. They suit handmade art, ornaments, rustic signs, and portraits, but they’re slow for batch work because every stroke depends on hand speed, tip temperature, grain direction, and surface prep.
Beginners scorch edges by pausing too long at corners. Keep the pen moving, sand the blank to a consistent grit, and use basswood or poplar first because open-grain oak makes the tip bounce and creates broken dark lines.
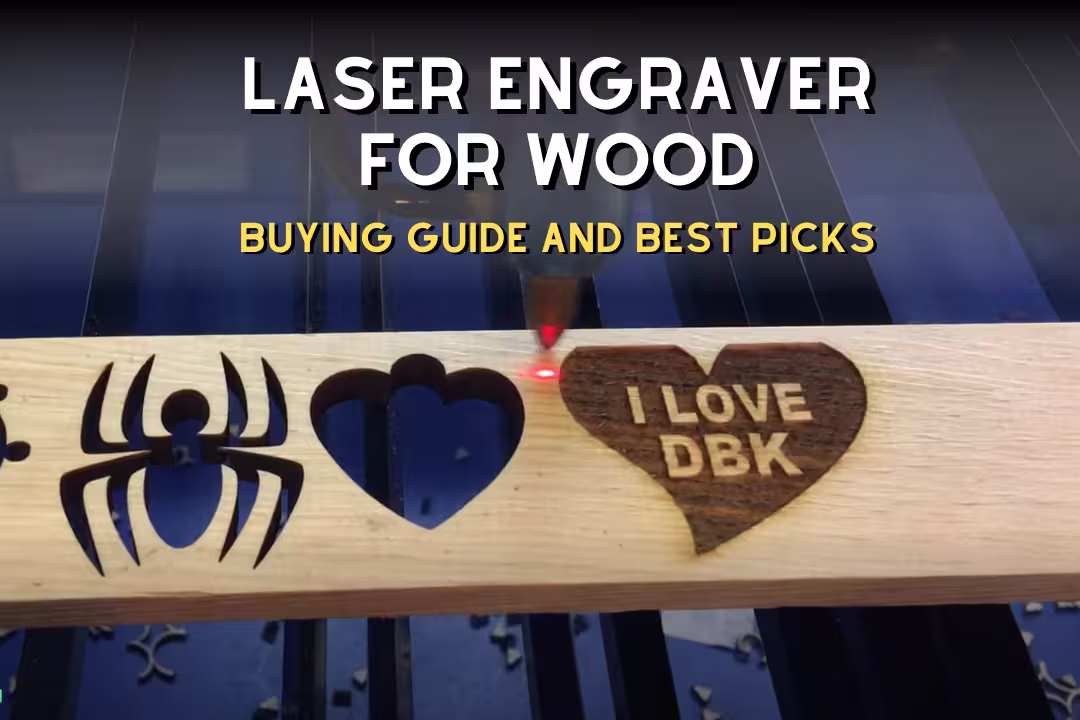
Diode Laser Engravers
Diode laser engravers are popular hobby wood laser engraving equipment because they’re compact, affordable, and strong for logos, text, ornaments, coasters, and thin plywood crafts. Most blue diode systems use about 5W–40W optical output and often run with LightBurn, LaserGRBL, or brand software.
Open-frame models need extra planning because the beam, smoke, odor, and fire risk aren’t contained. If you’re comparing a portable laser engraver, budget for an enclosure, air assist, exhaust fan, and proper wavelength-matched glasses before buying extra wood blanks.
CO₂ Laser Engravers
CO₂ laser engravers are faster on wood and many organic materials because their 10.6µm wavelength is absorbed well by wood, paper, leather, acrylic, and cardboard. Desktop units often run about 40W–100W, while larger commercial machines may reach 100W–150W or more.
The trade-off is upkeep: mirrors need alignment, lenses need cleaning, tubes age, and water cooling must stay stable. A dirty lens can crack from heat, so wipe soot off optics before it turns into a burnt film that steals power and ruins detail.
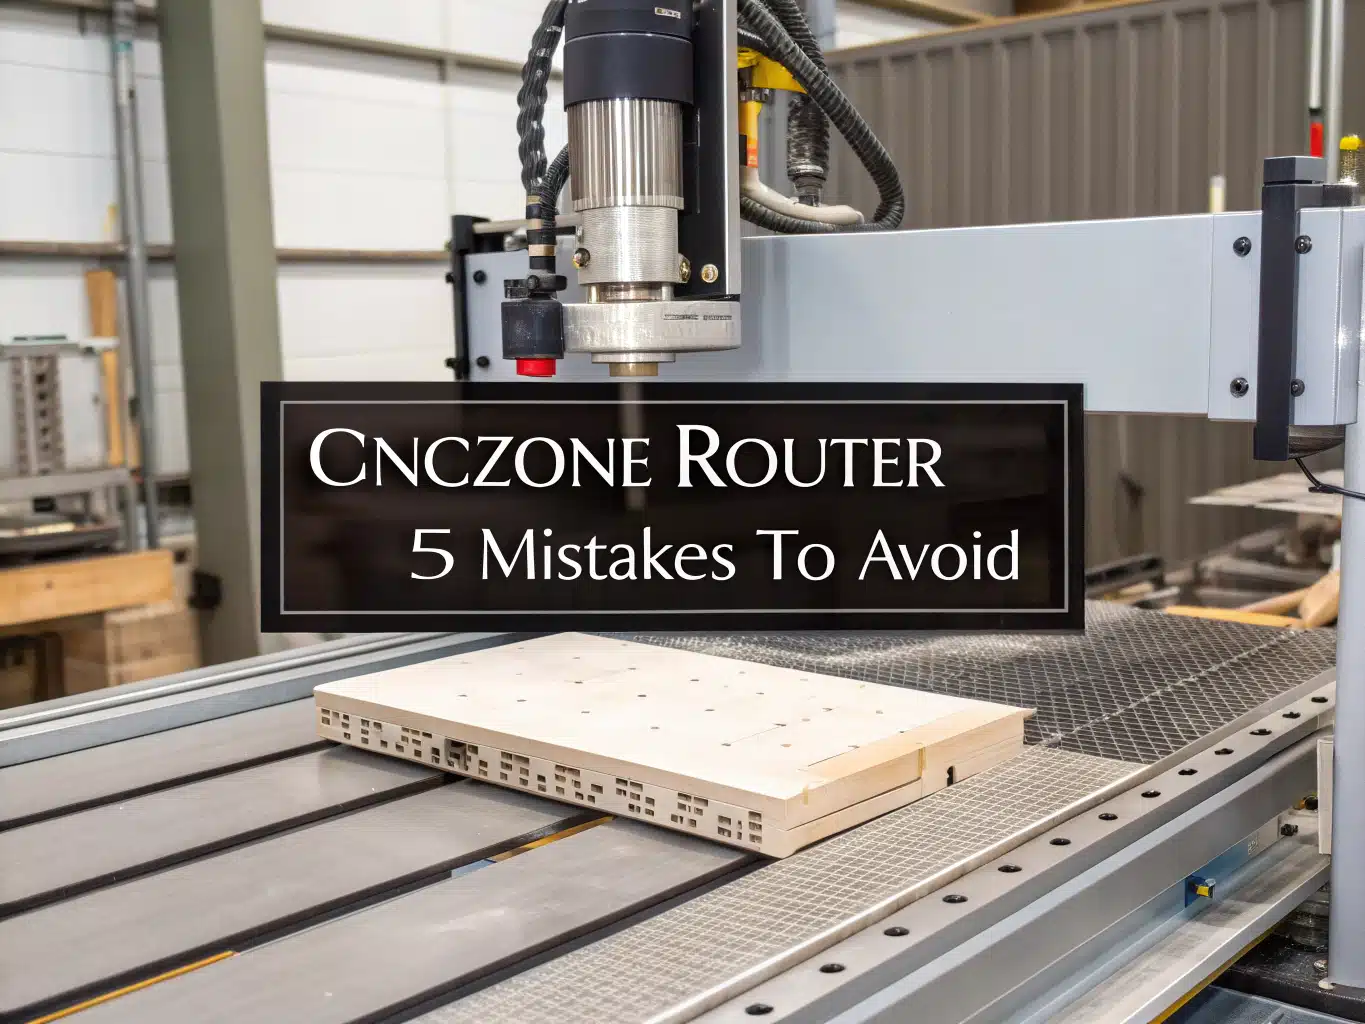
CNC Routers
CNC routers carve wood instead of burning it, which makes them the better choice for deep relief signs, plaques, furniture panels, and 3D textures. A CNC router needs toolpaths, bits, clamps, spoil boards, dust collection, and more setup time than a laser, but it gives real depth a laser can’t match.
Noise and dust are the big limits. The cutter throws chips with a dry rasping sound, and MDF dust hangs in the air unless you use a dust shoe, vacuum, and a respirator suited to the material.
Equipment Comparison Table
This comparison shows which wood engraving tools fit common projects, budgets, and shop setups. Treat the prices as planning ranges because accessories, ventilation, replacement parts, and software can change the real startup cost.
| Equipment Type | Approximate Cost | Best For | Detail | Depth | Repeatability | Main Limitation |
|---|---|---|---|---|---|---|
| Handheld engraving pen | $10–$50 | Names, initials, simple personalization | Medium | Shallow | Low | Depends on hand control |
| Rotary tool | $30–$200+ | Carving, deeper engraving, shaping | Medium to high | Medium | Low to medium | Practice and dust control needed |
| Pyrography pen | $20–$150+ | Burned artwork and shading | High by hand | Surface burn | Low | Slow for production |
| Diode laser engraver | $200–$1,500+ | Hobby engraving, gifts, signs | High | Shallow to medium | High | Ventilation and laser safety required |
| CO₂ laser engraver | $500–$10,000+ | Faster engraving and cutting | High | Shallow to medium | High | Higher cost and maintenance |
| CNC router | $300–$50,000+ | Deep carving, signs, furniture | Medium to high | Deep | High | Noise, dust, and toolpath learning |
Wood Laser Engraving Equipment Explained
Wood laser engraving equipment uses a focused beam to heat, darken, vaporize, or cut wood fibers. Lasers give clean repeatability for digital artwork, but the final result still depends on focus height, air assist, wood moisture, grain, resin, glue layers, and exhaust airflow.
Diode vs CO₂ Lasers
Diode lasers cost less, take less space, and work well for hobby engraving, but they cut wood slower than most CO₂ systems. A diode laser engraver for wood is a good fit for coasters, small signs, boxes, ornaments, and test batches before moving into a larger laser engraver for wood.
CO₂ lasers suit faster cutting, larger batches, and business work, but they bring water cooling, mirror alignment, exhaust, and tube replacement. If your work includes thick acrylic and plywood cutting, CO₂ usually saves time; if your work is mainly surface art on thin wood, a good diode may be enough.
Laser Power Ratings
Laser power ratings confuse many buyers because optical output power is not the same as electrical input power. A true 20W diode rating should describe beam output, while a high electrical watt number may include fans, motors, drivers, lights, and electronics that don’t directly engrave wood.
Useful ranges are about 5W for light diode engraving, 10W for stronger hobby work, 20W for faster engraving and thin plywood cutting, 30W–40W for stronger diode cutting, 40W for entry CO₂, and 60W–100W for small business CO₂ work. Too much power can blur fine text, so sharp detail often comes from focus, speed, DPI, and clean artwork rather than maximum wattage.
Work Area and Speed
Work area should be larger than the project blank, not just the design. Portable lasers may offer about 100mm × 100mm, common open-frame diode machines often sit near 400mm × 400mm, desktop CO₂ beds often range from 300mm × 200mm to 700mm × 500mm, and business machines may reach 900mm × 600mm or larger.
Advertised speed rarely matches practical wood engraving speed. A machine may move fast in empty travel, but dark photo engraving, high line density, multiple passes, and resinous wood all slow the job and can leave a smoky brown halo if exhaust lags behind the beam.
Resolution and Detail
Resolution settings often appear as DPI or lines per inch. On wood, 250–600 DPI is a practical range for many jobs because higher settings can add time, heat, and smoke staining without showing more detail once grain and scorch spread limit the edge.
Fine detail needs a focused beam, flat material, tight belts, clean optics, and artwork with enough resolution. Tiny serif fonts that look sharp on a screen can fill with soot on oak, while the same design on maple or basswood can look clean and crisp.
Air Assist and Enclosures
Air assist blows smoke and heat away from the cut or engraving line, which reduces flare-ups and improves edge quality. It doesn’t replace ventilation because the smoke still needs to leave the room through ducting, filtration, or a dedicated extraction system.
An enclosure helps contain laser light, smoke, and stray reflections, especially on open-frame diode machines. Look for viewing panels matched to the laser wavelength, an exhaust port, a stable frame, and enough height for jigs, rotary attachments, and thicker cutting boards.
Fiber Lasers for Wood
Fiber lasers usually aren’t the first choice for natural wood because their 1064nm wavelength is built for metals and some plastics. They can mark certain coated or treated surfaces, but diode and CO₂ lasers give more predictable results on basswood, plywood, maple, cherry, bamboo, and MDF.
The common mistake is buying a fiber laser for wood because it sounds more industrial. If your main work is wood products, put the budget into a better CO₂ system, safer enclosure, stronger exhaust, or a reliable diode setup instead.
Choose by Project and Budget
Project fit matters more than tool hype. A simple engraving pen may beat a laser for one-off initials, while an enclosed CO₂ laser can finish a tray of coasters long before a handheld tool reaches the second row.
Small Crafts
Small crafts include keychains, tags, coasters, ornaments, picture frames, and jewelry boxes. Handheld pens suit quick names, rotary tools suit deeper hand-shaped lines, and diode lasers suit repeatable artwork where every piece needs to match.
Beginner workaround: buy a pack of basswood blanks and mark each test with speed, power, bit type, or temperature. Scrap notes save more money than guessing, especially after you change wood species or switch from line art to shaded images.
Cutting Boards
Cutting boards need untreated, food-safe blanks such as maple, walnut, cherry, or bamboo. Avoid mystery finishes, stained boards, and coated imports unless the maker confirms the surface is safe to engrave and clean after burning.
Clean residue after engraving because soot can smear into end grain and feel chalky under a fingertip. Light sanding, a nylon brush, and food-safe mineral oil usually leave the lettering darker and the board smoother.
Signs and Décor
Signs and décor split into two groups: surface-marked signs and deep carved signs. A diode or CO₂ laser handles logos, wedding signs, door plaques, and photo panels, while a CNC wood engraving machine handles raised lettering, V-carved grooves, and carved backgrounds.
Large signs need a bed size that fits the whole blank or a pass-through workflow that won’t shift alignment. For deeper routed sign work, a desktop CNC can be easier to fit in a garage than a full-size router table setup.
Batch Production
Batch production rewards repeatability, jigs, bed size, exhaust strength, and fast file setup. An enclosed CO₂ laser or higher-power enclosed diode system can engrave trays of coasters, ornaments, tags, and cutting boards with fewer touch points per item.
Pro workaround: build a jig from scrap plywood and save the machine origin with the file. The first jig takes time, but it stops the tiny alignment errors that make a logo creep toward the edge by the tenth blank.
Deep Relief Carving
Deep relief carving belongs to CNC routers and rotary tools, not low-power diode lasers. Lasers darken and ablate the surface, while routers remove chips with V-bits, ball-nose bits, end mills, and 3D toolpaths.
Choose CNC when the final design needs shadow depth, raised letters, carved borders, or a tactile surface you can feel through a finish. Plan for dust collection, clamps, bit changes, sanding, and a slower finishing workflow than laser marking.
Price Ranges
Price ranges start near $10–$50 for handheld engraving pens, $30–$200+ for rotary tools, $20–$150+ for pyrography pens, $200–$1,500+ for diode lasers, $500–$10,000+ for CO₂ lasers, and $300–$50,000+ for CNC routers. Small business systems often land between $1,500 and $10,000 once enclosure, ventilation, filtration, and workholding are counted.
Don’t spend everything on the machine body. A cheaper laser with good exhaust, air assist, a honeycomb bed, and safe glasses often produces cleaner work than a stronger open-frame unit sitting in a smoky corner.
Ownership Costs
Ownership costs include burrs, bits, belts, lenses, mirrors, tubes, diode modules, honeycomb beds, spoil boards, clamps, filters, ducting, and finishing supplies. Basic exhaust ducting may cost $20–$100, an inline fan $40–$200, smoke filtration $150–$800+, and replacement filter cartridges $30–$300+ depending on the unit.
Consumables add up during real work. Rotary bit sets may cost $5–$40+, CNC bits can run $10–$100+ per bit or set, CO₂ tubes may cost $100–$600+, and diode modules can cost $100–$500+ if the emitter degrades after heavy use.
Woods, Software, and File Workflow
Wood choice affects contrast, depth, smoke, edge quality, and finishing more than many new buyers expect. Moisture, grain size, glue, resin pockets, and sanding grit can make the same design look sharp on one board and muddy on the next.
Best Wood Types
Basswood engraves cleanly because it’s pale, soft, and even grained, which makes it a forgiving first material for hand tools and lasers. Maple gives crisp detail for cutting boards, cherry warms beautifully with age, walnut looks premium but can have lower contrast, and bamboo often engraves dark but may vary at glue lines.
Oak is tricky for tiny text because its open pores break fine lines and pull smoke into the grain. Use bold artwork on oak, and save small photo engraving for basswood, maple, or fine birch plywood.
Plywood and MDF
Birch plywood is common for signs, boxes, ornaments, and laser-cut crafts because the face veneer engraves evenly. Glue layers can slow cutting, flare, or leave uneven depth, so run a test grid before promising a customer a tight production deadline.
MDF engraves evenly but creates heavy smoke and fine dust from binders and wood fibers. Composite wood products can involve formaldehyde-related concerns, so review the EPA formaldehyde information and use strong exhaust or filtration when engraving engineered boards indoors.
Moisture and Grain
Moisture changes burn because wet fibers steam, lighten the mark, and resist consistent depth. Indoor woodworking lumber often sits around 6%–10% moisture content, while damp craft blanks can leave pale patches, sticky residue, and a sharper campfire smell under the laser.
Grain direction affects hand tools too. A rotary burr can glide smoothly with the grain and then grab across it, so rotate the workpiece, use shallow passes, and clamp thin blanks to a sacrificial board to stop vibration.
Laser Software
Laser software controls speed, power, passes, fill patterns, line modes, image dithering, and job origin. LightBurn works with many diode and CO₂ systems, LaserGRBL is common for GRBL-based diode machines, RDWorks supports many Ruida CO₂ controllers, and xTool Creative Space or Glowforge Print may be easier for brand-specific workflows.
Check compatibility before buying the machine, not after unboxing it. The LightBurn documentation is a useful place to confirm supported controllers, file behavior, camera options, and setup limits.
CNC Software
CNC software builds toolpaths rather than laser burn settings. VCarve, Carbide Create, Easel, Fusion 360, AutoCAD, and Universal Gcode Sender appear often in wood shops because CNC work needs bit selection, feed rate, spindle speed, depth of cut, workholding, and safe machine motion.
The beginner mistake is treating a CNC router like a printer. A wrong toolpath can plunge too deep, snap a bit, chew up a clamp, or carve through the spoil board, so simulate the cut and start with shallow test passes.
Design File Types
Design files decide how cleanly the equipment follows the artwork. SVG works well for vector graphics, DXF suits CAD-style files, PNG and JPG suit photos or raster artwork, AI and PDF help with design exchange, and STL fits some CNC or 3D relief workflows.
Cleaner files save cleanup time. Convert fonts to outlines, remove duplicate paths, close open shapes, and keep separate layers for cut, score, and engrave settings so the machine doesn’t cut a border you meant to mark lightly.
Raster vs Vector
Raster engraving works like scanning lines across a photo or filled shape, which suits portraits, shaded logos, and filled text. Vector engraving follows paths and outlines, which suits crisp line art, logos, borders, and cut paths.
Use vector paths for small lettering whenever possible because the edges stay cleaner and the job often runs faster. Use raster for images, but test dithering and grayscale settings because wood grain can swallow subtle shadow detail.
Safety, Accessories, and Maintenance
Safety setup is part of wood engraving equipment, not an optional upgrade. Lasers create eye hazards, smoke, heat, and flame risk, while rotary and CNC tools create dust, chips, noise, and sharp spinning cutters.
Laser Eye Safety
Laser eye safety starts with knowing the wavelength and class of the machine. Many open diode and CO₂ systems can present Class 4 hazards, and the FDA laser products guide explains why direct and reflected beams can injure eyes.
Match glasses to the laser wavelength and optical density rating. Blue diode lasers are often near 450nm, CO₂ lasers are often 10.6µm with an invisible beam, and tinted plastic glasses with no rating should stay out of the shop.
Fire Prevention
Fire prevention matters because wood, soot, resin, masking paper, and small offcuts can ignite. Never leave a laser running unattended, keep the honeycomb bed clean, use air assist, and keep a suitable fire extinguisher within reach.
Watch corners on slow cuts because heat builds where the beam changes direction. If you see a bright orange flare instead of a tiny glow, pause the job, clear debris, reduce power, raise speed, or split the cut into more passes.
Fume Extraction
Fume extraction removes wood smoke, odor, fine particulates, and glue-related fumes from plywood or MDF. Basic ducting may work for a garage window, but indoor work often needs an enclosure, inline fan, sealed hose path, and carbon or HEPA filtration suited to smoke load.
Airflow leaks are a common source of lingering odor. Seal hose joints, keep the exhaust run short, clean filters on schedule, and check that smoke pulls away from the work instead of curling back across the engraving.
Dust Control
Dust control protects your lungs, bearings, belts, electronics, and finish quality. Wood dust exposure is a known workplace concern, and the OSHA wood dust page outlines respiratory and fire-related risks in wood operations.
For CNC work, use a dust shoe, vacuum or collector, sharp bits, and sealed collection paths. For rotary hand engraving, clamp the work near a small vacuum pickup and wear a respirator when carving MDF, walnut, oak, or any dusty engineered material.
Materials to Avoid
Avoid unknown materials because coatings, pressure treatments, vinyl films, and mystery adhesives can release harmful fumes or damage equipment. Never laser PVC or vinyl, and avoid pressure-treated wood, unknown coated boards, painted salvage lumber, and boards with oily finishes you can’t identify.
Use known blanks from reliable suppliers for kitchen items, children’s products, and indoor décor. If a board smells chemical, feels waxy, or leaves residue on sandpaper, test on scrap outdoors or choose a cleaner blank.
Essential Accessories
Useful accessories include air assist, honeycomb bed, enclosure, exhaust fan, ducting, smoke purifier, rotary attachment, clamps, transfer tape, calipers, focus tools, spare lenses, burrs, sanding drums, and finishing oil. For routers and CNC machines, add V-bits, end mills, spoil boards, collets, a touch probe, and a dust shoe.
Budget realistically: air assist often costs $30–$150+, honeycomb beds $40–$200+, enclosures $80–$500+, exhaust fan and ducting $40–$300+, smoke purifiers $150–$800+, and rotary attachments $50–$300+. Accessories often decide whether your first projects look clean or smoky.
Maintenance Costs
Maintenance costs stay low only when cleaning becomes routine. Soot on lenses reduces beam strength, dirty mirrors scatter power, loose belts blur lines, dull rotary bits burn wood, and packed dust inside a CNC can shorten bearing and motor life.
Set a schedule for lens cleaning, mirror checks, belt tension, bed cleaning, filter replacement, bit inspection, and dust collection emptying. A quick wipe after each smoky plywood session is cheaper than replacing a cracked CO₂ lens or troubleshooting weak engraving for half a day.
Recommended Beginner Wood Engraving Tools
Beginner tools should match simple projects before chasing production speed. Start with handheld engraving pens or rotary tool kits if you want low cost, small storage needs, and direct control before moving into laser or CNC equipment.
Handheld Engraving Pens
These handheld picks suit small names, craft blanks, tags, ornaments, and beginner practice without a software learning curve.

Mini Craft Pro
- Compact cordless design for easy control
- 5 speed settings for different tasks
- 69 accessories for sanding polishing and engraving
- USB charging for convenient everyday use
- Great for DIY crafts and detail work

Creator Engraving Pen
- Cordless and portable for flexible use
- Easy for beginners to pick up fast
- Works on more than 50 surfaces
- Rechargeable design for repeat projects
- Includes 30 bits plus a mastery guide

Classic Dremel Engraver
- Simple tool for personalizing projects
- Includes stencils for cleaner lettering
- Great for leather metal glass and wood
- Easy to handle for craft and hobby use
- Reliable 120 volt power for steady engraving

Precision Engraving Pen
- 24 watt power for consistent etching
- Works on wood metal and glass
- Comes with letter and number stencil set
- Includes 4 durable replaceable bits
- Handy size for detailed custom work

NEIKO Electric Engraver
- 120 volt power for dependable engraving
- Tungsten carbide tip for lasting performance
- Works on metal wood glass and plastic
- Easy handheld design for custom marking
- Great for stencils and personal projects
Glow Grip Engraving Pen
- Cordless kit for flexible creative use
- Built in LED light helps guide detail work
- 5 speed settings for better control
- Rechargeable design with 31 bits included
- Works on metal wood glass and plastic
Use stencils first if lettering is your goal. Freehand letters often lean or widen on soft grain, while a light stencil pass creates a groove the bit can follow on the second pass.
Rotary Tool Kits
These rotary kits fit users who want one tool for engraving, carving, sanding, polishing, shaping, and light cutting.

Dremel Stylo Craft Tool
- Slim pen style body for precise work
- Ideal for engraving carving and etching
- Works well on wood glass and jewelry
- Includes 15 accessories for versatile use
- Comfortable for detailed creative projects

Dremel 4300 Rotary Kit
- Powerful rotary tool for demanding jobs
- LED light improves visibility while working
- 5 attachments and 40 accessories included
- Great for grinding cutting sanding and carving
- Versatile choice for hobby and home projects

Phalanx Rotary Power Kit
- Strong 180 watt motor for tough tasks
- 6 speed control for precise results
- Flex shaft adds comfort and accuracy
- Massive 139 piece accessory set included
- Great for crafting drilling polishing and more
A flex shaft makes detailed rotary engraving easier because the handpiece feels lighter and vibrates less than the full motor body. Pair it with clamps and a small vacuum pickup so dust doesn’t hide the line you’re trying to follow.
Troubleshooting and Final Buying Checklist
Troubleshooting starts with one change at a time. If you adjust power, speed, focus, air assist, and material all at once, you won’t know which fix helped or which one made the mark worse.
Burn Marks
Burn marks around the design usually come from too much power, speed set too slow, poor air assist, smoke trapped near the surface, or resin-rich wood. Reduce power, increase speed, add air assist, mask the surface, and improve exhaust flow before blaming the machine.
For stubborn scorch, use low-tack transfer tape, engrave through it, then peel it away before final sanding. On detailed pieces, sand the blank smooth before masking so tape doesn’t lift fibers and blur fine edges.
Blurry Detail
Blurry detail comes from poor laser focus, low-resolution artwork, loose belts, machine vibration, coarse grain, or a warped board changing focus height across the job. Refocus carefully, tighten belts, use vector artwork, and choose fine-grain wood for small text.
Check the surface with a straightedge before engraving a photo or fine logo. A bowed plywood sheet can move in and out of focus enough to make one corner sharp and the opposite corner soft.
Uneven Depth
Uneven depth can come from plywood glue layers, knots, moisture, warped blanks, inconsistent grain density, or poor workholding. Clamp the wood flat, run a material test grid, use better plywood, and add passes rather than overpowering the first pass.
On CNC projects, surface the spoil board and probe the workpiece before carving fine lettering. A board that’s tilted by a small amount can make a V-bit carve deep on one side and barely scratch the other.
Smoke Staining
Smoke staining shows up as a brown haze around the engraving, especially on pale wood. Clean the honeycomb bed, improve exhaust, use air assist, mask the surface, raise speed, and wipe residue before applying oil or finish.
Don’t oil too soon because finish can lock soot into the pores and make a pale board look dirty. Brush, vacuum, wipe with a suitable cleaner, dry fully, then finish after the surface looks clean under angled light.
Rotary Chatter
Rotary chatter sounds like a harsh buzzing jump and leaves scalloped marks in the cut. It usually means the workpiece moved, the bit is dull, the speed is too high or too low, or you’re pressing harder than the bit can cut.
Fix chatter by clamping the board, using a sharper carbide or diamond bit, making shallow passes, and bracing both hands. For finishing tool marks after carving, a dedicated sanding machine can speed cleanup on larger sign blanks.
Brand and Support
Brand support matters more after the first month than during unboxing. Compare warranty terms, replacement part supply, controller compatibility, software support, community size, upgrade paths, enclosure quality, exhaust design, and access to lenses, mirrors, tubes, belts, boards, or diode modules.
Common brands include xTool, Glowforge, Ortur, Atomstack, Sculpfun, LaserPecker, Creality, OMTech, Monport, Thunder Laser, Boss Laser, Epilog, Trotec, Shapeoko, Inventables, Genmitsu, FoxAlien, Onefinity, and Avid CNC. A smaller machine with active support can beat a larger bargain unit if parts take weeks to find.
Final Checklist
Use this checklist before buying wood engraving equipment so the machine fits the work, the room, and the real cost of safe operation.
- Match the tool to the project: pen for simple marks, rotary for hand carving, laser for repeatable surface artwork, CNC for deep relief.
- Check the real working area against your largest blank, not just your design size.
- Confirm optical laser power, not just electrical input wattage.
- Budget for ventilation, enclosure, air assist, dust collection, safety glasses, clamps, and replacement parts.
- Check software compatibility with LightBurn, LaserGRBL, RDWorks, brand software, VCarve, Easel, Carbide Create, or Fusion 360.
- Start with basswood, maple, birch plywood, cherry, or bamboo before testing difficult woods like oak and dark walnut.
- Avoid PVC, vinyl, pressure-treated lumber, unknown coatings, and mystery finishes.
- Plan maintenance time for optics, belts, filters, bits, burrs, spoil boards, and honeycomb beds.
- Run test grids on every new wood batch before engraving finished pieces.
- Buy from a brand or seller that can supply support, parts, and setup guidance.
Best overall choice: beginners should start with a handheld engraver or rotary tool for simple practice, choose a diode laser for repeatable digital craft work, move to CO₂ for faster production, and pick CNC for deep carved wood signs. That path avoids the most common mistake: buying a machine before defining the type of engraving you actually need.
FAQs
What Equipment Is Needed To Engrave Wood?
You need an engraving tool, a stable work surface, and the right safety gear to engrave wood.
For hand engraving, a wood burner, rotary tool, or carving tools may work well. For laser engraving, you also need software, ventilation, and a machine that matches your project size.
What Is The Best Wood Engraving Equipment For Beginners?
The best wood engraving equipment for beginners is usually a simple laser engraver or a basic wood burning kit.
These options are easier to learn, safer to control, and better for small projects. A beginner-friendly setup should also include test wood, masking tape, and proper ventilation.
Is A CO₂ Laser Or Diode Laser Better For Wood?
A CO₂ laser is usually better for wood if you want faster cutting and deeper engraving.
A diode laser is often cheaper and easier for beginners, making it a good choice for lighter engraving jobs. The best option depends on your budget, project size, and how often you plan to use it.
How Much Does Wood Engraving Equipment Cost?
Wood engraving equipment can cost anywhere from under $50 to several thousand dollars.
Hand tools and wood burning kits are the most affordable, while diode and CO₂ laser machines cost more. Your final price depends on the machine type, power level, and included accessories.
Do You Need Ventilation For Wood Laser Engraving?
Yes, you need ventilation for wood laser engraving.
Laser engraving creates smoke, fumes, and fine particles that should be removed from your workspace. A fume extractor, exhaust fan, or well-ventilated area helps protect your health and keeps the machine cleaner.
Affiliate Disclosure: Some links in this post are affiliate links. If you make a purchase through these links, we may earn a small commission at no extra cost to you. We only recommend products we genuinely believe in.