


A chair rail is horizontal wall molding that divides a wall into visual zones and may protect it from furniture. This guide explains height, styles, materials, costs, installation methods, and fixes for uneven walls.
Table of Contents
What Is a Chair Rail?
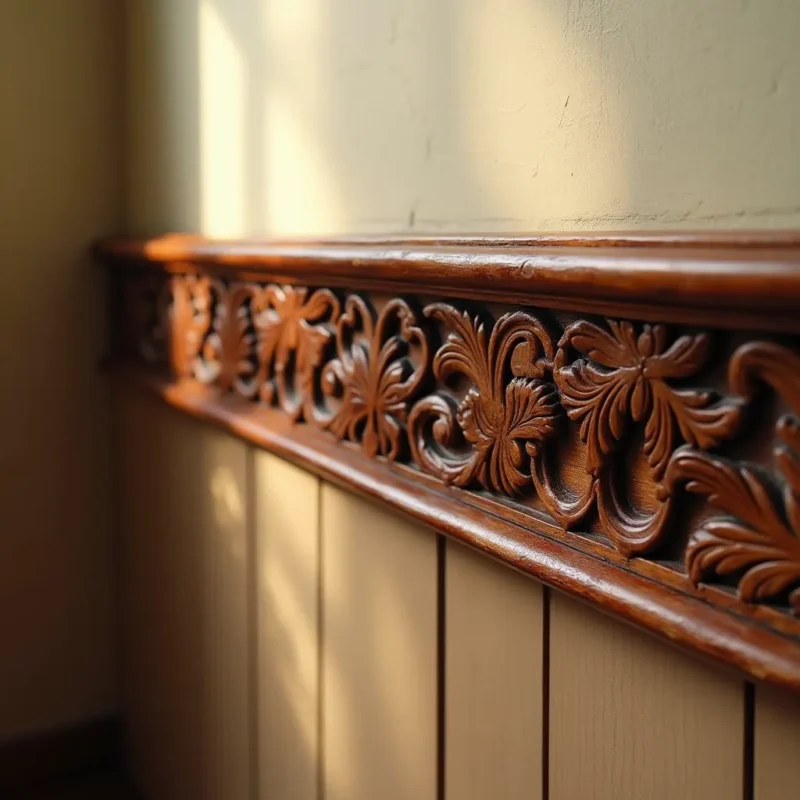
A chair rail is a horizontal strip of decorative molding installed around all or part of a room. It can intercept chair backs, separate wall finishes, cap lower paneling, or add architectural detail to a plain wall.
Practical and Decorative Uses
A functional rail must meet the chair’s actual contact point and project farther from the wall than the chair back. A narrow strip installed at an arbitrary height may look attractive yet provide no protection at all.
In dining rooms, the molding can take the dull tap and scraping pressure that would otherwise mark painted drywall. The best protective arrangement combines a projecting profile with a washable lower-wall finish, since chair legs, shoes, and vacuum heads can still strike below the rail.
Decorative chair rail creates a clean transition between two paint colors, paint and wallpaper, or a smooth upper wall and paneling below. It also gives artwork and furniture a visual reference line, which can make an unfurnished room feel more ordered.
Chair Rail Versus Wainscoting
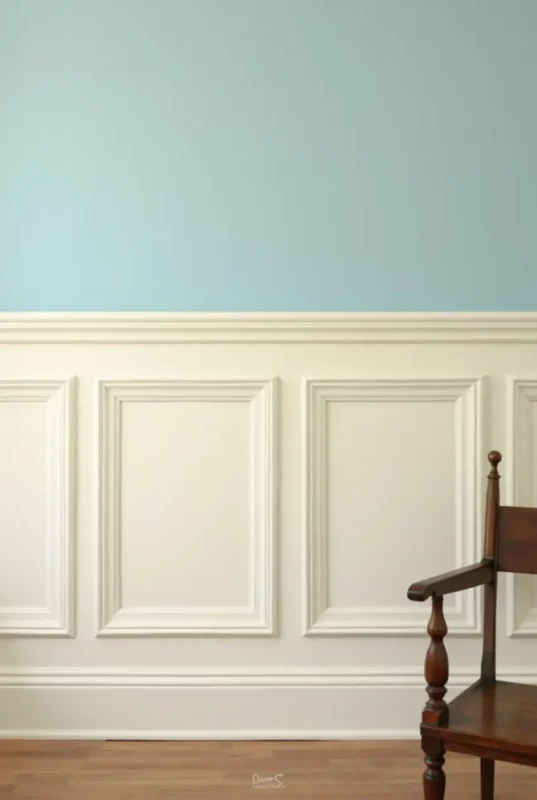
A chair rail is the horizontal molding itself. Wainscoting is the larger lower-wall treatment, which may include beadboard, raised panels, battens, flat panels, or applied rectangular frames.
The two features can appear together or separately. A rail often serves as a wainscot cap, but a standalone chair rail doesn’t turn the painted area beneath it into paneled wainscoting.
Dado rails and wainscot caps: “Dado rail” is a common architectural term for molding positioned above the lower portion of a wall. A dedicated wainscot cap often has a rabbet or groove that overlaps panel material, while ordinary chair rail molding usually has a flat back.
Wall protection requirements: No universal rule requires chair rail in an ordinary room. Where impact resistance matters, measure the furniture, check the profile’s projection, and choose a lower-wall coating that can tolerate cleaning rather than relying on molding alone.
How High Should Chair Rail Be?

Most chair rails sit 30–36 inches above the finished floor, measured to the top edge of the molding. That range is a starting point rather than a code requirement; wall proportion, furniture contact, and nearby architectural lines can justify another height.
30–36-Inch Height Range
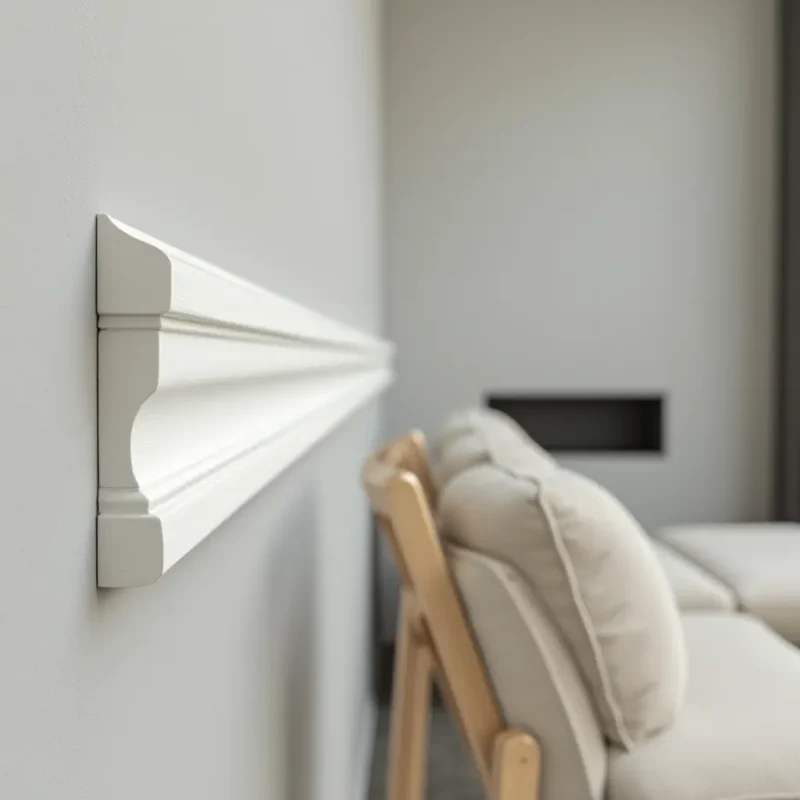
The familiar 32-inch placement works well on many eight-foot walls because it falls near one-third of the wall height. A 36-inch rail can suit taller rooms or high-backed dining chairs, but a wide molding centered at that mark will extend above and below it.
Pick one measurement reference before marking the room: top edge, bottom edge, or profile centerline. The top edge is easiest to check with a laser, while the bottom edge can help when the rail caps panels cut to a fixed height.
Ceiling Height Placement Table
| Ceiling height | One-third calculation | Practical interpretation |
|---|---|---|
| 8 feet or 96 inches | 32 inches | Common chair rail starting point |
| 9 feet or 108 inches | 36 inches | Works with many dining chairs |
| 10 feet or 120 inches | 40 inches | May read as a wainscot cap |
| 12 feet or 144 inches | 48 inches | Usually needs furniture and architectural checks |
One-third wall method: Dividing wall height by three produces a useful visual baseline. It shouldn’t force a 48-inch rail into a tall room where chair backs strike at 34 inches or where the high line cuts awkwardly through windows and switches.
Actual-chair measurement method: Put the intended chair on the finished floor, including its rug and floor pads, then slide it gently toward the wall. Measure the highest and farthest point of contact; you can often feel a rounded chair back touch drywall before the seat reaches its normal resting position.
Baseboard thickness changes that contact geometry. A thick baseboard keeps the rear legs away from the wall, while an angled chair back may still arc over a shallow rail, so test height and projection together.
Architectural alignment method: Compare the proposed line with window stools, door handles, countertops, built-ins, fireplace shelves, and stair trim. Two horizontal lines missing each other by an inch often look accidental; a clear separation usually reads better than an almost-match.
Room-specific height choices: Dining rooms benefit from actual-chair measurements. Hallways need shallow profiles, bedrooms should account for headboards, bathrooms need moisture-safe materials, and stair installations require a planned sloped transition rather than a forced horizontal line.
Painter’s tape mockup: Run low-tack tape around the full room and view it while standing and seated. Morning and side lighting reveal dips that disappear under overhead light, and a full perimeter mockup gives a truer impression than a short sample beside one door.
Chair Rail Ideas and Styles
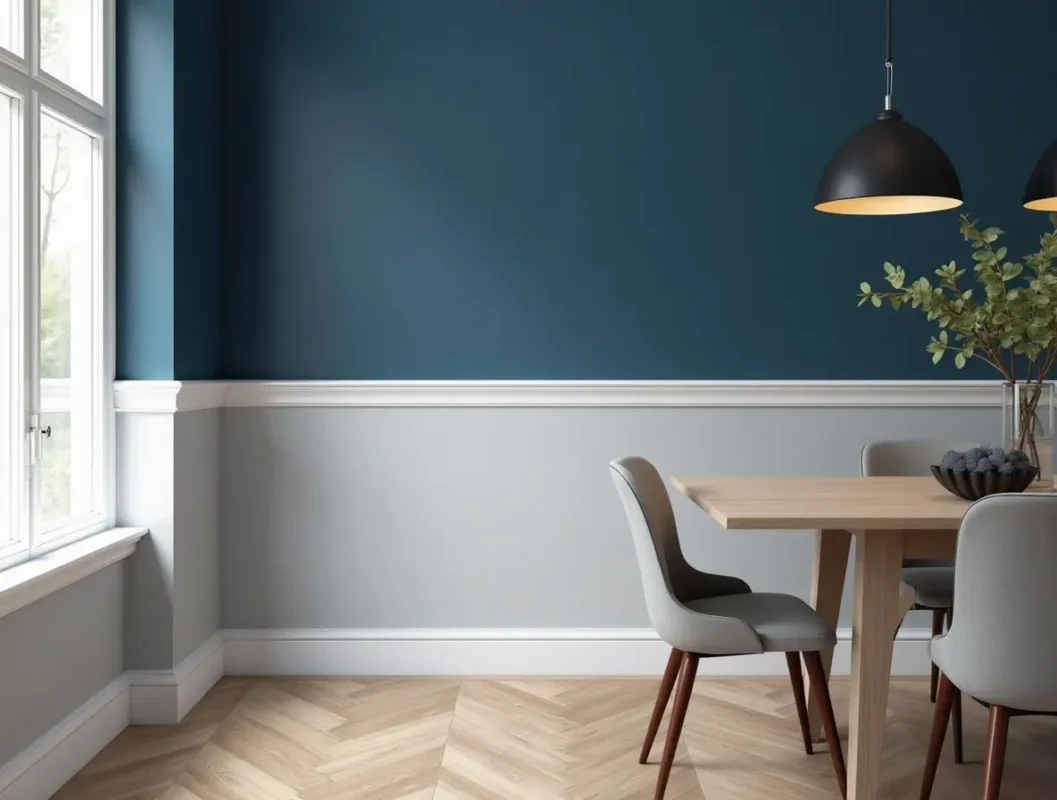
Strong chair rail ideas use profile, color, and proportion as one composition. Modern rooms favor restrained strips and same-color paint, while traditional rooms can support deeper molded profiles, wallpaper, and paneled lower walls.
Modern Chair Rail Ideas

Modern chair rail ideas include square-edged flat stock, a slim half-round strip, double horizontal bands, or molding painted exactly like the wall. A low-contrast finish leaves a shallow shadow line rather than breaking the room into unrelated colors.
For an accent feature wall, continue the rail across applied rectangular frames or use it as the top boundary of vertical battens. Plan the design around outlets and wall edges so it doesn’t finish with narrow, awkward fragments.

Metal strips and pipe-like profiles can suit industrial interiors, though their exposed edges and mounting hardware need careful treatment. Deep metal projections in a narrow passage can snag clothing, so reserve them for wide rooms or a controlled accent wall chair rail.
Are chair rails outdated? No. A chair rail can look dated when a highly ornate white profile separates two unrelated colors, yet simple molding, monochromatic paint, and orderly panel layouts fit contemporary interiors.
Traditional Chair Rail Styles

Traditional chair rail styles use beads, coves, ogees, and rounded upper edges. Colonial and Federal rooms tend to suit controlled profiles, while Victorian treatments can carry deeper carving and a broader visual band.
Two-tone paint ideas: A darker lower wall hides minor scuffs and gives the room visual weight. A darker upper wall draws the eye upward, while the same color in two sheens creates separation without a sharp color break.
Accent feature walls: A chair rail doesn’t need to wrap every room. Ending it on one wall can work if the termination meets an inside corner, casing, built-in, or returned end rather than stopping as a raw square cut.
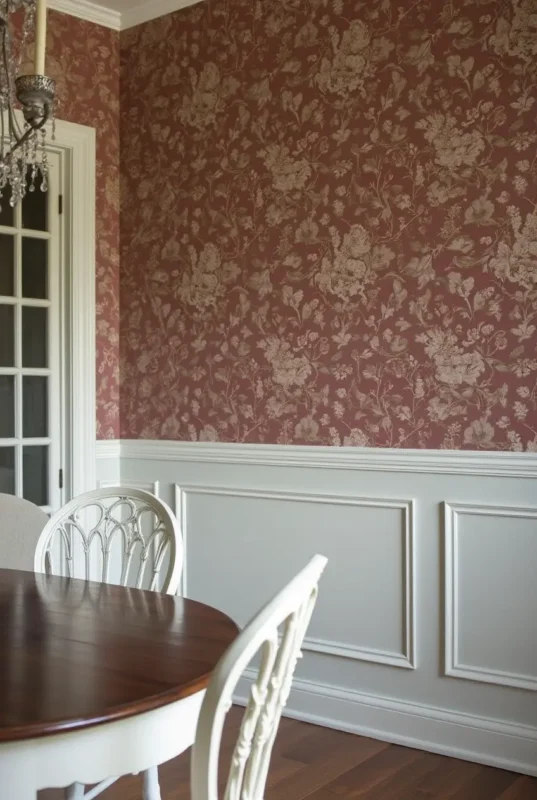
Chair rail and wallpaper: Wallpaper commonly sits above a painted lower wall, though reversing the arrangement can create a rich dado effect. Trim and adhere the wallpaper edge properly before covering it; molding shouldn’t act as the only restraint holding loose paper in place.
Wainscoting and panel molding: Lay out every rectangular frame before installing the rail. Equal frame widths aren’t always possible, but consistent margins around doors, corners, and outlets matter more than forcing identical dimensions across walls of different lengths.
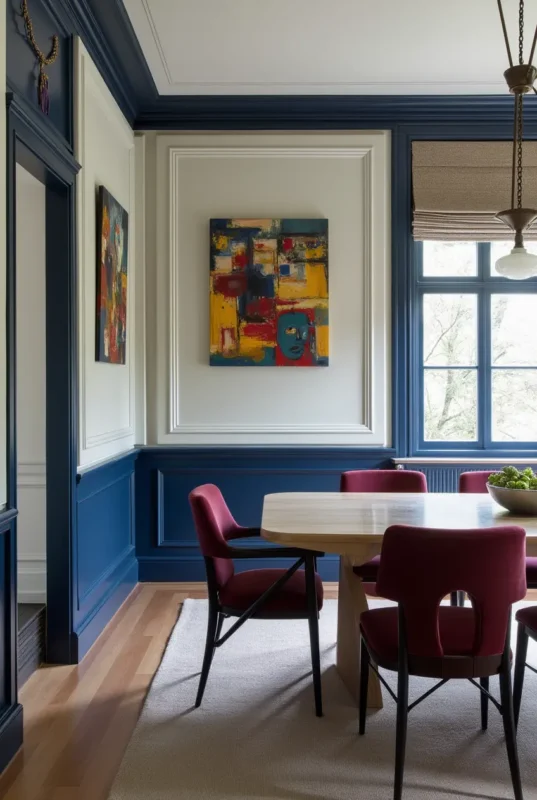
Monochromatic chair rails: Painting the molding and wall deep navy, muted green, or warm off-white lets the profile show through light and shadow. Use a tougher trim sheen if chairs touch it, but expect a visible sheen shift under side lighting.
Small-room proportions: A high, strongly contrasting rail can make a low room feel shorter. Keep the line near the lower third, reduce profile depth, and limit color contrast when the room is narrow or crowded with furniture.
Baseboard and casing coordination: Chair rail doesn’t have to match other trim exactly, but the profiles should share a similar level of detail. Compare its projection with nearby baseboards and casing before buying stock.
Choosing Chair Rail Materials and Profiles

Choose chair rail material by moisture exposure, finish, curvature, and installation method. Wood offers crisp joinery, MDF provides a smooth paint surface, PVC and polyurethane tolerate damp conditions better, and flexible TPE follows gentle curves.
Material Comparison Table
| Material | Best use | Main benefit | Common risk |
|---|---|---|---|
| Solid wood | Painted or stained rooms | Crisp cuts and authentic grain | Humidity movement |
| Finger-jointed pine | Paint-grade trim | Economical and often primed | Joints may show through thin paint |
| MDF | Dry interior rooms | Smooth, consistent profile | Swollen raw edges after wetting |
| PVC | Bathrooms and utility areas | Strong moisture tolerance | Thermal movement and paint limits |
| Polyurethane | Detailed architectural profiles | Lightweight and moisture resistant | Dents and product-specific joint work |
| Flexible TPE | Gentle curves and quick updates | Bends without woodworking tools | Bond failure or less-crisp detail |
Solid wood and finger-jointed pine: Pine, poplar, oak, and maple can be coped and adjusted with common trim tools. Clear hardwood suits stain, while factory-primed pine board and finger-jointed stock make more sense under paint.
Wood feels firm and warm under a sanding block, and its crisp edge stays readable after several paint coats. Leave long pieces in the room before installation where the supplier recommends acclimation, then seal cut ends and avoid forcing bowed stock flat with oversized fasteners.
MDF benefits and moisture risks: MDF machines into smooth profiles and paints evenly, but exposed cuts can drink in primer and swell after water contact. Seal every cut, keep it away from regular splashing, and review this guide to MDF trim before using it in a bathroom.
Cutting MDF creates fine dust that hangs in the air and leaves a dry, powdery feel on exposed skin. Use tool-connected extraction, eye protection, and respiratory protection suited to the task; the OSHA wood dust guidance explains respiratory and other workplace hazards.
PVC and polyurethane profiles: These materials resist moisture better than standard MDF and come in plain or deeply molded shapes. Check the maker’s adhesive, filler, primer, paint, joint-gap, and temperature instructions because products that look similar may require different finishing systems.
Flexible TPE trim: TPE can follow bowed walls and broad curves that rigid molding can’t. Tight bends can distort beads, wrinkle the profile, or pull the adhesive loose, so tape a dry sample around the curve and inspect it from both directions first.
Profile Scale and Projection
Profile height controls visual weight, while wall projection determines whether the rail can intercept a chair. A three-inch-wide molding that projects only half an inch may fail against a curved chair back, while a smaller rounded profile can provide better contact.
Hold a full-size sample beside the casing rather than choosing from a small online image. Deep chair rail that extends past thin casing needs a return, transition block, or shaped termination; otherwise, the exposed end grain or hollow profile remains visible.
Flexible self-adhesive options: These products suit gentle curves and installations without a nailer. Clean the surface, let it dry, check paint cure time, and position the full run with temporary tape before exposing any adhesive.

Flexible Self-Adhesive Chair Rail Trim
- Twenty feet of versatile trim
- Self-adhesive backing for simple installation
- Flexible design follows gentle curves
- Adds dimension to walls and frames
- Ideal for DIY chair rail updates
 Buy on Amazon
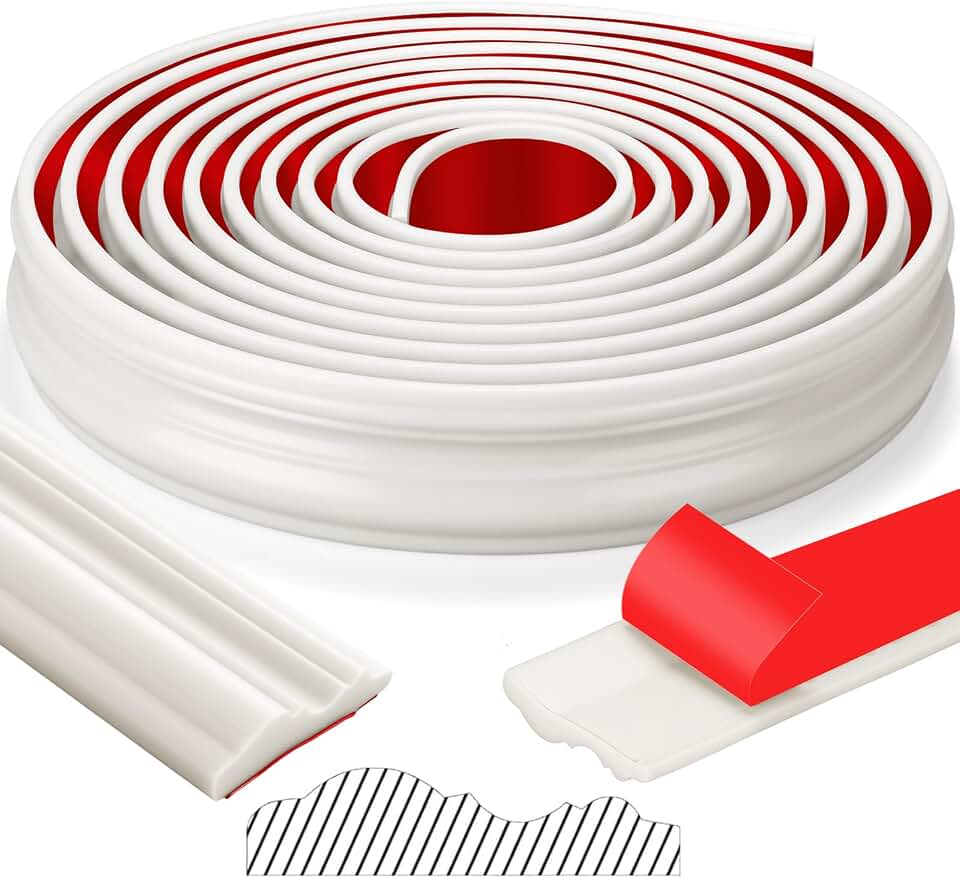
Stylish Flexible Chair Rail Molding
- Long roll covers up to 19.7 feet
- Flexible trim works on walls and edges
- Adhesive backing enables fast installation
- White finish delivers a clean classic look
- Helps protect walls from chair scuffs
Buy on Amazon
Paintable peel-and-stick options: Test primer and paint on an offcut, then bend it to the expected radius after the coating cures. A brittle coating may show hairline cracks when the trim flexes, while heavy paint can soften small profile details.

Paintable Peel-and-Stick Wall Molding
- Paintable white finish suits custom decor
- Peel-and-stick application saves installation time
- Wide profile creates a defined chair rail
- Works for wainscoting panel layouts
- Lightweight trim is easy to handle
Buy on Amazon

Slim Peel-and-Stick Chair Rail Trim
- Slim profile gives walls a subtle finished edge
- Peel-and-stick backing simplifies DIY projects
- Lightweight material is easy to cut and position
- Useful for chair rails and panel details
- White surface complements many interiors
Buy on Amazon

Paintable TPE Chair Rail Molding
- Strong self-adhesive backing holds securely
- Paintable white surface supports custom color
- Flexible TPE material handles curved details
- Long 240-inch roll suits larger projects
- Adds polished definition to walls
Buy on Amazon
Primed architectural profiles: Factory-primed urethane works well where a permanent installation and deeper traditional detail are wanted. Check piece length and freight before comparing prices, since oversize shipping can cost more than an apparently cheaper profile saves.

Bedford Primed Chair Rail Two-Pack
- Classic Bedford profile adds traditional detail
- Factory-primed surface is ready for paint
- Two-pack covers longer wall runs
- Durable urethane resists common moisture concerns
- Three-inch height makes a bold wall transition
Buy on Amazon

Federal Primed Chair Rail Two-Pack
- Federal profile offers timeless wall detail
- Factory primer helps speed up finishing
- Two-piece set supports longer installations
- Durable urethane is lightweight and moisture resistant
- Narrow profile suits refined traditional rooms
Buy on Amazon

Simon Primed Chair Rail Molding
- Substantial profile creates a dramatic wall accent
- Factory-primed for a paint-ready surface
- Durable urethane offers lasting performance
- Moisture-resistant construction suits varied rooms
- Long piece works well for continuous runs
Buy on Amazon
Measuring and Budgeting Chair Rail
Measure chair rail in linear feet, subtract openings where the trim stops, then add 10% waste for a simple room or at least 15% for complex layouts. Convert every product’s piece price into price per linear foot before comparing materials.
Linear-Foot Formula
The basic formula is: wall lengths receiving molding minus omitted openings, multiplied by the waste factor. Measure each wall separately rather than trusting room dimensions, since alcoves, chimney breasts, and built-ins can change the installed perimeter.
12-by-14-foot room example: The perimeter is 12 + 14 + 12 + 14 = 52 feet. Subtract a four-foot door opening to reach 48 feet, then multiply by 1.10 for 52.8 feet; buy at least 53 feet, rounded to available stock lengths.
Waste allowance: Ten percent usually covers a rectangular room with straightforward painted trim. Use 15% or more for many corners, directional patterns, uncertain cuts, stain-grade work, or pieces too short to accept useful scarf joints.
Stock-length planning: Sketch each wall and assign 8-, 10-, or 12-foot pieces before ordering. A room that needs 53 installed feet may require 56 or 64 purchased feet because leftover sections can’t always be joined attractively.
Cost Per Linear Foot
Divide each piece price by its stated length. A $24 eight-foot piece costs $3 per linear foot before tax, delivery, waste, adhesive, fasteners, filler, caulk, primer, paint, and tools.
| Material category | Planning range per linear foot | 53-foot molding example |
|---|---|---|
| Simple MDF or finger-jointed molding | $1–$5 | $53–$265 |
| Paint-grade solid wood | $2–$8 | $106–$424 |
| Hardwood or detailed profiles | $6–$20+ | $318–$1,060+ |
| PVC, polyurethane, or flexible profiles | $3–$15+ | $159–$795+ |
Material cost ranges: These figures are broad planning allowances, not retailer quotes. Profile depth, species, finish, region, stock length, and freight can move a product outside its material category’s range.
Complete project costs: Add blades, adhesive, nails, filler, caulk, sandpaper, primer, paint, tool rental, delivery, wall repair, and disposal. Buying inexpensive molding rarely saves money if short lengths create extra seams and unusable offcuts.
DIY versus professional installation: DIY is attractive when you own a saw, level, nailer, and painting tools. Paid installation becomes more useful for historic plaster, stairs, stain-grade hardwood, deep profiles, curves, or rooms with numerous out-of-square corners.
Ask contractors to separate materials and labor and state the measured footage, number of corners, wall preparation, painting, furniture moving, and disposal. This makes estimates easier to compare and exposes allowances that might later become change orders.
How to Install Chair Rail

Install chair rail by mocking up the height, marking a consistent reference line, pre-finishing the stock, cutting test joints, fastening safely, and filling and painting after installation. The most common beginner errors are assuming square corners and measuring repeatedly from an uneven floor.
Tools and Supplies
- Tape measure, pencil, laser level or spirit level, and painter’s tape
- Stud finder with live-wire detection where suitable
- Miter saw or miter box and a coping saw for profiled wood
- Finish nailer, brad nailer, or hammer with suitable fasteners
- Material-compatible construction adhesive and caulk gun
- Wood filler or manufacturer-approved patching compound
- Paintable caulk, sandpaper, primer, and trim paint
- Eye, hearing, and respiratory protection suited to the work
Keep several short offcuts for test cuts. A scrap with a 44-degree cut can reveal an out-of-square corner without shortening the finished piece, and two opposing scraps show whether the profile faces align before you approach the saw with full-length molding.
Safe layout and pre-finishing: Establish one level reference line, then compare it with floors, ceilings, windows, and built-ins. Prime and apply the first finish coat before installation, leaving joint filling, caulking, and the final coat until the rail is fixed.
A perfectly level laser line can expose a visibly sloping ceiling in an old room. Stand at the main entrance and judge the taped line from across the space; a slight visual adjustment may look straighter than a mathematically level rail, but document the change before cutting panels below it.
Inside and Outside Corners
Inside corners: Two 45-degree miters often open where walls aren’t square. For profiled wood, run one piece square into the corner and cope the second piece over its face; a slight back-bevel lets the visible edge seat tightly.
Outside corners: Measure or test the actual angle rather than assuming 90 degrees. Divide the corner angle between the two cuts, use scrap first, and glue vulnerable outside miters where the molding maker permits it.
Coping, miters, and returns: A return folds the profile back into the wall where the rail ends without meeting casing. Cut and glue the small return at the bench, since holding a thumbnail-sized piece beside a moving blade is unsafe.
Scarf joints for long runs: Join long walls with overlapping angled cuts rather than square butt joints. Place the seam over framing where practical and orient the overlap so the joint edge is less visible from the main doorway.
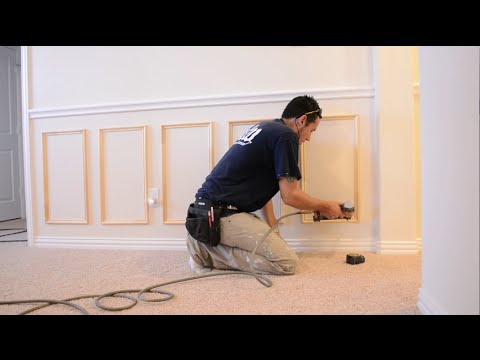
Fastening without utility damage: Check for studs, outlets, plumbing fixtures, HVAC registers, and protective metal plates. Don’t drive unnecessarily long nails blindly into walls, and never defeat a metal plate that may shield wiring or pipework.
Adhesive-only installation: Adhesive works best on clean, sound, dry, compatible coatings. Gloss, grease, dust, wall texture, chalky paint, low temperatures, and uncured paint can weaken the bond; removal may tear paint and drywall paper.
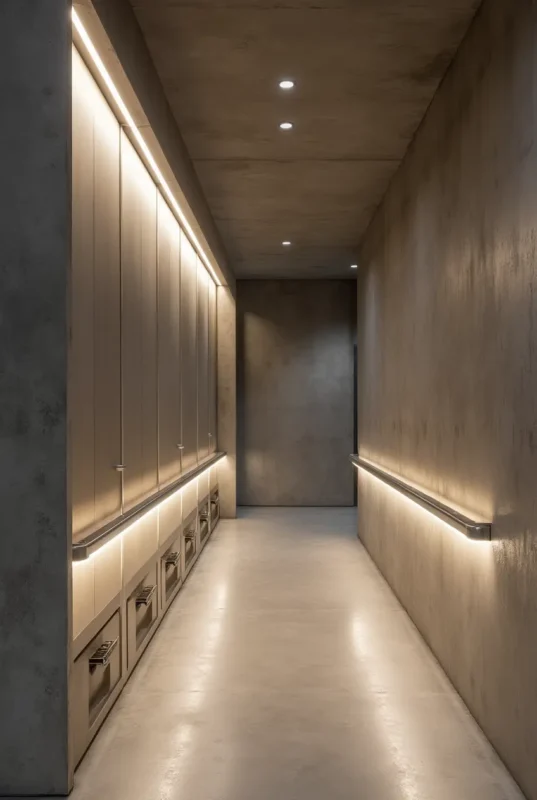
Illuminated or hollow rail systems require a planned route for drivers, cable access, ventilation, and service. Electrical work must follow local requirements, and the lighting components should remain accessible rather than being sealed permanently behind glued molding.
Filling, caulking, and painting: Use filler on nail holes and appropriate joints, then use paintable flexible caulk only for narrow wall-to-molding gaps. Thick caulk can’t rescue a poorly cut corner and tends to shrink into a soft, visible groove.
Prime bare surfaces and repairs, then apply thin finish coats. Paint may feel dry within hours yet remain soft below the surface, so keep chair backs away until the coating reaches the manufacturer’s stated full cure time.
Lead paint and plaster safety: Homes built before 1978 may contain lead-based paint. Cutting, sanding, or removing painted trim can release hazardous dust, so consult the EPA Renovation, Repair and Painting Program and applicable local rules before disturbing suspect coatings.
Plaster can fracture beyond a nail or drill point and may conceal lath that changes fastening behavior. Use methods suited to the wall assembly, predrill where needed, and avoid treating brittle plaster like modern drywall.
Fixing Common Chair Rail Problems
Most chair rail problems come from uneven surfaces, weak bonds, poor termination planning, or moisture movement. Diagnose the cause before filling gaps; cosmetic patching over loose molding usually cracks again.
Wavy Walls and Floors
Don’t measure the rail height from the floor at every few feet. Set a level reference, identify the worst wall waves, and use selective adhesive, fastening, scribing, or a slight back-bevel rather than bending rigid molding until the profile twists.
A long straight rail can bridge shallow drywall hollows. Pulling every hollow tight may make the face look rippled, so keep the visible edge straight and caulk only the narrow gaps the material and finish system can tolerate.
Misaligned architectural lines: If the rail nearly meets a windowsill or built-in line, move it into clear alignment or create a purposeful gap. Where changing the full-room height isn’t practical, use a transition block or terminate the rail at casing.
Out-of-square corners: Cut two short test pieces and adjust each half-angle in small steps. A gap at the face calls for a different correction than a gap at the wall side, so mark test scraps before changing the saw setting.
Casing and termination conflicts: When chair rail projects beyond door or window casing, don’t leave its square end exposed. Use a return, plinth-like transition block, tapered end, or a thinner profile suited to the existing trim package.
Adhesive Bond Failures
Peeling adhesive trim usually points to dust, grease, textured paint, low application temperature, humidity, uncured paint, excessive curve tension, or repositioning after first contact. Remove failed residue using a method compatible with the wall finish, then test a short fresh sample.
Press flexible trim with even hand pressure rather than stretching it along the wall. Stretched material tries to recover its original length and can lift at ends and corners several days later, often leaving a faint sticky edge that catches dust.
Moisture and material movement: Swollen MDF normally needs replacement once the profile has softened or mushroomed. Seal raw replacement ends, correct the moisture source, and use PVC or polyurethane where repeated dampness is likely.
Wood joints can open seasonally as indoor humidity changes. Use properly conditioned stock, sound scarf joints, and flexible wall-edge caulk, but don’t fill a moving structural joint with a hard compound that will crack or push loose.
Curved walls and stairways: Flexible trim suits broad curves, yet beads and coves may deform on tight radii. Stairways add sloped cuts and plane changes; mock up full-size transitions before ordering long runs or cutting expensive architectural profiles.
Removal and wall damage: Score paint and caulk lines before prying nailed molding. Work from one end with broad protection behind the pry tool, locate fasteners, and expect strong construction adhesive to remove drywall paper or wallpaper with the rail.
The most reliable real-world workaround is to build a short sample assembly before committing: wall finish, adhesive or fastener, molding, filler, caulk, primer, and paint. Let it cure, test the bond, bend painted flexible trim, and check how the profile reacts to side light and chair contact.
FAQs
What Is The Standard Height For A Chair Rail?
The standard chair rail height is 32 to 36 inches above the floor. This range works well in most rooms with eight-foot ceilings and aligns with the traditional purpose of protecting walls from chair backs. For taller ceilings, many installers use a height about one-third of the wall height for balanced proportions.
Are Chair Rails Out Of Style?
Chair rails are not out of style when they suit the room’s architecture and design. They remain popular in dining rooms, entryways, and traditional homes, but can also look modern with simple profiles and matching paint. A clean installation and intentional color choice help the trim feel current rather than dated.
Does Chair Rail Make A Room Look Smaller?
Chair rail does not automatically make a room look smaller. A rail installed too high or painted in a strong contrasting color can visually divide the wall and lower the apparent ceiling. Keeping it near the traditional one-third wall height and using similar colors above and below it creates a more open, balanced look.
What Is The Difference Between Chair Rail And Wainscoting?
A chair rail is a single horizontal molding, while wainscoting is decorative wall paneling installed below it. Chair rail can be used alone to protect or define a wall, whereas wainscoting adds a larger finished treatment such as beadboard, raised panels, or board-and-batten. Many designs use a chair rail as the top edge of wainscoting.
Can Chair Rail Be Installed Without Nails?
Chair rail can be installed without nails by using a strong construction adhesive designed for trim. Adhesive works best on clean, flat, painted drywall or smooth surfaces, but it can be harder to remove later without damaging the wall. For the most secure and removable installation, professionals often combine adhesive with finish nails.
Affiliate Disclosure: Some links in this post are affiliate links. If you make a purchase through these links, we may earn a small commission at no extra cost to you. We only recommend products we genuinely believe in.


What are the paint colors in #3
The top is a teal-toned navy, the bottom is a light gray, and the trim is crisp white.