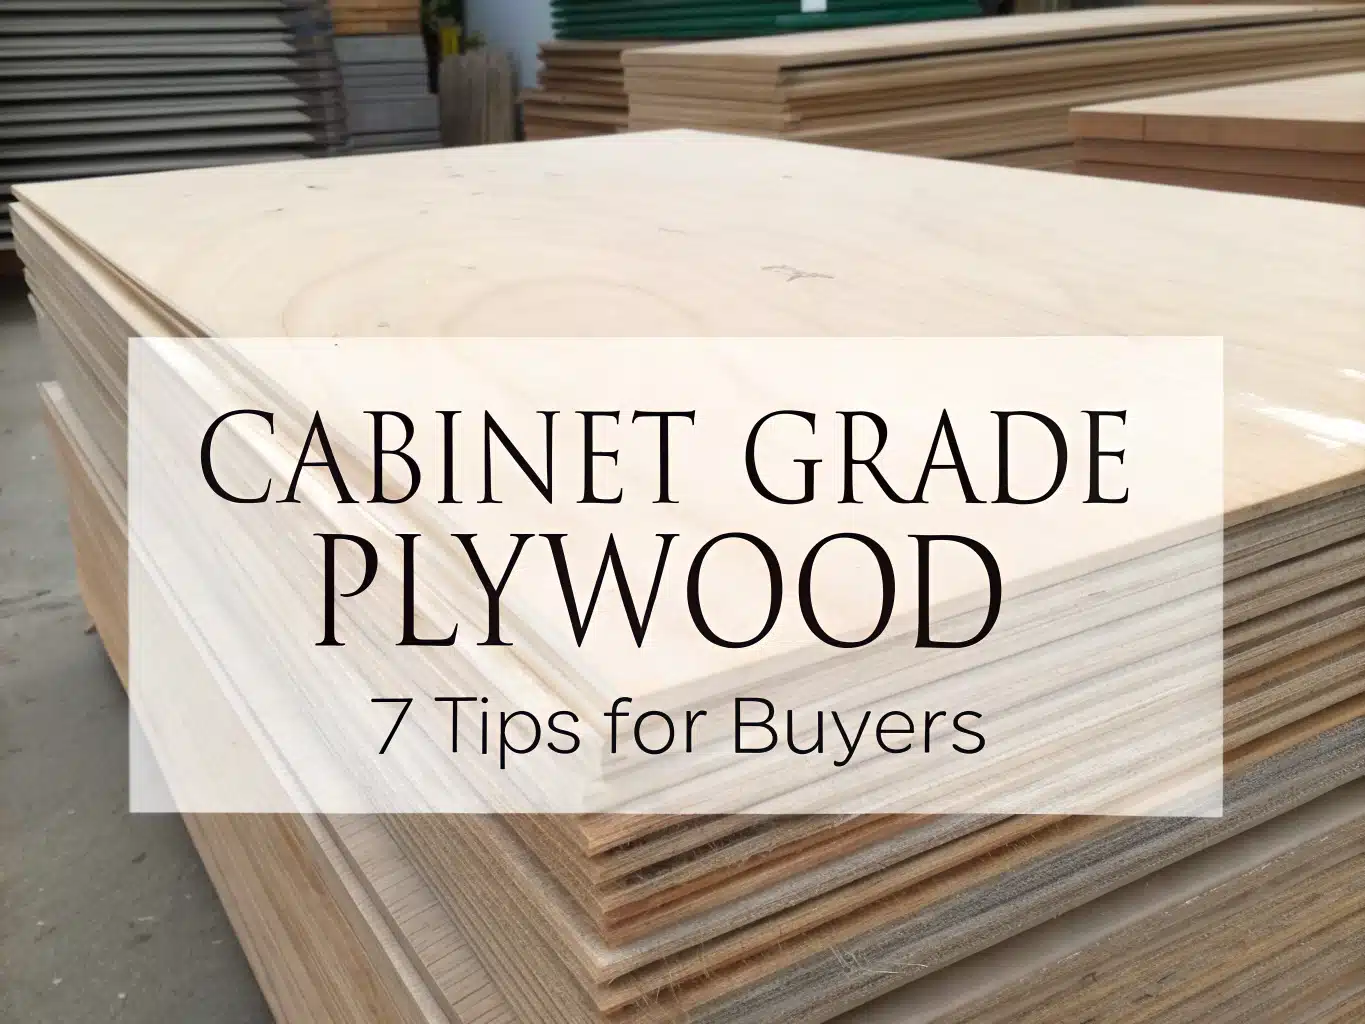
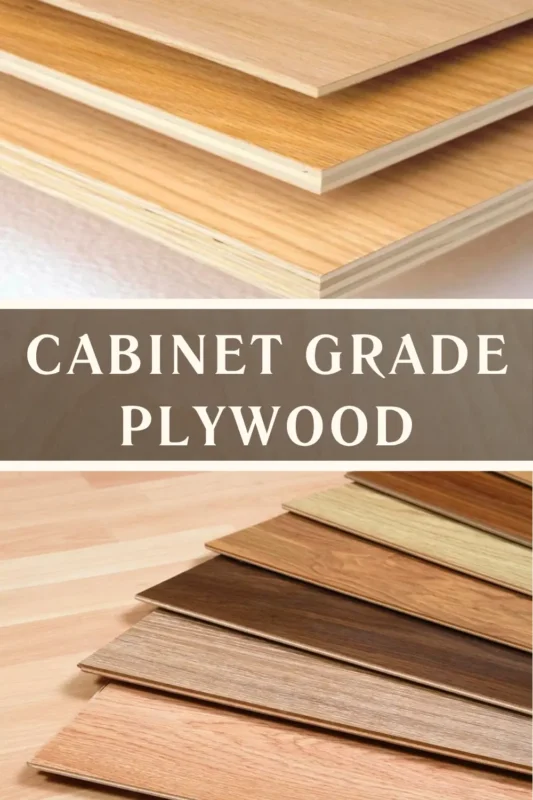
Cabinet grade plywood is hardwood plywood made for furniture and cabinets, with a smooth face veneer, a flatter core, and fewer defects than construction panels. In plain terms: it’s the plywood you can sand, finish, and put in a kitchen without fighting knots, deep voids, or ripples telegraphing through paint.
Table of Contents
This guide breaks down what is cabinet grade plywood, how cabinet plywood grades are labeled, which cores behave best, and what actually goes wrong in the shop when you pick the wrong sheet.
What is cabinet grade plywood?
Cabinet-grade definition
Cabinet-grade usually means a hardwood plywood panel with a furniture-friendly face veneer (maple, birch, oak, cherry) over a core that’s made to stay flatter and finish cleanly. The face is sanded smooth, defects are limited, and the panel is intended for interior use where joinery and appearance matter more than rough structural duty.
In practice, the term isn’t regulated at retail. Two stacks can both be tagged “cabinet grade” while one has tight, clean veneers and the other has paper-thin faces that sand through after two passes with 180 grit. Treat “cabinet grade” as a starting claim, then verify grade stamps, core type, and face thickness with your eyes and hands.
Cabinet vs construction plywood
Construction plywood (often softwood panels like CDX) is built for sheathing and strength, not for a clean finish. You’ll feel it right away: raised grain, football patches, and a rougher surface that grabs your fingertips and drinks primer unevenly. Those defects can print through paint and can cause blowout when you route edges for cabinet parts.
Cabinet plywood cuts cleaner, routes with less fuzz, and takes finish more predictably. Cross-banded plies still give it strength, but the priority shifts to flatness, veneer quality, and consistent thickness so doors line up and drawer slides don’t bind after installation.
If you’re building shop cabinets or garage storage, construction panels can work, but plan on trade-offs: more filling, more sanding, and edges that crumble when you try to band them. For kitchen or bath work, that extra labor often costs more than stepping up to a real cabinet panel.
Key quality traits
Flatness is the first test. Stand a sheet on edge at the store and sight down it; a subtle bow becomes a warped cabinet run once it’s screwed to a wall. I also press down near corners—cheap cores can feel “spongy” where internal voids collapse under hand pressure.
Face veneer quality matters more than most beginners expect. A thin face looks great until you sand; then you hit glue line or core, and the spot turns dull and blotchy under clear coat. If you plan to stain, favor higher face grades and lighter sanding—let the mill’s sanding do the heavy work.
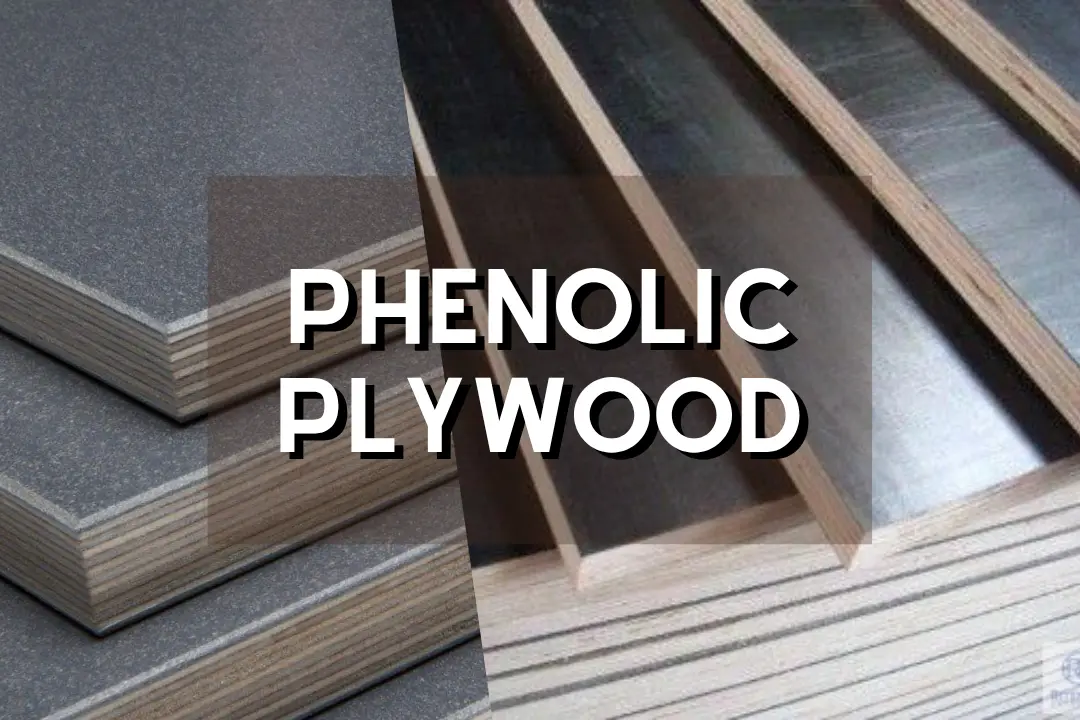
Core integrity shows up at the edges. Look for gaps and dark pockets; those voids can ruin pocket screws, leave weak hinge-side panels, and create ugly craters when you flush-trim. If you’ll expose edges on modern slab cabinets, void-free cores like Baltic birch or MDF-core can save hours of filling.
Cabinet plywood grades explained
A, B, C, D grades
A-grade faces are the cleanest: smooth, sanded, and meant for clear finishes where the surface stays visible. B-grade allows small repairs and tight knots that won’t jump out after paint or a light stain. C and D are where bigger knots, splits, and patches show up, so they belong in hidden areas.
A detail that matters at the bench: D-grade can allow large knots up to about 2.5 inches, which is why “one side good” shop sheets sometimes surprise people with crater-like defects on the back. That size allowance is commonly cited in plywood grade guides like What Are the Different Grades of Plywood?.
When you’re building cabinets, I treat C/D as “utility only.” Use it for toe-kicks, temporary jigs, or spacers—parts where a knot won’t split when you drive a screw close to an edge.
Face/back notation
Two letters describe most hardwood plywood: first letter is the face, second is the back (A/B, A/C, B/C). If the panel will show on both sides—like an end panel, open shelf, or a cabinet island back—pay for the second letter. A/B costs more than A/C, but it also means fewer patches on the “hidden” side that turns visible after a design change.
Watch for mislabeled stacks where the top sheet looks great and the rest don’t match. I’ll pull a sheet from the middle and check both faces in store lighting, because side-lighting reveals ripples and patch telegraphing that overhead warehouse lights hide.
A/B and B/BB
A/B is common for cabinet exteriors: one nicer face, one decent back. B/BB shows up constantly in Baltic birch. “BB” often means the back allows more patches (still sound and sanded), which is fine for drawer boxes, carcasses, and painted work where you want a consistent core and edges that look crisp after a round-over.
If you’re cutting parts for exposed-edge modern cabinets, B/BB can beat a flashy A-face on a cheaper core. The edge quality comes from the multi-ply structure, not from the prettiest veneer.
| Grade marking | What I use it for in cabinets | Common beginner mistake |
|---|---|---|
| A/A | Two-sided visible panels, slab ends, open shelving | Over-sanding and burning through the veneer |
| A/B | Cabinet sides, doors (if plywood doors), exposed ends | Assuming the “B” side never becomes visible |
| A/C | Carcasses where inside gets paint or stays hidden | Putting the C side inside a bright cabinet with lighting |
| B/BB | Baltic birch drawer boxes, CNC parts, exposed edges | Expecting a furniture-clear face on both sides |
| C/D | Toe-kicks, shop fixtures, hidden stretchers | Using it for doors or face panels |
AA architectural grade
AA-grade (often described as architectural) targets high-visibility interiors and premium millwork where both faces need to look close to perfect. I reach for it on large, uninterrupted surfaces—pantry ends, appliance panels, or built-ins with clear coat—because tiny veneer color shifts stand out across wide spans.
AA sheets can still fail if the core is weak. Don’t let a gorgeous face distract you from checking the edge for voids and checking flatness before you commit to long cabinet runs.
Core types in cabinet grade plywood
Veneer core
Veneer core uses layered wood veneers. It’s lighter than MDF-core and holds screws better, which matters for hinges, drawer slide screws, and attaching face frames. When I cut it on a table saw, a good veneer core sounds “crisp” and consistent; low-end cores sound hollow in spots and can kick back splinters at knots or voids.
Edge case: veneer core can telegraph slight core ripples into glossy finishes on big flat doors. If you’re building slab doors, I’ll often pick MDF-core or combination-core to keep the surface dead-flat under raking light.
MDF core
MDF-core plywood stays very flat and gives you a smooth surface under thin veneers. The trade-off hits the moment you machine it: the dust is ultra-fine and feels dry and chalky in your throat without strong extraction. It’s also heavier, so wrangling a full 4×8 onto a saw solo can strain your wrists and tweak corners.
Screw holding is the big risk for beginners. MDF-core can strip if you over-drive or place screws too close to the edge. A pro workaround is to pre-drill, use confirmat screws or euro screws where suited, and add glue blocks inside corners so fasteners aren’t doing all the work.
Combination core
Combination core mixes veneer plies with an MDF layer (or similar). You get better flatness than straight veneer core, with better screw holding than full MDF-core. It’s a solid middle choice for cabinet sides and interiors that need to stay true while still taking hardware without drama.
Common snag: combination cores can vary a lot by mill. If your dado stack is dialed in for one brand and you swap to another, the “same” 3/4-inch sheet might be a hair thinner, and your shelves will feel loose. Cut test dados from offcuts before you run production parts.
Ply count and voids
Ply count is a quick signal of stability. Many 3/4-inch cabinet panels are built with multiple layers (often cited around 7 plies), while Baltic birch tends to use more, thinner plies that resist warping and leave cleaner exposed edges. For deeper numbers and grading rules, I reference the HPVA / ANSI plywood guide (PDF) when I need to confirm what a stamp actually implies.
Voids are what wreck “perfect” cabinet work fast. Hit a void with a pocket screw and it can suddenly spin out with no bite. Hit one with a hinge cup near the edge and you can blow the veneer and leave a crater that won’t hide under paint. If you see repeated voids on the edge, step away from that stack or shift to a multi-ply birch panel meant for exposed edges.
For a visual check, I’ll trim 1/8-inch off a scrap edge and look at the cross section under light. A good core looks uniform; a bad one looks like a map of dark caves and glue pockets.
Thickness options for cabinet plywood
3/4-inch for boxes
3/4-inch is the go-to for cabinet boxes because it gives you stiffness, screw bite, and predictable joinery. Dados and rabbets are more forgiving at this thickness, and you’re less likely to see side panels “oil can” when you clamp. Many cabinet build specs call 3/4-inch the standard for carcasses, echoed in guides like Top 5 Cabinet Grade Plywood Types.
Beginner mistake: assuming “3/4” is always 0.750. Lots of sheet goods run under-thickness. I set dado width using calipers or a test fit from the actual panel, not the number on the shelf tag.
Contextual product example for smaller builds and prototypes: a half-sheet can be easier to handle on jobsite tools.
1/2-inch for shelves
1/2-inch works for cabinet backs in a dado, smaller uppers, and many shelves when spans are modest. The trade-off is sag: long runs loaded with dishes will creep. If I can’t add a front edge stiffener (solid wood nosing or a lipped edge), I’ll step up thickness or redesign the span with dividers.
Real-life tip: shelves fail at the front edge first. A 3/4-inch x 1-inch hardwood nosing glued on does more than people think, and it also protects veneer edges from that gritty “sandpaper rub” you feel when sliding plates across raw plywood.
1/4-inch for backs
1/4-inch is common for cabinet backs when the back sits in a rabbet or dado and the cabinet gets secured to studs. It’s light, easy to nail, and keeps the box square during assembly. For freestanding furniture, I’ll often bump backs thicker or add stretchers so the piece doesn’t rack when dragged across a floor.
Avoid the trap of stapling 1/4-inch to the back of a wide cabinet and expecting it to stop racking forever. If the cabinet will be moved (closets, shop storage), a captured back in a groove plus corner blocks holds shape far better.
Common sheet sizes
4×8 sheets are the default, but many cabinet suppliers stock 5×5 (common for Baltic birch), 4×10 for tall panels, and handy half sheets for small shops. If you want a deeper reference on nominal vs actual sizes and what’s common in stores, use this internal guide on plywood dimensions.
Planning tip: break full sheets down early. Carrying a full 3/4-inch panel feels awkward and “dead” in the hands; one corner bump can crater a veneer edge before you even make a cut. I rough-cut with a track saw, then joint final edges at the table saw or router table.
Hardwood species used for cabinet grade plywood
Birch and Baltic birch
Birch is a workhorse: tight grain, light color, and it paints cleanly without open pores. It also tends to look consistent across larger areas, which helps when you’re matching multiple cabinet runs.
Baltic birch is the upgrade people notice instantly at the saw: the blade sings a steadier pitch, and the edge comes off looking striped and clean instead of chipped and hollow. It’s popular for drawer boxes, CNC parts, and any design where you’ll leave edges visible. For a deeper look at specs and what makes it different, see this internal guide on Baltic birch.
Maple
Maple faces look clean and modern under clear coat, and they’re forgiving under paint. The grain is subtle, so seams and patches don’t shout the way they can on oak. That’s why I’ll pick maple for contemporary kitchens, built-ins, and closet systems where you want a smooth, calm look.
One caution: maple can blotch under some stains. If you want color, use a conditioner or a dye-based system, and test on offcuts from the same sheet. This internal overview on maple plywood helps when you’re comparing face quality and finishing options.
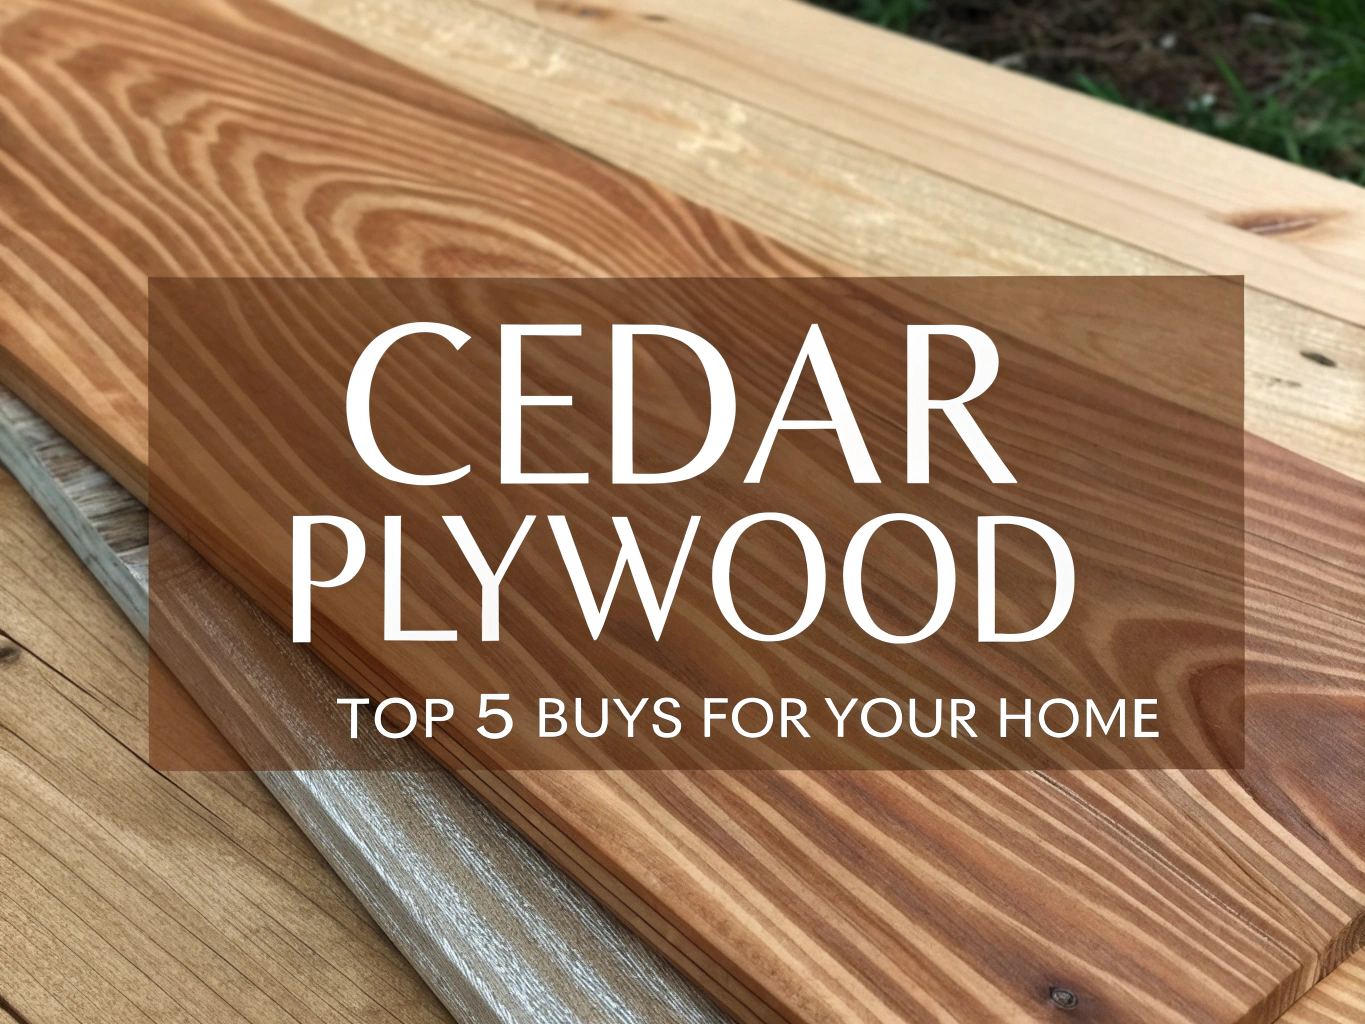
Oak and cherry
Oak has open pores and strong cathedral grain, which reads “traditional” fast. It stains well, but the pores can telegraph through smoother paint films. If you’re painting oak-faced plywood, plan on grain filling or accept that texture will stay visible.
Cherry brings warmth, and it darkens with light exposure. Panels that start close in color can drift apart over months if one side sits in shade. I’ll lay out parts so the most visible faces come from the same sheet, and I’ll warn clients that cherry changes—because it will, and it’s part of the look.
Species vs strength
Face species mainly changes the look, not the panel’s core strength. A birch face over a weak, voidy core still behaves like a weak panel where it counts: screw holding, edge durability, and flatness. When people ask me “Which is stronger, oak or maple plywood?” I point them to core type and ply structure first.
Quick reality check: if you can dent the edge with a fingernail or it crumbles under a light chamfer bit, no face veneer will save it in a high-wear kitchen.
Uses and applications
Cabinet boxes and carcasses
Carcasses are where cabinet grade plywood shines: stable panels, clean dados, and consistent thickness for square assemblies. When I’m building boxes, I’ll pick a core based on fastening method—veneer core for screws and pocket holes, MDF/combination for flatness when surfaces will be under bright, raking light.
Mistake to avoid: building a whole kitchen from mixed stacks. If half your boxes are slightly different thickness, your face frames and reveals turn into a slow fight. Buy the run from the same supplier lot when you can.
Drawers and built-ins
Drawer boxes love multi-ply birch because edges stay clean and joints hold. You’ll feel it during assembly: the corners pull together without that crunchy collapsing sensation you get when a screw hits a void. For built-ins, cabinet plywood keeps tall panels straighter and reduces seasonal movement compared with solid wood panels.
Build tip: if you’re using slides, pre-drill and avoid over-driving screws. Stripped holes are common in softer cores, and the fix (moving slides) creates visible misalignment fast.
Furniture and closets
Furniture builds benefit from cabinet plywood when you want clean, stable panels that won’t cup like wide solid boards. Closets are a sweet spot too—especially prefinished interiors—because shelves stay straighter and you get fast wipe-clean surfaces after install.
One limitation: exposed plywood edges need a plan. If you don’t want the striped ply look, you’ll need edge banding or solid edging, and that changes your cut list and reveal sizes.
Where not to use
Wet exteriors are the wrong place for standard cabinet plywood. Splash zones, outdoor cabinets, and damp basements can swell cores and pop veneers. If moisture is part of the job, step over to panels rated for that environment, like marine plywood, and design for drainage and airflow.
Also skip cabinet plywood for high-impact shop tops where you’ll hammer and pry; the face veneer can bruise. For work surfaces, I’ll use thicker material, sacrificial skins, or overlays meant to take abuse.
Prefinished cabinet grade plywood
UV-cured finishes
UV-cured prefinished plywood comes with a factory-applied coating that’s hard, consistent, and fast to work with. The tactile difference is obvious: it feels slick and sealed, and glue squeeze-out beads on the surface instead of soaking in. Many shops use these panels for cabinet interiors because the coating resists light scuffs and wipes clean.
The risk is finishing compatibility. Some UV finishes don’t like certain touch-up products, and you can get adhesion issues if you try to topcoat without scuff sanding. If you need to paint parts that meet a prefinished interior, mask carefully and test your primer on a scrap first.
When prefinished helps
Time savings is the big win. If you’ve ever finished cabinet interiors in place, you know the smell of solvents hanging in a room and the tacky feel of dust landing on a wet coat. Prefinished panels let you build boxes, band edges, and install with far less finishing work on site.
One trade-off: any scratches you cause during assembly are harder to fix invisibly. I use clean gloves when sliding panels on benches, add moving blankets under parts, and keep clamps from rubbing finish by slipping thin cardboard pads under clamp heads.
Common prefinished species
Maple and birch are common prefinished faces since they look clean and bright inside cabinets. Oak shows grain texture through clear coatings, which some people love and others hate once interior lighting hits it. If you’re matching an existing kitchen, bring a door or drawer front to compare color under the store’s lighting.
Lighting edge case: warm LED strips can shift the perceived color of maple interiors to a creamier tone. Test one finished panel under the exact lighting spec before you order a whole kitchen’s worth.
Buying notes and common mistakes
“Cabinet grade” label pitfalls
Labeling is where people get burned. Big-box “cabinet grade” can mean a decent face on a low-grade core with voids and thin veneers. Open the stack, check the edge, and look for a stamp or spec that calls out the grade and core type instead of trusting the shelf talker.
If you need a quick checklist, I use three checks in-store: (1) sight for bow/twist, (2) inspect both faces for patches and color match, (3) inspect the edge for voids. If two of three fail, it’s not coming home with me.
Paying for Baltic birch
Baltic birch often costs more because you’re paying for multi-ply core quality and better edge performance, not just the face. That premium makes sense for drawers, CNC-cut parts, and exposed-edge designs where filling voids would eat your time. It can be overkill for a painted toe-kick or a fully hidden stretcher.
Common mistake: buying “birch plywood” and assuming it’s Baltic birch. Many birch-faced sheets are a different product with fewer plies and more voids. Verify sheet size (often 5×5 for true Baltic birch), ply count, and grade marking like B/BB.
Edge banding for finishes
Edge banding is how you make plywood look like a finished cabinet part. Iron-on banding works well when your edges are straight, sanded, and dust-free. The sensory cue I rely on is the glue line: when it’s hot enough, you’ll feel the banding “relax” and slide a hair; when it cools, it grabs tight and sounds sharper under a trim chisel.
Beginner mistake: overheating the banding and scorching the veneer, or trimming too aggressively and tearing grain at the ends. Pro workaround: heat in short passes, roll hard with a J-roller while warm, then trim with a sharp edge-banding trimmer or a freshly honed block plane taking whisper-thin cuts from both ends toward the center.
If you need matching supplies for common cabinet thicknesses, these are the kinds of products I pair with birch and maple panels.
For maple-faced builds, a matching roll helps avoid that “two-tone” edge that shows up under clear coat.
If you’re working on small parts, templates, or laser/CNC projects, thin birch sheets can be more consistent than bargain craft packs.
For more sheet options in different thicknesses, here are a few common Baltic birch formats people compare when planning small cabinet parts and jigs.

Baltic Birch 12 x 18 inch Craft Plywood quarter inch Pack of 6
- Durable Baltic birch construction for stable, warp resistant panels
- Consistent B/BB grade face for smooth finishing and painting
- Sized for laser, CNC and hand cutting projects
- Thicker than basswood for stronger builds and prototypes
- Six sheet pack gives material for multiple crafts and spare parts

Baltic Birch 24 x 36 inch Plywood half inch thick
- Half inch thickness provides strong support for shelving and structural projects
- Large 24 x 36 inch size ideal for furniture panels and cabinets
- B/BB grade face offers a smooth surface for staining or painting
- More rigid and stable than balsa or basswood for load bearing uses
- Works cleanly with CNC, laser cutting and routing

Baltic Birch 12 x 24 inch Sheets Pack of 6 one eighth inch
- Thin one eighth inch panels ideal for laser engraving and detailed cuts
- Stable Baltic birch layers reduce splitting and tear out
- Smooth veneer surface accepts paint, stain and adhesive well
- Light weight for easy handling and assembly
- Six sheet box gives extra material for prototypes and repeat projects
Practical Notes From Real-World Use
Warp surprises happen after you break sheets down. A panel can look flat in a vertical rack, then spring a little once you cut it into narrower sides. When I’m building a full run, I rough cut parts, sticker them flat for a few hours, then do finish cuts so any movement happens before joinery.
Veneer sand-through is the silent killer on budget “cabinet grade” sheets. It often shows up at edges and around patches where the veneer is already thin. My workaround is to scrape instead of sand when leveling edge banding, and to use a sanding block with fresh paper instead of a soft pad that digs valleys.
Dado fit can fail between batches. “Same thickness” from two suppliers can vary enough that shelves either won’t seat or they slop around and pull out of square under clamp pressure. I cut dados with test pieces from the exact sheet stack and label the setup for that job only.
Glue squeeze-out on prefinished interiors is another gotcha. It dries like hard plastic beads and can scratch when you scrape it off. I’ll use painter’s tape at glue lines, apply a smaller bead than feels “safe,” and wipe immediately with a barely damp rag—too wet and you can leave a dull halo.
- Bring a small flashlight to spot ripples, patches, and veneer seams in store lighting.
- Check edges for void clusters; one void is workable, a pattern is a reject.
- Buy extra sheet stock for grain matching on visible ends and panels.
- Plan edge treatment early: exposed plies, edge banding, or solid lipping change dimensions.
- Keep offcuts for finish tests; stain and topcoat behave differently sheet to sheet.
If you want a deeper grade-by-grade breakdown next, this one on plywood grades helps when you’re decoding stamps across different product lines.
FAQs
What Is Cabinet Grade Plywood?
Cabinet-grade plywood is a high-quality plywood made specifically for furniture and cabinetry.
It Has Smooth, Void-Free Faces, Consistent Thickness, And Durable Veneers For Reliable Glue Joints And Finishes. It Is Typically Offered In Better Face Grades (A, B) And Stable Cores Like Veneer Core Or Baltic Birch For Strength And Screw-Holding.
What Are Cabinet Plywood Grades And What Do A/B And B/BB Mean?
Cabinet plywood grades describe face veneer quality and allowable defects.
Grade Pairs Like A/B Mean One Side Has A Paintable A Face And A B Back, While B/BB Indicates Both Faces Are Usable But BB Allows More Visible Repairs. These Grades Help You Choose Finish Quality And Cost For Visible Cabinet Parts.
Is Baltic Birch Considered Cabinet Grade Plywood?
Yes, Baltic birch is commonly considered cabinet-grade plywood.
It Has Many Thin, Even Veneers With Few Voids, Giving Excellent Strength, Stability, And Screw-Holding For Drawers And Cabinet Boxes. Its Consistent Edge And Machining Properties Make It A Top Choice For Cabinetmakers.
What Thickness Plywood Should I Use For Cabinet Boxes?
Use 3/4-inch (18mm) plywood for most cabinet boxes.
This Thickness Gives Good Rigidity And Screw-Holding For Face Frames And Carcasses; 1/2-inch (12mm) Can Be Used For Lightweight Or Economical Builds, While 5/8-inch Is A Compromise. Reserve Thicker Or Braced Shelving For Heavy Loads.
What Core Is Best For Cabinets: Veneer Core Or MDF Core?
Veneer-core plywood is generally the best choice for cabinets.
It Provides Superior Strength, Stability, And Screw-Holding Compared With MDF Core And Machines Cleanly For Dados And Rabbets. MDF Core Can Be Smooth And Paint-Ready But Is Heavier And Holds Fasteners Less Reliably.