Laminated Wood Guide: Types, Uses, Laminate Wood Flooring & Care
Table of Contents
Laminated wood is wood built from multiple thin layers bonded together so it stays straighter and often carries more load than a single piece of lumber. People use it for structural beams and panels, and it also shows up in laminate wood flooring where a printed wood image and wear layer sit over a dense fiber core.
This guide breaks down how laminated wood is made, the main types (CLT, glulam, NLT, plywood), and where each one works best. It also covers wood laminate flooring, what “waterproof” really means, and exactly how to clean laminate wood floors without swelling seams or dulling the finish.
What laminated wood is
Laminated wood means you’re looking at multiple layers (lamellas or veneers) joined into one thicker, more stable piece. In practice, that layered build helps control movement from seasonal humidity swings—so you get fewer surprises like twist, cup, or a bowed edge that won’t sit flat on a saw table.
A big reason it performs well is that the layers can be selected and oriented to balance internal stresses. That’s why laminated wood is often 2–3x more resistant to warping than comparable solid lumber in typical indoor humidity ranges, while also using less “clear” wood than a single big timber. One good overview of common laminated timber formats is in Homedit’s laminated wood guide.
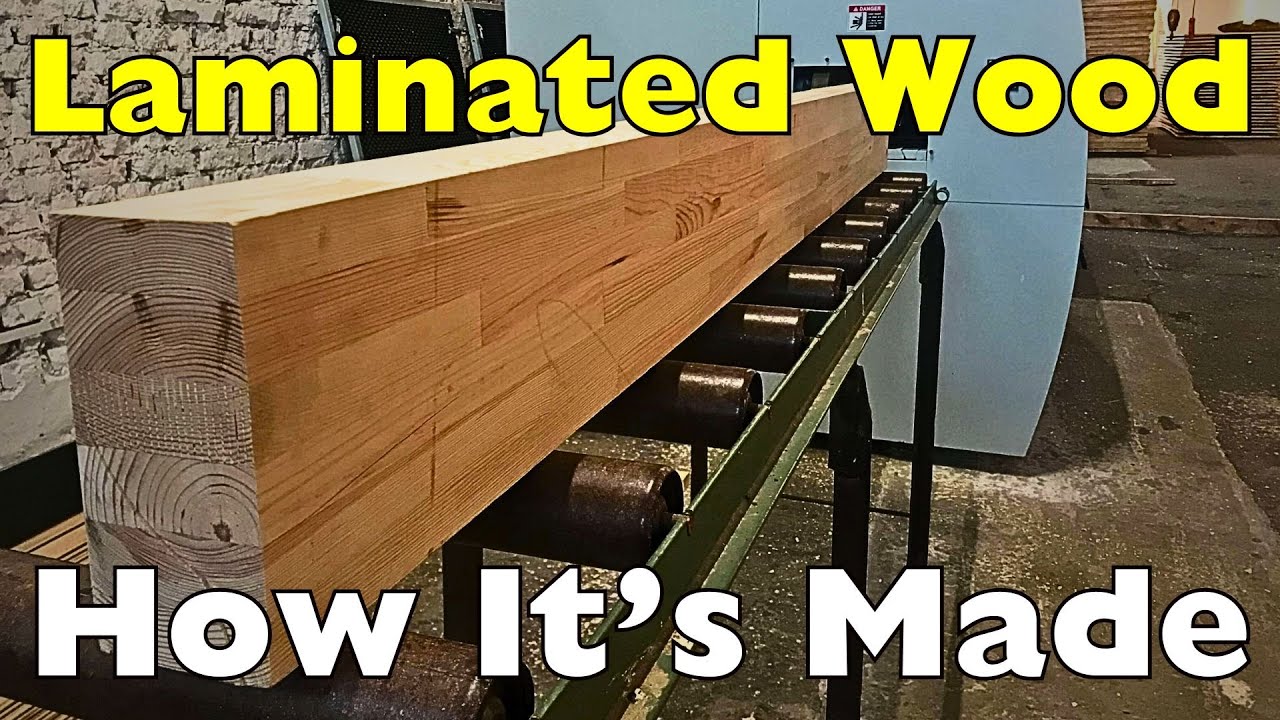
How it’s made
Most laminated wood starts with kiln-dried lumber or peeled veneers. The pieces get planed, sorted, then coated with adhesive and pressed under controlled pressure until the glue line cures. On a shop floor you can actually feel the difference: cured laminated stock tends to have a “harder” tap tone and a slick, glassy glue line when you run a fingernail across a freshly cut end grain.
Beginners often miss one step: moisture consistency. If you laminate boards with mismatched moisture content, one layer shrinks more later and the panel can telegraph a ridge line or develop a gentle “potato chip” curve. The workaround is simple: let all parts acclimate in the same space, then glue up within a tight window.
Layers and grain direction
Layer orientation is where laminated wood gets its stability. Some products keep grains parallel (common in glulam beams), while others rotate layers 90° (CLT and plywood style) to resist expansion and contraction across the width. When you cut a cross-laminated panel, the sawdust shifts from fluffy to slightly gritty as you cross alternating grain—your blade “feels” the change in resistance.
Edge cases matter: cross-grain builds can be very stable, but they also change fastener behavior. Screws can bite differently from one layer to the next, so pre-drilling reduces split risk and keeps the head seated clean. If you’re building cabinetry or shop projects, pairing stable sheet goods with the right grade helps—see plywood grades for a quick match between appearance and performance.
Adhesives and materials
The adhesive line decides a lot: PU (polyurethane) and phenol-based systems show up in structural products because they handle load and humidity cycles better than basic interior glues. If you’ve ever sanded a panel and hit a glue seam that “smears” and loads the paper, that’s usually a sign the adhesive isn’t meant for heavy machining or high heat.
Watch for beginner mistakes with “mystery” panels. Some laminated boards use interior-only glue, and they’ll delaminate if they live near a sink, in a damp basement, or behind an exterior wall. If a supplier doesn’t explicitly state exterior-rated or structural rating, treat it like an indoor product and design around that limit.
Types of laminated wood
“Laminated wood” covers several families, from heavy structural panels to thin decorative surfacing. Picking the right one is about load path, moisture exposure, and what you need from the face—paint-grade, stain-grade, or hidden under finish flooring.
Cross-laminated timber
CLT stacks lumber in layers with alternating grain direction to form big wall, floor, and roof panels. It can feel almost “stone-like” underfoot during install because it spreads point loads and reduces bounce compared to light framing when it’s properly supported.
CLT’s big win is predictable performance at scale, but openings and penetrations are where projects go sideways. If you field-cut without planning, you can expose edges that wick moisture or weaken a critical zone. Layout penetrations early, and seal fresh cuts if the panel will see humid conditions.
Glued laminated timber
Glulam (glued laminated timber) bonds layers with grain mostly parallel to create beams and columns. The practical upside is you can get long spans in shapes solid sawn lumber can’t do cleanly—straight, tapered, even gentle curves—while keeping a crisp, architectural face.
One real trade-off: glulam is strong, but it’s still wood, so detailing against water matters. A beam end trapped in a wet pocket will check and stain, and you’ll smell that sour, damp odor long before you see serious damage. Binkley’s overview of laminated timber in bridges highlights why moisture detailing is a top priority in exposed builds (Laminated timber in bridge construction).
Nail laminated timber
NLT is made by stacking dimensional lumber on edge and fastening it together (often nails or screws). It’s popular for floors and roofs where you want speed and a warm wood ceiling look without the lead times and factory precision demanded by CLT.
Common beginner mistake: assuming NLT is automatically flat. If the lumber isn’t sorted for crown and moisture, you’ll chase high spots forever with sanding. The pro move is to “read” each board’s curvature, alternate crowns, and clamp/fasten in a sequence that keeps the panel under control.
Veneer timber and plywood
Plywood and laminated veneer products use thin sheets glued in alternating grain directions. They’re my go-to when I need sheet stability for built-ins, subfloors, and jigs because the cross-layers resist seasonal width changes that would crack paint lines or pop fasteners.
Sheet choice changes everything. Cabinet work leans on clean faces and stable cores—cabinet-grade plywood saves a lot of patching and edge repairs. Wet zones demand better glue and core quality—marine plywood is built for harsher moisture cycles.
If you want the official “what counts as a laminate panel” definition, Wikipedia’s laminate panel entry gives the broad category and common layer types. Use it as a vocabulary map, then verify specs with the manufacturer for anything structural or wet-area related.
Laminate panels and boards
Laminate panels often mean a substrate (HDF, plywood, particleboard) with a tough surface layer added for wear, stain resistance, or easy cleaning. You’ll see these in cabinets, shop fixtures, and many budget-friendly furniture builds where the face needs to survive fingerprints, sliding objects, and cleaning sprays.
Edges are the weak point. Water and impacts find seams first, then the substrate swells and the surface blisters. If you’re building with laminate-faced board, protect edges with banding, and avoid leaving raw cores exposed under sinks or near humidifiers.
Benefits of laminated wood
Laminated products win because they let you buy performance rather than hunt for perfect trees. You get straighter parts, scalable sizes, and less waste—plus you can match the product type to load, moisture, and appearance requirements.
Strength and stability
Strength-to-weight is the headline benefit. By bonding layers and controlling grain direction, many laminated wood products reach roughly 1.5–2x the strength-to-weight of comparable sawn members in real framing layouts, while staying straighter over time.
The trade-off is failure mode. Solid wood often cracks gradually; laminated products can fail at glue lines if they’re misused (wrong environment, wrong rating, or poor edge sealing). Buy panels and beams with clear structural or exposure ratings if they’ll see load or humidity cycles.
Moisture performance
Laminated wood can be more predictable in humidity than solid wood because the layers counteract each other’s movement. That doesn’t mean “waterproof.” It means it’s less likely to turn into a propeller when indoor RH swings from winter-dry to summer-sticky.
A common mistake is using the wrong cleaner or too much water on laminated surfaces, then blaming the product. Swollen joints usually come from repeated wetting at seams and edges. Treat seams like end grain: wipe spills fast and keep wet mops away from standing puddles.
Sustainability and waste reduction
Waste reduction is real with laminated builds because smaller boards and veneers can become high-value panels and beams. Many guides cite 20–30% less wasted wood versus relying on large clear timbers for the same final sizes, since defects can be cut out or distributed across layers.
One caution: “eco-friendly” depends on adhesives and sourcing. If you’re sensitive to odors, some panels off-gas more than others—your nose catches it as a sharp, chemical note right after unpacking. Let panels air out, and look for low-emission certifications when the project is indoors.
Durability and lifespan
Durability depends on the layer stack and surface protection. Structural laminated wood in buildings can last 50–100+ years when it stays dry and is detailed correctly, while laminated furniture panels can resist racking and sagging better than a single wide board.
Don’t ignore small protection steps that pay off big. Felt pads under chair legs reduce grit scratches that feel like sandpaper underfoot, and they also keep laminate surfaces from developing that dull “gray drag” that shows up in high-traffic lanes.
Where laminated wood is used
Laminated wood shows up anywhere builders and makers need predictable size, stability, and repeatable performance. The right use case depends on load, exposure, and how visible the surface will be after installation.
Construction uses
Construction applications include beams, columns, wall panels, floor panels, and bridge components. On site, the big advantage is speed: large panels reduce piece-count, and straight beams mean fewer shims, fewer squeaks, and cleaner drywall lines.
Big risk: moisture during staging. If panels sit on wet ground or stay wrapped while condensation builds inside the plastic, edges can swell before install. Store on stickers, off the slab, with airflow so the wrap doesn’t turn into a mini greenhouse.
Furniture uses
Furniture makers use laminated stock for legs, tops, and curved parts because it holds shape and uses material efficiently. The tactile giveaway is in the cut: a laminated edge shows repeating lines that you can feel as tiny ridges before sanding, then it turns into a smooth, consistent edge that finishes evenly.
One constraint: edge appearance. If you don’t want layer lines visible, plan for edge banding, a miter wrap, or a thicker face veneer. For nicer faces, matching veneer species helps—veneer walnut is a common upgrade when you want a premium look without a solid slab.
Flooring and subfloors
Subfloors often use plywood or similar laminated sheets because they spread loads and hold fasteners. A flat, stiff subfloor is the hidden difference between a quiet floor and one that crunches and squeaks with every step.
Laminate flooring is separate from structural laminations, but the principle is similar: a dense core plus protective layers. If you’re planning underlayment and floor height, it helps to know typical sheet thicknesses and weights—plywood dimensions and plywood weight help you avoid surprises at stairs and transitions.
Countertops and surfaces
Countertops often use laminated builds (like butcher block or laminate-faced panels) because they’re stable and easy to service. A good laminated top feels warm to the touch compared to stone, and it won’t “ring” when you set down a mug—more of a soft, muted thud.
Sinks and dishwashers are the danger zones. Steam and drips attack seams and edges, then swelling starts. If you’re building or buying a wood top, butcher block wood edge sealing and regular re-oiling stop a lot of the common failure patterns.
Laminate wood flooring explained
Laminate wood flooring is a layered floor plank with a wear layer on top, a printed “wood look” layer, a dense core (usually HDF), and a balancing backing. It’s popular because the surface resists scratches better than many soft hardwoods while keeping material cost low.
How laminate flooring is built
The wear layer is a clear coating (often melamine-based) that takes abrasion. Under it sits the printed décor layer, then the HDF core that gives the plank its stiffness and click-lock profile, plus a backer that helps balance moisture forces.
Click-lock edges are precise but not magic. If the subfloor isn’t flat, the joints flex with every step and you’ll hear a gritty ticking sound, then see seam gaps. That’s why flatness prep fixes a lot of “bad flooring” complaints before the first plank even goes down.
AC ratings and wear
AC ratings (AC1 to AC5) reflect abrasion resistance testing and give you a decent shortcut for traffic level. AC3 is a common baseline for residential, while AC4–AC5 fits busy homes, rentals, or light commercial where chairs and entry grit punish the finish.
Don’t overspend on AC rating if the core and joints aren’t good. Many failures start as small edge chips that turn into a lifted seam once moisture sneaks in. Look for tight, clean milling and a solid warranty that calls out seam swelling coverage.
Typical cost and lifespan
Material cost for laminate planks often lands around $1.50–$4 per sq ft, with lifespan commonly 15–25 years depending on traffic, pets, and cleaning habits. It can run 70% cheaper than hardwood in many installs once you add underlayment, transitions, and labor.
| Product | Typical lifespan | Common weak point | Best fit |
|---|---|---|---|
| Laminate flooring (HDF core) | 15–25 years | Seams/edges swelling | Living rooms, bedrooms, rentals |
| Engineered hardwood | 20–40+ years | Wear layer thickness limits refinishing | Main floors where real wood is wanted |
| Plywood subfloor panels | Decades (kept dry) | Delamination from water exposure | Base layer under many floor types |
| Glulam/CLT structural members | 50–100+ years | Moisture traps at connections | Beams, walls, mass timber builds |
Brands to know
Pergo and Mohawk are two names that come up often when people compare wear ratings, click systems, and waterproof claims across big-box and flooring dealers. I like to evaluate brands less by marketing and more by joint tightness, core density, and whether accessories (transitions, stair noses) match without ugly gaps.
Beginner mistake: mixing brand A planks with brand B transitions to save money, then fighting height mismatches and exposed edges. Buy transitions made for your exact product line if you want clean doorways and stair landings without odd lips that catch socks.
Laminate wood floor waterproof options
Laminate wood floor waterproof products usually mean the surface and joints resist water long enough to clean up spills, not that the core can live underwater. Marketing terms blur the line, so you have to read what’s actually protected: the top, the seams, or the whole plank including the edges.
What “waterproof” means
Waterproof in laminate often refers to a sealed surface plus hydrophobic edge coatings and tight click locks that slow water entry. If you spill a cup of water and wipe it within an hour, you’re usually fine; if a pet bowl leaks daily at the same seam, swelling can still happen over time.
A real-world tell: walk barefoot after a spill and you’ll notice a faint “grab” at the seam if the edge has started to raise. Catching that early and drying the area fully prevents the step-by-step seam breakdown that turns into a permanent ridge.
HDF core moisture limits
HDF cores swell when water gets past the wear layer and seam protection. Many waterproof laminate lines aim to keep absorption low for short exposures, but repeated wetting cycles still fatigue the joints, especially at kitchen sink runs and exterior doors.
If you want a deeper material reference for lamination methods and how layers interact, Duespohl’s overview is a helpful baseline (Lamination: Everything You Need to Know). Use it to frame questions for your flooring dealer: seam coating type, edge sealing process, and allowable wet-mop instructions.
Where waterproof works best
Best locations are places with spills, not floods: kitchens (away from the sink base), powder rooms (if the toilet is stable and caulked at the base), mudrooms where you can use mats, and basements that are already dry and conditioned.
Don’t treat it like a shower pan. For full bathrooms with frequent standing water, many rigid-core vinyl products handle the reality better. If you still pick laminate, use wide mats, manage humidity, and seal transitions so water can’t run under the field.
Common failure causes
- Leaving standing water at seams (pet bowls, plant pots, wet boots) until the core swells.
- Installing over an uneven subfloor so joints flex and “pump” moisture inward.
- Skipping perimeter expansion gaps, leading to buckling that cracks joints.
- Using steam mops that drive heat and moisture into the click-lock edges.
- Failing to seal problem transitions at exterior doors and sliding doors.
The expert workaround is to control water pathways: good mats, quick wipe habits, and tight transitions. If a chronic spill zone can’t be avoided (like a dog water station), set it on a boot tray and treat that area like a mini wet room.
How to clean laminate wood floors
How to clean laminate wood floors comes down to two rules: remove grit often, and use very little water. Laminate looks tough, but the weak point is almost always the seam—once water gets into the core, you can’t “dry it back” to flat.
Daily dry cleaning
Dry cleaning protects the wear layer. Use a microfiber dust mop or a vacuum with a hard-floor head. Avoid a rotating beater bar because it can pepper the surface with tiny scuffs that show up as hazy streaks in side light.
You’ll feel the difference underfoot: grit makes the floor feel “crunchy” in socks near entries. Knock that out daily in busy seasons, and you’ll extend the finish life a lot more than any polish ever will.
Damp mopping safely
Damp mopping means the pad is barely wet, not dripping. Spray cleaner onto the mop pad (not the floor), then work in small zones. If you see wet shine sitting behind the mop, you’re using too much liquid.
A pro trick for kitchens: keep a dry microfiber towel in your back pocket. After you mop the sink run, do one fast dry pass along the seams. That 10-second step prevents the slow seam swell that shows up weeks later.
Cleaners to avoid
Avoid steam mops, heavy waxes, oil soaps, and abrasive powders. These either force moisture into joints or leave residue that turns tacky and attracts dirt, which then grinds into the finish like fine sand.
If your floor starts looking cloudy, it’s often cleaner buildup, not wear. The fix is to switch to a pH-neutral laminate cleaner and rinse lightly with a barely damp pad, then dry buff—no soaking, no buckets.
Stain and scuff fixes
Scuffs from rubber soles usually lift with a slightly damp microfiber cloth and a tiny amount of laminate-safe cleaner. For stubborn marks, a white nylon pad used gently can work, but test in a closet first so you don’t dull the sheen in a noticeable spot.
For sticky spills (juice, syrup), lay a warm, wrung-out cloth over the spot for a minute, then wipe clean. Don’t scrape with metal—those scratches catch light and never fully disappear.
Laminated wood products for DIY
Laminated wood products make DIY easier because they’re more predictable than wide solid boards. You can cut, drill, and assemble with fewer “surprise” twists after finishing—just match the product to exposure and the look you want.
Laminated wood blanks
Laminated blanks are great for handles, jigs, knobs, mallet heads, and small parts where movement ruins fit. The glue lines also help resist splitting when you drill close to an edge, which is a common failure with small solid offcuts.
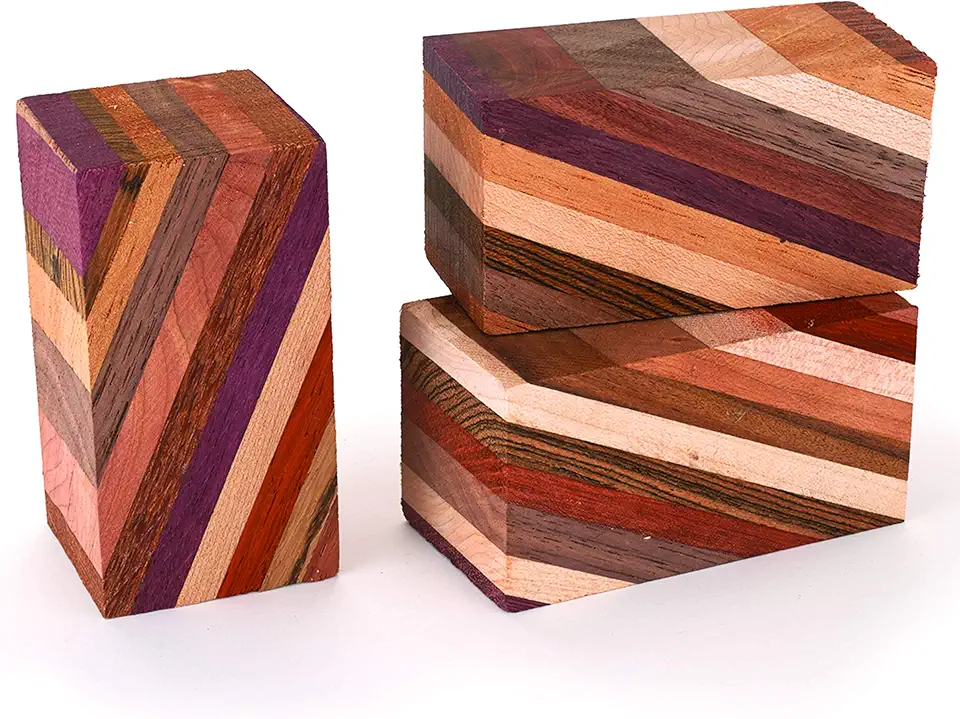
Laminated Wood Blank 1.5-inch x 1.5-inch x 3-inch
- Solid laminated construction for strength and stability in small projects
- Pre glued layers reduce movement and improve durability
- Smooth, ready to sand and finish for carving or turning
- Compact size ideal for handles, pegs, and custom parts
- Versatile blank works well for carving, drilling and shaping
Common mistake: sealing only the outside faces and leaving end grain raw. End grain drinks finish fast; you’ll feel it go from slick to fuzzy after the first coat. Flood end grain with extra finish coats or thin first coats so moisture swings don’t telegraph through the laminations.
Peel-and-stick surfaces and repairs
Peel-and-stick films and repair tapes are fast fixes for cabinet sides, countertops, and rental-friendly makeovers. Clean and degrease first, then use a felt squeegee so you don’t trap bubbles that later become lifted blisters at the edges.
Here are peel-and-stick and repair options that work well for quick updates and touch-ups.
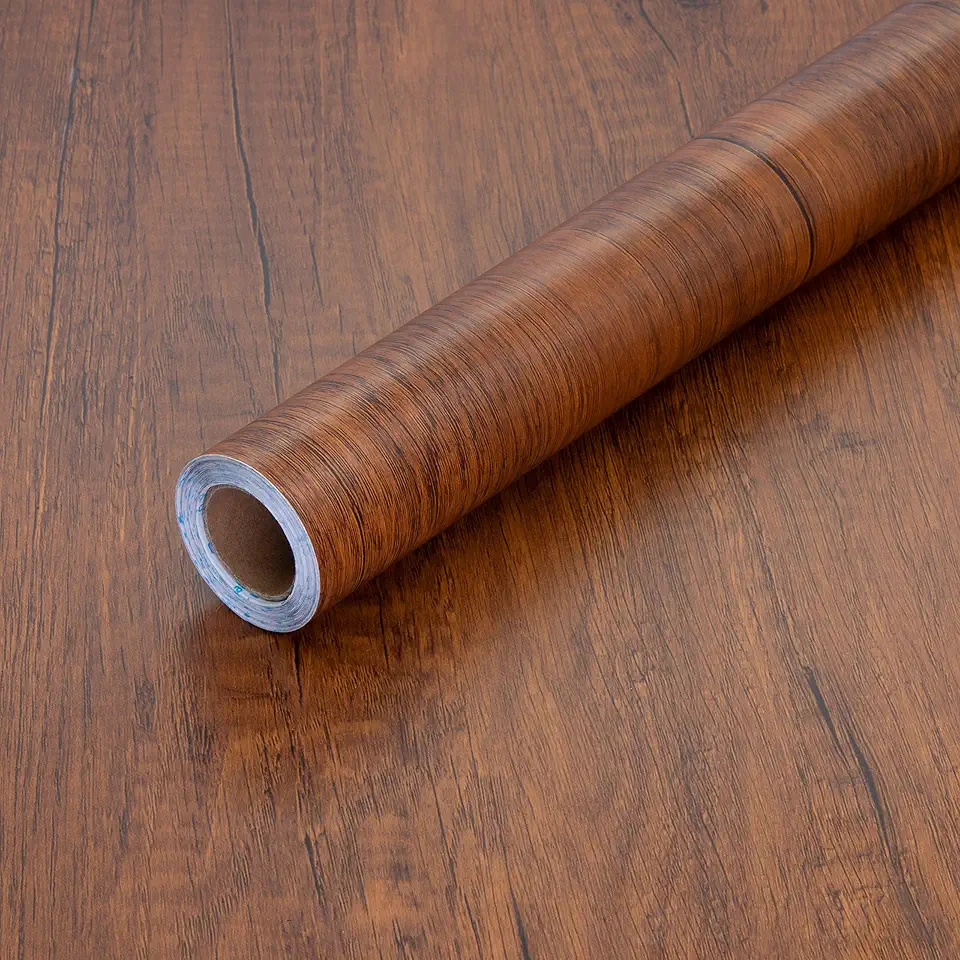
Brown Peel and Stick Wood Grain Wallpaper 17.71-inch x 118-inch
- Self adhesive vinyl for quick, bubble free application
- Removable without sticky residue for easy updates
- Realistic wood grain hides scratches and worn surfaces
- Water resistant surface wipes clean with a damp cloth
- Great for cabinets, countertops, furniture and shelving

Walnut Peel and Stick Countertop Film 16-inch x 78-inch
- Thicker waterproof vinyl for durable countertop and cabinet coverage
- Self adhesive backing for fast, no glue installation
- Removable design peels off without leaving residue
- Realistic walnut grain finish for an upgraded look
- Easy to trim and conform to curved or irregular surfaces

Wood Grain Repair Tape 2.4-inch x 15-foot Natural Oak
- Self adhesive tape quickly covers scratches, nicks and edge wear
- Flexible backing conforms to curved trim and furniture edges
- Natural oak grain blends with common wood finishes
- Water resistant surface stands up to everyday use and cleaning
- Easy to cut to size for precise touch ups and repairs
Risk to watch: heat and humidity. Near a dishwasher or a sunny window, budget films can shrink and expose seams. The workaround is to wrap edges further than you think you need, then warm the film lightly so it conforms before final trimming.
Craft sheets and plywood packs
Craft sheets in basswood, walnut plywood, MDF-core panels, and Baltic birch are ideal for templates, laser cutting, models, and small boxes. Thin laminated sheets cut cleanly when your blade is sharp; you’ll hear a smooth, steady hiss instead of the chatter that signals tearout or a dull edge.
Here are sheet and plywood packs that fit common DIY and maker projects.

Unfinished Paulownia MDF Craft Boards 10-inch x 16-inch
- Double sided veneered surface ready for painting and staining
- Stable MDF core resists warping during cutting and engraving
- Lightweight paulownia face for easy handling and mounting
- Ideal size for signs, plaques, laser work and mixed media
- Pack of four boards offers consistent value and project flexibility

30-Pack Basswood Craft Sheets for Laser Cutting and Carving
- Thin, unfinished basswood ideal for laser cutting and wood burning
- Smooth grain sands and paints cleanly for detailed work
- Consistent thickness across sheets for precise projects
- Lightweight and easy to glue for models and ornaments
- Great value pack for classrooms, makers and hobbyists
Walnut Plywood Sheets 12-inch x 12-inch 3mm 6-Pack
- Premium walnut veneer for a high end appearance
- Consistent 3mm thickness suited for laser cutting and engraving
- Smooth surface accepts stains, paints and clear coats well
- Six sheet pack supports multiple small projects and prototypes
- Precision cut panels minimize waste and speed up prep time

48-Pack Basswood Sheets 1/8-inch 12-inch x 12-inch
- Consistent 1/8-inch thickness ideal for laser cutting and modeling
- Unfinished smooth surface ready for painting, staining and engraving
- Plenty of sheets for practice, classes and batch projects
- Easy to sand and glue for architectural models and crafts
- Lightweight sheets reduce material cost while keeping quality

Premium Baltic Birch Plywood 1/8-inch x 12-inch x 18-inch 6-Pack
- B BB grade veneer for a smooth, consistent finish on both faces
- Stable 3mm thickness resists warping in detailed projects
- Excellent choice for scroll sawing, laser cutting and crafts
- Takes paint, stain and varnish evenly for professional results
- Six flat sheets offer enough material for multiple projects
Mistake to avoid: assuming every plywood pack takes stain the same way. Some cores and glues telegraph through thin face veneers once you apply a dark stain. If you need predictable staining, test on an offcut and consider a sanding sealer before color.
Practical Notes From Real-World Use
Reality check: laminated wood solves many movement problems, but it doesn’t forgive poor storage, sloppy sealing, or wet cleaning habits. The most common disappointment I see is seam swelling in “waterproof” laminate floors that were installed perfectly—then cleaned with a soaking mop until the joints slowly raised and stayed that way.
What didn’t work in real spaces was relying on marketing labels instead of controlling water at the source. The fix was boring but effective: bigger entry mats, a boot tray, wiping spills immediately, and switching to a spray-on microfiber method so there was never standing water in the first place.
Another gotcha shows up in DIY laminations and craft builds: glue lines can sand differently than the wood, so beginners sometimes dish the softer layers and leave faint ridges. A harder sanding block, lighter pressure, and fresh paper keeps faces flat—then a final hand-sand with the grain blends everything so the layers look intentional instead of wavy.
FAQs
What Is Laminated Wood And How Is It Different From Solid Wood?
Laminated wood is an engineered product made by bonding multiple layers of wood or veneers together, while solid wood is a single continuous piece cut from a tree. The layered construction gives laminated wood greater dimensional stability and improved resistance to warping, often at a lower cost. Solid wood, by contrast, can be refinished multiple times and shows unique grain patterns.
Is Laminate Wood Flooring Real Wood?
Not usually – most laminate flooring has a printed decorative layer over a fiberboard core with a protective wear layer, so it mimics the look of wood but is not solid hardwood. Higher-end products can use thin real-wood veneers, but they still differ from true hardwood in how they can be repaired and refinished.
Is Laminate Wood Floor Waterproof Or Just Water Resistant?
Most laminate floors are water resistant rather than fully waterproof; they can handle brief spills but prolonged exposure or standing water will damage the core. Some products are marketed as waterproof thanks to sealed joints and special cores, so always check product specifications and manufacturer guidelines. Wipe up spills promptly and avoid flooding to protect the floor.
What Is The Best Way To Clean Laminate Wood Floors Without Streaks?
Use a dry microfiber mop for daily dusting and a well-wrung damp microfiber mop for deeper cleaning to avoid streaks. Use a pH-neutral cleaner made for laminate or just water with a tiny drop of mild dish soap for stubborn spots, and never flood the floor. Dry the surface quickly with a microfiber cloth to prevent streaking and moisture damage.
Why Does Laminate Flooring Buckle Or Swell After Cleaning?
Buckling or swelling after cleaning is usually caused by excess water penetrating the seams and reaching the laminate core. Laminate cores can absorb moisture, expand, and push against adjacent planks, causing gaps, warping, or buckles. Common causes include using too much liquid, poor cleaning methods, or failed seams – fix by drying quickly and addressing any damaged boards or seals.