Table of Contents
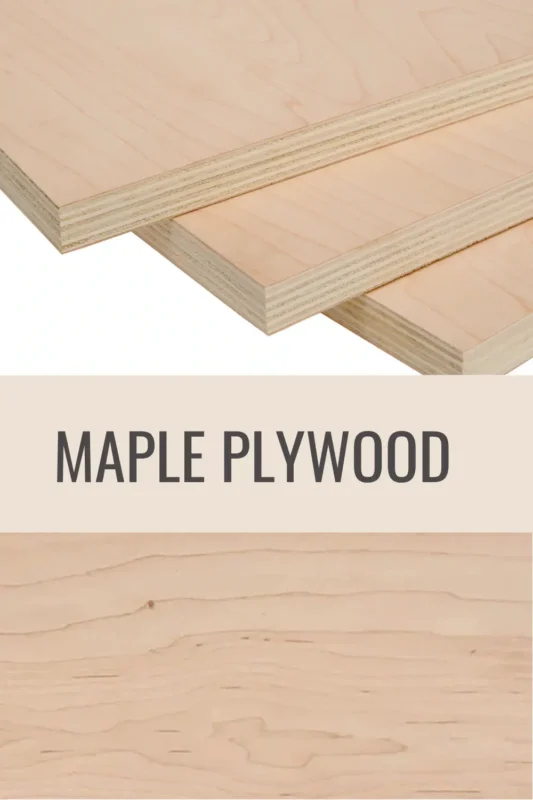
Maple plywood is a hardwood-veneer plywood made with thin maple faces over a layered core, built for stiffness, clean grain, and durable wear. It’s a go-to sheet good for cabinets, furniture, and laser projects when you want a smooth surface that machines cleanly and finishes bright.
Quick answer: Choose maple plywood when you want a tighter, calmer grain than birch, higher dent resistance, and a lighter “clean” look—then plan your finish to prevent blotchy stain and your tooling to avoid burn marks.
What maple plywood is
Maple plywood is an engineered panel with maple veneer on one or both faces, bonded over a cross-laminated core. That alternating grain direction is why a 4×8 sheet stays flatter than most solid wood panels when humidity swings hit.
Veneer construction
Veneers are peeled or sliced thin, then stacked with each layer’s grain turned 90 degrees before pressing with heat and adhesive. You feel the difference when cutting: a good panel has a steady, “even” resistance through the cut, while a lower-grade core will chatter and change pitch as the saw hits voids.
Common mistake: assuming “maple plywood” means maple all the way through. Many sheets are maple-faced with a different core (poplar, mixed hardwood, MDF, or veneer-core), so ask for the core type and the face/back grade before you buy.
Internal tip: if you’re deciding between veneer-core and MDF-core, check weight and stiffness first—this affects sag on shelves and how panels behave on a table saw. Use this reference on plywood weight to sanity-check what you’re hauling home.
Hard maple basics
Hard maple (often sugar maple) is the species most people mean when they want a pale, durable face veneer that resists dents in kitchens and shop furniture. Its density is the upside for durability and the downside for tool wear—dull cutters heat up fast and leave brown scorch lines that don’t sand out easily.
Real trade-off: hard maple faces can be thin on some imports, so aggressive sanding can burn through into the lighter glue line or core. I stop at 180–220 grit on faces and do my smoothing with finish build, not heavy sanding.
Learn the wood: if you want more context on how maple behaves compared to other hardwoods, this overview of maple wood helps explain why it dents less yet can stain unevenly.
Grain and color
Maple grain is tight and subtle, with a smooth feel under your fingertips once it’s planed or sanded. Color runs from creamy white to light tan, and it can pick up a warm amber tone under oil-based finishes or UV exposure.
Edge case: figure like curly, birdseye, or quilted sometimes shows up in face veneers, but it’s not guaranteed unless the grade or product explicitly says so. If you’re chasing that “shimmer” chatoyance, see curly maple and match your finish plan early because film finishes highlight figure better than stain-heavy schedules.
Birch vs maple plywood: key differences
Birch vs maple plywood usually comes down to three things you’ll notice fast: dent resistance, surface look, and how forgiving the sheet is during machining and finishing. Maple often looks “cleaner” and wears harder; birch is often easier to source and budget for.
Hardness and durability
Hard maple is harder than birch on the Janka scale (about 1450 lbf vs. about 1260 lbf), which lines up with what you see in daily use: maple cabinet sides and face panels stay cleaner longer when broom handles, pots, and shoes keep tapping them. Those hardness figures are widely summarized in supplier comparisons like Birch or Maple Plywood: Pros and Cons Explained.
Beginner risk: thinking hardness equals “stronger everywhere.” Hardness mostly describes dent resistance; screw holding and edge durability depend heavily on core quality and thickness, so a great birch-core panel can outperform a cheap mixed-core maple-faced sheet.
Appearance and grain
Maple reads smoother and calmer from across a room, especially under clear coat. Birch tends to show more visible cathedraling and a warmer yellow cast, which can be a plus if you want a cozy tone without stain.
Pro workaround: if you need sheets from different batches to match, tint your clear coat (not the stain) by a tiny amount and spray test cards. That keeps the grain quiet while you nudge color into alignment.
Workability and machining
Machining favors birch when your tooling is average or you’re doing lots of cuts, because maple’s density builds heat faster. On a table saw, maple’s cut sound often shifts into a higher pitch as the blade warms; that’s my cue to slow feed slightly and clean pitch off the blade before scorch marks start.
Common mistake: routing maple plywood with a dull bit and expecting sanding to fix burn. Burn in maple can go deep and turn gray-brown once finish hits, so the fix is prevention—sharp spiral bits, lighter passes, and a clean collet that doesn’t let the bit slip and rub.
Finishing and staining
Staining is where maple can punish shortcuts. It can absorb unevenly, so one pass looks great and the next section goes muddy—especially near glue squeeze-out that you can’t see until stain makes it pop.
Pro workaround: wipe the faces with mineral spirits before stain. Wet spots reveal glue contamination instantly, and the surface flashes off fast so you’re not waiting all day to proceed.
Cost and availability
Budget reality: maple plywood often runs about 20–30% higher per square foot than comparable birch in many U.S. retail channels, with bigger jumps on pre-finished panels and thicker cabinet cores. Availability can flip by region—birch is easier to find in many markets, while consistent, flat maple cabinet sheets can sell out fast at pro yards.
Buying mistake: comparing only “per sheet” pricing. Compare cost per usable face: a cheaper sheet that has mineral streaks, football patches, or sanding-through spots can waste more time (and money) than it saves.
Sustainability
Sustainability depends on species, region, and certification, but birch is often described as faster-growing and widely available in managed forests, which can reduce supply pressure. If sustainability is a main driver, look for FSC or equivalent chain-of-custody documentation from your supplier instead of guessing from the species name alone.
Hidden risk: imported plywood can meet the look you want but miss the emissions standards you expect. Ask for a CARB Phase 2 / TSCA Title VI compliant panel (U.S.) or equivalent documentation in your region, especially for indoor cabinetry and kids’ furniture.
Maple plywood thicknesses and sizes
Thickness drives stiffness, screw holding, and how “dead flat” a panel stays after milling. Small changes matter: a true 3/4-inch cabinet panel behaves very differently from an undersized 18mm sheet on long shelves.
Maple plywood 3/4 (19mm)
Maple plywood 3/4 (often labeled 3/4-inch or 19mm) is the standard for cabinet boxes, face frames (when you’re doing slab/European style), and shelves. The tactile “tell” of a good 3/4 sheet is how it slides on a saw table: flatter panels feel like they’re on air; warped ones rock and grab, which is where kickback risk rises.
Pro tip: if you’re building long spans, don’t rely on thickness alone. Use a dado, a fixed shelf, or a front edge band that’s tall enough to act like a beam; you’ll cut sag dramatically without jumping to 1-inch stock.
1/4 maple plywood (6mm)
1/4 maple plywood is a sweet spot for drawer bottoms (captured in grooves), cabinet backs (when the box design supports it), templates, and hobby work where you still want rigidity. In hand, good 1/4-inch maple feels surprisingly “stiff for its weight,” while low-grade sheets feel spongy at the edges where the core isn’t tight.
Beginner mistake: nailing 1/4-inch backs on and calling the cabinet “square.” If the back is your squaring panel, use staples/nails plus glue blocks or a rabbet so the thin panel can actually lock the case into square without wrinkling.
1/8-inch and 3/8-inch
1/8-inch (3mm) maple sheets are common for laser cutting, inlays, light skins, and model work. They cut fast and engrave crisp, but they also telegraph clamp marks easily—press your fingernail into raw 3mm veneer and you’ll feel how quickly it bruises, even when the face is maple.
3/8-inch (roughly 9mm) is a practical middle thickness for small box parts, jigs, drawer sides in light-duty builds, and panels where 1/4 feels flimsy. It’s also thick enough to take shallow joinery without blowing out the face veneer during milling.
Sheet size options
Sheet sizes usually mean 4×8 (most common), with some suppliers stocking 5×5 (often associated with Baltic-style panels) and project panels like 2×4. For hobby and laser work, smaller panels like 12×12, 12×16, and 12×24 reduce waste and ship flatter because they’re less prone to corner damage.
Planning help: if you need a refresher on nominal vs actual panel sizing and why “3/4” isn’t always 0.750, this guide to plywood dimensions makes cutlists more accurate.
| Thickness (nominal) | Best uses | What to watch for |
|---|---|---|
| 1/8-inch (3mm) | Laser cutting, ornaments, skins, inlays | Warping, clamp dents, scorch marks |
| 1/4-inch (6mm) | Drawer bottoms, cabinet backs, templates | Wrinkling if used to square a case without support |
| 3/8-inch (~9mm) | Small boxes, jigs, light panels | Face veneer chip-out on dull cutters |
| 3/4-inch (19mm) | Cabinet boxes, shelves, furniture carcases | Sag over long spans, heavy sheets, edge voids in cheap cores |
Choosing maple plywood by project
Project fit matters more than species debates. The “best” maple plywood is the sheet that stays flat, machines cleanly with your tools, and finishes the way you want without expensive redo work.
Cabinets and shelving
Cabinet boxes love 3/4-inch maple plywood when you want a bright interior and tough sides that don’t show wear. Pre-finished maple interiors are popular because you skip rolling finish inside a box—no smell lingering in the kitchen and no tacky corners collecting dust.
Risk to avoid: forgetting edge treatment. Maple faces look premium, but raw plywood edges don’t—use edge banding, lipping, or a solid maple nosing so shelves don’t look like striped layers and so the front edge resists dings.
Related reading: if you’re sorting specs for kitchen builds, compare face grades and core options in cabinet-grade plywood so you don’t pay premium prices for a paint-grade sheet.
Furniture builds
Furniture benefits from maple plywood when you want clean, modern surfaces that take clear coat well. It’s also a smart choice for parts that get handled a lot—drawer fronts, case sides, and table components where knuckles, rings, and belt buckles would chew up softer faces.
Pro workaround: for visible panels, pick sheets from the same lift and lay them out in the store under consistent lighting. Mixed bundles can shift slightly in color, and that shift looks bigger when two panels meet at a corner.
Laser cutting and engraving
Laser maple is popular because the face is smooth and fine-grained, so engraved detail stays crisp and doesn’t “fuzz” like open-grain woods. That said, maple can still scorch if your air assist is weak, your masking lifts, or your focus is slightly off.
Common mistake: running “one perfect setting” across different batches. Glue lines, moisture content, and density vary; I cut a tiny calibration grid first, then lock settings for that specific stack of sheets.
Community note: real users often report that maple’s density can yield clean engraving but still needs tuned power/speed to reduce dark edges. You can scan experiences in threads like Glowforge community discussions to see what changes people make with masking, air assist, and focus.
Indoor vs outdoor use
Indoor use is where maple plywood shines. For outdoor projects, the weak point isn’t the maple face—it’s the glue line and the core, which can swell, check, and delaminate as water gets in through edges and fastener holes.
Workaround: if you must use a maple-faced panel outside (say, a protected porch piece), seal every edge and drill hole, then use a film finish rated for exterior exposure. If outdoor durability is non-negotiable, start with marine plywood and add maple veneer only if you can keep it protected from standing water and sun.
Finishing maple plywood for best results
Finishing is where maple plywood can look high-end or frustrating, with little middle ground. A careful schedule prevents blotches, glue shadows, and that “dirty” stain look that makes maple seem lower quality than it is.
Stain conditioner
Conditioner (or a thin washcoat of dewaxed shellac) limits how deeply pigment dives into thirsty areas, which is why it helps maple so much. When you wipe stain after conditioning, the rag glides more evenly and you feel less “grab” where end-grain-like veneer patches would otherwise go dark.
Beginner mistake: over-conditioning, then wondering why the stain looks weak. If you need a deeper tone, switch to a dye (or a tinted topcoat) rather than piling on pigment stain that can get muddy on maple.
Paint and clear coats
Clear coats keep maple looking bright and modern. Water-based poly stays clearer; oil-based finishes warm the color and can push it amber, which is great for traditional looks but surprises people expecting “white maple” to stay icy.
Paint works well on maple plywood if you prep it like a cabinet surface: scuff sand, remove dust thoroughly, then prime with a bonding primer. The slick face veneer can let paint scratch off if you skip that primer step.
Avoiding blotchiness
Blotch control starts before stain ever opens. Sand evenly, stop at 180–220, vacuum, then wipe with solvent to reveal glue. If you feel a slightly rubbery patch while sanding, that’s often glue smear—sand it out or it’ll show up as a pale “halo” after finishing.
Pro workaround: pre-raise the grain with a light water wipe when using water-based finishes. Let it dry, then knock it back with a light pass; that avoids the rough “sandpaper” feel that shows up after the first coat.
Buying checklist: quality and specs
Buying smart means checking the sheet like you’re already in the shop. Ten seconds of inspection can save hours of filling, sanding, and trying to hide face defects under finish.
- Check face grade (A, B, etc.) and confirm whether the back is paint-grade or matching.
- Look for flatness by sighting down the long edge and pressing corners on a known-flat rack.
- Inspect edges for voids and core gaps that will blow out during routing.
- Ask the yard for core type (veneer-core, MDF-core, combo core) based on your joinery and weight limits.
- Confirm thickness with calipers if your dado stack or CNC pockets are dialed tight.
Veneer grades
Grades describe what you’ll see on the face: fewer patches, tighter color, and less mineral streaking as you move up. If you need clearer labels and what they mean for cabinet work, use plywood grades as your quick reference before you call the supplier.
Beginner risk: buying “cabinet plywood” as a generic label. Some dealers use that term loosely, so verify the actual face grade and whether it’s a paint-grade back that’s going to live inside a visible open cabinet.
Flatness and consistency
Consistency shows up in joinery. If one sheet measures 0.720 and the next is 0.740, your dados will either be sloppy or too tight, and you’ll “fix” it with glue gaps or forced assembly that can bow parts out of square.
Pro workaround: batch your project from one unit (one lift) whenever possible. When that’s not possible, assign slightly thinner sheets to parts with adjustable joinery (like backs in rabbets) instead of fixed dados.
Core types and stability
Core choice changes everything: veneer-core feels lighter and holds screws well; MDF-core stays very flat and paints great but is heavier and weaker at edges; combo cores aim to split the difference. If you’re also considering Baltic-style panels, compare with Baltic birch so you don’t mix up “birch face” and “birch all-through” construction.
Risk to avoid: edge-fastening MDF-core without proper technique. Pre-drill, use confirmat screws when appropriate, and don’t over-torque—stripped holes in MDF-core don’t “tighten back up” the way veneer-core sometimes can.
Pre-finished options
Pre-finished maple plywood speeds cabinet builds because the interior is already sealed and wipeable. The trade-off is glue and adhesion: pocket-screw joints and dado glue-ups need scuffed surfaces where glue should bond, or you’ll get joints that feel fine today and creak loose later.
Pre-finished interiors save time, but you’ve still got to prep the glue surfaces or the finish can act like a release layer.
Shop-floor rule of thumb
Recommended maple plywood sheets for laser and hobby use
Laser-ready sheets save time because thickness and flatness are more consistent, which means fewer focus issues and fewer ruined parts from incomplete cuts.
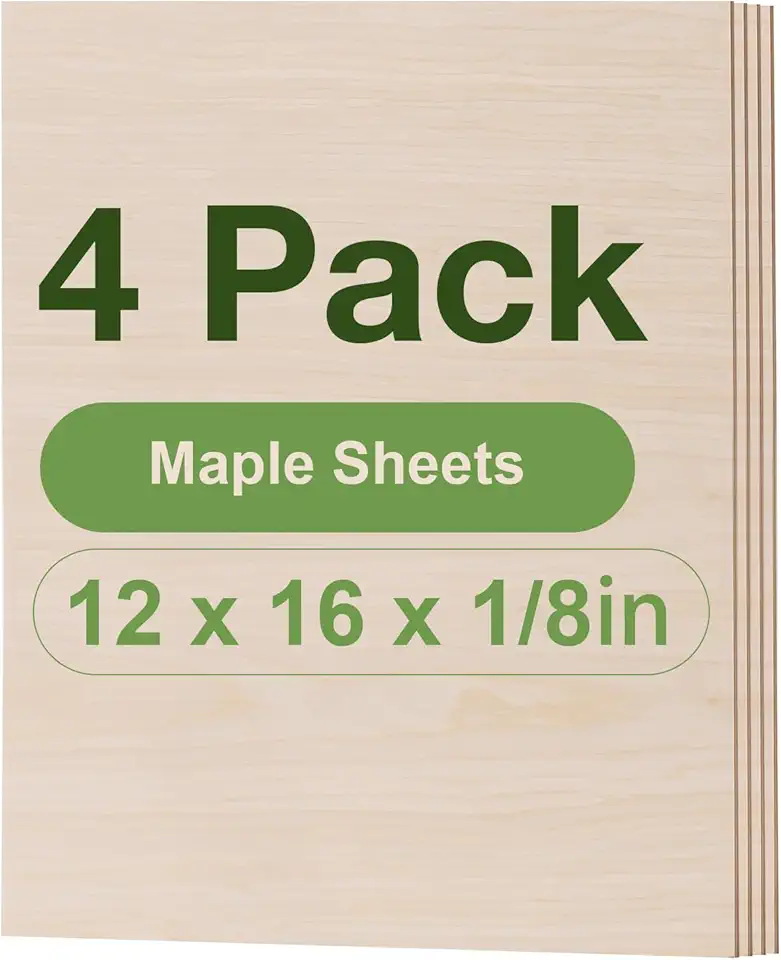
Maple Laser Plywood 4-Pack 12 x 16 1/8-inch
- Smooth unfinished surface ideal for laser cutting and engraving
- Consistent 3mm 1/8-inch thickness for precise cuts
- Thin, flat sheets perfect for architectural models and small crafts
- Accepts stain, paint, and wood burning for custom finishes
- Four-sheet pack gives extras for testing and multiple projects

Maple Laser Sheets 8-Pack 12 x 16 1/8-inch
- Eight consistent 3mm 1/8-inch sheets for larger projects and backups
- Smooth unfinished faces are ideal for engraving and cutting
- Thin profile reduces charring and yields fine detail
- Accepts paints, stains, and sealers for versatile finishing
- Great value pack for hobbyists, classes, and prototyping

ROBOTIME Maple Laser Sheets 4-Pack 12 x 16 1/8-inch
- Precision-cut 3mm 1/8-inch maple for clean laser engraving
- Smooth, unfinished surface for detailed etching and finishing
- Reliable density minimizes burning and ensures consistent results
- Ideal for models, ornaments, signage, and craft projects
- Compact four-pack is great for hobbyists and small runs

Sturdy Maple Sheets 4-Pack 12 x 12 1/4-inch
- Thicker 6mm 1/4-inch panels for stronger, more rigid parts
- Square 12 x 12 inch size fits many laser beds and projects
- Smooth unfinished surface ready for engraving, staining, or burning
- Great for structural model pieces, bases, and durable crafts
- Four-sheet pack provides spares for fitting and finishing
Practical Notes From Real-World Use
Burn marks surprised me the first time I pushed maple plywood through a crosscut sled with a blade that was “fine” on birch. The cut edge came out with faint brown lines and a slightly sweet, toasted smell; switching to a cleaner blade and easing feed fixed it faster than sanding ever did.
Blotchy stain is the second gotcha. A panel can look flawless raw, then turn uneven the second pigment hits; the fix that keeps projects on schedule is a washcoat (dewaxed shellac works) plus test pieces cut from the same sheet, not from offcuts you found in a scrap bin.
Thin veneers create a quiet failure that shows up late: you sand through near edges and corners while trying to erase a scratch. The workaround is changing the process, not sanding harder—use a card scraper lightly, spot-seal the repair zone, and let the topcoat level the sheen instead of trying to “perfect” raw veneer.
Sheet variation shows up when you mix suppliers. One “3/4-inch” maple sheet might fit your dado perfectly, and the next can force a mallet fit that bows a cabinet side; keeping one build to one batch solves most of that, and calipers solve the rest.
FAQs
Is Maple Plywood Better Than Birch Plywood For Cabinets?
Maple plywood is often preferred for cabinets because of its attractive grain and smooth finish. Birch plywood, however, typically offers slightly better dimensional stability and a lighter tone, which can suit modern looks. Choose maple when the visible surface and warm appearance matter most, and birch when stability or lighter staining is a priority.
What Is Maple Plywood 3/4 Used For?
Three-quarter-inch (3/4-inch) maple plywood is commonly used for furniture frames, cabinet carcases, shelving, and heavy trim because its thickness adds strength. Its rigidity provides good screw holding and structural support for boxes and shelves. Finishers also use it when a stable, attractive surface is needed for veneering or clear finishes.
Is 1/4 Maple Plywood Strong Enough For Drawer Bottoms Or Panels?
Quarter-inch (1/4-inch) maple plywood can be used for drawer bottoms and thin panels but should be supported at the edges or with a center runner for heavier loads. By itself it may sag under sustained weight, so add supports or use thicker plywood for large spans. For light or decorative panels, 1/4-inch is usually sufficient and easy to finish.
Does Maple Plywood Stain Evenly Or Does It Get Blotchy?
Maple plywood can stain unevenly and is prone to blotching if not sealed or conditioned before staining. To reduce blotchiness, apply a pre‑stain conditioner or sanding sealer and test on a scrap piece, then apply thin, even coats. For clear or natural finishes, use spray application or wipe-on finishes to maintain a uniform appearance.
Is Maple Plywood Good For Laser Cutting And Engraving?
Maple plywood can be suitable for laser cutting and engraving if you choose thin, void-free sheets made with a laser-safe adhesive. Thicker or gapty plywood and certain resins can char badly or emit harmful fumes, so always check material specs. Test small pieces, ventilate the workspace, and adjust laser power and speed for the cleanest cuts and engravings.