

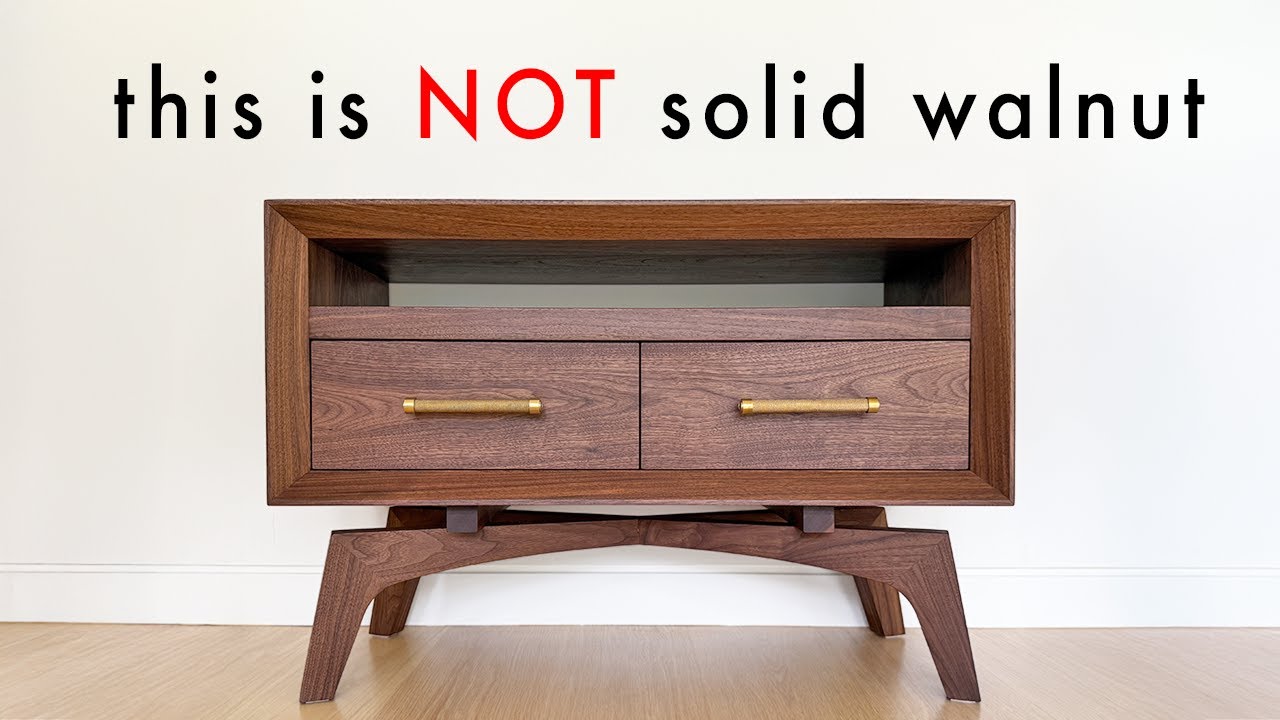
Walnut wood veneer is a thin layer of genuine walnut bonded to a backing, core, or prepared surface. It gives cabinets, furniture, doors, speakers, and crafts real wood grain while using less walnut than solid lumber.
Table of Contents
Walnut Wood Veneer Basics

Authentic veneer is real wood, but product names can blur the line between natural walnut, reconstructed wood, laminate, and printed film. Shoppers who search for “veneer wood walnut” are usually looking for genuine walnut veneer, not walnut-colored contact paper.
Real Veneer Verification
Check the material description for a species name, wood face thickness, cut, backing, and finishing instructions. Terms such as walnut effect, wood grain vinyl, melamine, or decorative film don’t prove that the product contains walnut.
Real veneer has pores and small irregularities that continue through the face rather than repeating like a printed image. Under side lighting, the grain changes from warm chocolate to a soft gray-brown as you tilt it; printed film keeps a flatter, slightly plastic sheen.
Veneer vs Solid Walnut
Solid walnut runs through the full component, so it tolerates deeper scratches and repeated sanding. Veneer places a thin walnut face over MDF, plywood, or particleboard, which lowers material use and makes wide panels less prone to seasonal expansion across their width.
| Factor | Walnut veneer | Solid walnut |
|---|---|---|
| Construction | Thin walnut face over a core | Walnut through the full thickness |
| Wide-panel movement | Low with a stable, balanced core | Requires room for seasonal movement |
| Refinishing | Limited by remaining face thickness | Usually permits deeper sanding |
| Edges | Need banding or a solid lipping | Exposed edges remain walnut |
| Large-surface cost | Usually lower | Usually higher |
Veneer vs laminate: laminate uses printed decorative paper and resin, so it often resists stains, abrasion, and wet cleaning better. Veneer offers natural pores, changing light reflection, and more finishing options, but its topcoat must carry most of the wear.
Veneer vs vinyl: vinyl is a polymer film with a photographed grain. It can suit a temporary update, yet it can’t be sanded, stained, pore-filled, or repaired like veneer walnut wood, and heat may shrink or loosen its edges.
Key quality factors include species, cut, face grade, thickness, backing, grain match, sequence availability, and usable dimensions. A large sheet isn’t automatically better: splits near rolled edges and sapwood outside the photographed area can reduce usable coverage.
Practical use note: run a fingertip across the sheet under low side light before cutting. A shallow ridge that barely catches a fingernail can remain visible after finishing, while a backing wrinkle may telegraph through as a long shadow on a glossy panel.
Walnut Species, Cuts and Matching

The species sets the broad color range, while cutting and matching control the visible pattern. Two walnut wood veneer sheets from the same species can look unrelated if one is flat-cut and the other is quarter-cut.
American Black Walnut
American black walnut, or Juglans nigra, commonly ranges from medium brown to dark chocolate, with gray, red, or purple undertones. Pale sapwood may be selected out or darkened by steaming, which can soften the natural contrast.
The USDA Wood Handbook lists representative solid black walnut values near 38 lb/ft³ at 12% moisture content and 1,010 lbf Janka hardness. Those figures describe solid wood; veneer durability depends more heavily on the core and finish.
For a closer comparison of color and naming, see black walnut vs walnut. Product listings should still identify the botanical or commercial species rather than relying on “dark walnut.”
European Walnut
European walnut, usually Juglans regia, often shows tan, gray, caramel, and irregular dark streaks. It suits furniture that needs a softer, more varied surface than the familiar dark brown of black walnut wood veneer.
Claro walnut, or Juglans hindsii, is linked with California and valued for dramatic color, curl, crotch, and burl figure. Feature-grade sheets can cost far more than plain black walnut; the Claro walnut guide explains its natural appearance in greater depth.
Reconstituted walnut starts with wood that is dyed, laminated, and sliced again to form a repeatable pattern. It remains wood-based, but it isn’t naturally sliced American black walnut; its main benefit is predictable color across long cabinet runs.
Flat-cut veneer displays cathedral arches through the center and straighter grain near each edge. Quarter cutting produces a calmer linear pattern, while rift cutting reduces cathedral figure further and often costs more because each log yields less usable face material.
Rotary-cut walnut is peeled around a log and can create broad, flowing grain across wide sheets. Curly, fiddleback, crotch, and burl cuts work well on drawer fronts and focal panels, but their shifting grain can drink stain unevenly and show seams clearly.
Book matching opens consecutive leaves like pages, producing a mirrored design. Adjacent leaves can look alternately light and dark—the barber-pole effect—because their fibers reflect light in opposite directions, not because the stain failed.
Slip matching keeps every leaf in the same orientation, which gives straight-grain veneer more consistent reflection. Sequence and panel matching preserve the cutting order across doors or wall panels; buy the full sequence together because a later order may come from another tree.
Balance matching uses equal-width leaves, while center matching creates symmetry around a panel centerline. Explore common wood grain patterns before choosing a match, since a mirrored cathedral can look formal while random matching resembles separate boards.
Veneer Formats and Backings
Choose a backing from the project shape, pressing method, and tolerance for repositioning. Raw veneer gives the most matching freedom, while backed sheets trade some flexibility for easier handling.
Raw Walnut Veneer
Raw walnut veneer consists of thin, unsupported leaves, often near 1/42 inch or 0.6 mm. That dimension varies by maker and sanding stage, so measure a sample rather than treating 1/42 inch as a fixed standard.
Raw leaves are fragile before bonding and can split with a dry rustling sound along the grain if lifted from one corner. Veneer tape, jointed seams, cauls, clamps, or a vacuum press help spread pressure while limiting cracks and glue bleed-through.
Paper-Backed Veneer
Paper-backed veneer supports the wood face and lets large sheets flex without breaking as readily. Most products still need a separate approved adhesive; paper backing isn’t the same as pressure-sensitive adhesive.
Wood-backed veneer, sometimes called two-ply, uses a second wood layer with its grain crossing the face. It handles well and hides minor substrate texture better, but added thickness makes tight curves harder to wrap.
Peel-and-stick veneer carries factory-applied pressure-sensitive adhesive. It saves glue application time on clean flat surfaces, yet offers little repositioning and can fail over wax, silicone polish, coarse plywood, loose paint, or swollen particleboard.
Walnut edge banding covers exposed plywood, MDF, and particleboard edges. Buy it slightly wider than the panel, match the grain direction to the face, and check whether it is raw, iron-on, PSA-backed, or non-glued before planning tools.
Thickness labels require care. Ten mil equals 0.010 inch or 0.254 mm, while 0.4 mm equals 0.0157 inch, close to 1/64 inch; a seller may quote the backing, wood face, or full assembly.
Sheet Sizes, Specifications and Cost
Buy enough veneer for every face, trimming margin, grain match, and reverse-side balance. A nominal sheet dimension gives gross coverage rather than the finished usable area.
Sheet Sizes and Coverage
| Sheet size | Nominal coverage | Coverage after 15% allowance |
|---|---|---|
| 12 × 12 inches | 1 sq. ft. | About 0.87 sq. ft. |
| 24 × 48 inches | 8 sq. ft. | About 6.96 sq. ft. |
| 24 × 96 inches | 16 sq. ft. | About 13.9 sq. ft. |
| 48 × 96 inches | 32 sq. ft. | About 27.8 sq. ft. |
Convert each dimension to feet, multiply length by width, then multiply by the number of faces. Add 10–15% waste for simple panels or 15–20% for matching, edge wrapping, defects, and cutouts.
A 24 × 96-inch sheet covers 16 square feet before trimming. With a 15% planning allowance, treat it as roughly 13.9 square feet of finished coverage rather than trying to consume every narrow offcut.
Lot planning matters more than nominal area on doors and long runs. Order sequence-matched sheets together, confirm grain direction, and include a spare leaf because replacement veneer from another flitch may shift from cool brown to reddish chocolate under the same finish.
Price Per Square Foot
Divide the product price by nominal square footage to compare like constructions. An $80 sheet measuring 24 × 96 inches costs $5 per square foot before shipping, waste, adhesive, balancing material, edge treatment, and finish.
| Veneer format | Broad US retail planning range |
|---|---|
| Standard raw walnut leaves | $2–$8 per sq. ft. |
| Flexible paper-backed sheets | $5–$12 per sq. ft. |
| PSA-backed veneer | $6–$15 per sq. ft. |
| Figured, crotch, or burl walnut | $10–$30+ per sq. ft. |
| Walnut edge banding | $0.30–$1.50+ per linear ft. |
These are planning ranges, not guaranteed quotes. Figure, grade, backing, sequence, sheet width, shipping method, and inventory can move the final amount sharply; raw leaves and finished PSA sheets aren’t equivalent products.
Total project costs can include oversized shipping, adhesive, veneer tape, blades, a J-roller, edge banding, reverse-side veneer, grain filler, stain, toner, topcoat, test pieces, and pressing equipment. Small consumables often make a cheap sheet less economical than a supported product.
- Confirm the exact walnut species or reconstituted construction.
- Record length, width, package quantity, and grain direction.
- Ask whether thickness means the face, backing, or full sheet.
- Identify raw, paper-backed, wood-backed, PSA, or pre-glued construction.
- Check cut, face grade, sapwood content, figure, and sequence availability.
- Verify the required adhesive, pressure, temperature, and curing period.
- Check suitability for curves, heat, humidity, kitchens, or vehicle interiors.
- Ask whether listing photographs show the actual sheet or a sample.
Specialty sellers are better for exact flitch photographs, sequence matching, burl, and technical backing choices. Marketplace products are convenient for standard sizes and repairs, but reviews may combine several variants, so match feedback to the exact ASIN, size, and backing.
Suitability and compliance apply to the entire panel, not the decorative face alone. For cabinets made with composite cores, check supplier documentation against EPA composite wood standards; natural veneer doesn’t cancel emissions from a noncompliant core or adhesive.
Walnut Veneer by Project
Large panels benefit from supported sheets and planned grain sequences, while repairs need flexible material with a close color match. Select the format by use rather than buying one veneer type for every surface.
Cabinets and Large Panels
For cabinets and large furniture panels, prioritize full-size paper-backed sheets, sequence consistency, and enough overhang for clean trimming. MDF creates a smooth door face, while cabinet-grade plywood offers lower weight and stronger screw holding.

Walnut Paper-Backed Veneer Sheet
- A-grade flat-cut walnut veneer face
- Paper backing adds handling support
- Non-glued format allows adhesive choice
- Large 24 x 96 inch sheet
- Ideal for furniture restoration and cabinetry
 Buy on Amazon
Peel-and-Stick Projects
Peel-and-stick walnut veneer works best on smooth, sealed, flat, indoor surfaces. Apply a sample first, then press firmly with overlapping roller passes; factory adhesive can’t compensate for dust, wax, grease, silicone polish, loose paint, or rough grain.
Flexible Walnut Peel and Stick Veneer
- Natural walnut flat-cut look
- Ultra-thin 0.4 mm veneer layer
- Self-adhesive backing simplifies installation
- A-grade veneer face for a refined finish
- Generous 24 x 96 inch sheet for larger projects
Buy on Amazon
Furniture and equipment repairs need grain alignment before anything else. A small square patch with cross-grain lines often stands out more than a larger irregular patch cut along a cathedral line; speakers and instruments also need veneer thin enough to follow their contours.

Black Walnut Veneer for DIY Repairs
- Black walnut wood appearance
- Thin sheets suit detailed surfaces
- Refreshes furniture and speaker cabinets
- Useful for guitar and automotive projects
- Great for handmade DIY upgrades
Buy on Amazon
Plywood and MDF edges need banding slightly wider than the core. Let the adhesive set before trimming, support the grain during the cut, and test iron heat on scrap because excessive heat can darken walnut or squeeze glue through a thin face.

Walnut Iron-On Edge Banding Roll
- Walnut veneer edging for clean panel ends
- Pre-glued hot melt adhesive
- Activates with a household iron
- Smooth sanded finish saves prep time
- Long 50-foot roll supports multiple repairs
Buy on Amazon
Craft sheets reduce waste on boxes, coasters, model parts, drawer repairs, marquetry practice, and decorative inserts. Lay every square under the same light before cutting because separate pieces may vary from caramel brown to near-black.

Walnut Veneer Squares for Crafts
- Set includes 12 walnut veneer sheets
- Handy 12 x 12 inch square format
- Suitable for door panel accents
- Convenient for small repairs and crafts
- Multiple pieces support matching projects
Buy on Amazon
Substrates and Adhesives
MDF is the most predictable base for flat indoor veneer work, while plywood suits panels that need lower weight or stronger fastener holding. The correct adhesive depends on the veneer backing, substrate, press method, temperature, and moisture exposure.
MDF Substrates
MDF has a smooth, uniform face that limits telegraphing through thin veneer. Its edges absorb glue quickly and may need sealing or banding, while sanding dust must be removed with extraction and a clean cloth before bonding.
Plywood and particleboard need close inspection. Fill veneer-core voids, patches, fastener depressions, and raised seams because side lighting can reveal each defect through a thin face; swollen particleboard is rarely a sound repair base.
Existing furniture may carry wax, oil, silicone polish, grease, or weak finish. Cleaning and deglossing can work on a sound coating, but sanding silicone contamination into the finish spreads it and may create circular areas where glue or topcoat pulls away.
Backing-Adhesive Matrix
| Veneer construction | Common bonding method | Main risk |
|---|---|---|
| Raw veneer | PVA veneer glue with cauls or vacuum pressing | Bleed-through and uneven pressure |
| Paper-backed veneer | Approved cold-press or contact adhesive | Bubbles and limited repositioning |
| Wood-backed veneer | Cold-press or approved contact adhesive | Restricted bend radius |
| PSA veneer | Factory pressure-sensitive adhesive | Contamination and weak roller pressure |
| Pre-glued edge banding | Heat-activated adhesive | Scorching or incomplete activation |
Contact cement limitations include little repositioning time, trapped air, uneven film thickness, and gradual movement under heat or stress. Use it only where both product makers permit it, and respect coat weight, drying interval, assembly window, and roller-pressure directions.
Balanced construction places compatible material on the reverse face to counter stress. The back doesn’t always need decorative walnut, but veneering only one face of a thin panel can lead to cupping after glue moisture and room humidity change.
Moisture and movement remain relevant with engineered cores. Solid wood makes a risky substrate because its seasonal movement can strain the glue line, while water-based adhesive can curl thin leaves before pressure is applied.
Adhesive safety begins with the safety data sheet and both manufacturers’ directions. Solvent vapors need suitable ventilation and ignition control; wood and MDF dust call for extraction, eye protection, and a properly selected respirator.
Installation and Finishing
Successful installation depends on acclimated material, a flat substrate, deliberate grain placement, even adhesive coverage, and full pressure. Most failures begin before the walnut wood veneer touches the panel.
Inspect and Condition
Inspect and condition the veneer and core in the work area for the period named by the supplier; 24–48 hours is a common planning window. Check cracks, dimensions, sequence numbers, backing damage, adhesive shelf life, and color under the final room lighting.
Prepare the substrate until it is flat, dry, stable, and free from dust or oil. Fill depressions, flatten seams, remove weak coatings, and test adhesion on an inconspicuous area instead of trusting a surface that merely feels smooth.
Plan the grain across doors and drawer fronts before cutting. Photograph the full layout, number the rear waste area, and orient cathedrals consistently; pencil pressure on the show face can bruise soft fibers and appear after a clear coat.
Cut Veneer Oversize
Cut oversize with a veneer saw or fresh utility blade against a steel straightedge. Several light passes create less tearing than one hard stroke, and supporting both sides stops a narrow strip from snapping along the grain.
Apply and press within the adhesive’s open and assembly times. Work with the specified system—J-roller, scraper, cauls, clamps, or vacuum bag—and concentrate full pressure at corners, seams, cutouts, and perimeters where lift begins most often.
Trim and edge after the stated setting or curing period. A sharp knife, veneer trimmer, or controlled flush-trim bit works, but keep the router base flat and support the exit side so the cutter can’t split the last inch.
Sand without breakthrough by working lightly with the grain, often finishing around 180–220 grit if the coating maker permits it. Corners feel warm almost at once under a powered sander; that heat and sudden pale patch signal that the thin face is at risk.
Choose a finish after testing an offcut from the same sheet. Oil-based clear coats deepen brown and amber tones, while waterborne finishes preserve a paler look; hard-wax oils give a low-build feel but carry their own maintenance schedule.
Stain and grain filling are optional. Dye or toner can blend sapwood and mismatched leaves more evenly than heavy pigment, while grain filler levels walnut’s open pores for a glassy surface; test the full adhesive, color, and topcoat sequence together.
UV color protection slows fading but can’t freeze walnut’s original color. Light exposure commonly shifts dark brown walnut into a lighter honey or golden brown, so rotate loose objects and limit strong window exposure where matching matters.
Troubleshooting and Maintenance
Bubbles, lifted edges, visible seams, pale sand-through spots, and warped panels usually trace back to pressure, contamination, moisture, or an unsuitable adhesive. Diagnose the failure cause before adding more glue or finish.
Bubbles and Blisters
Bubbles and blisters can result from incomplete pressure, trapped solvent, dusty substrate, uneven adhesive, or incorrect open time. Don’t puncture every bubble at once; identify the adhesive first, since heat, injection, and re-pressing aren’t safe for every backing.
Lifting edges often follow weak perimeter pressure, contamination, handling before cure, or repeated heat and moisture. A controlled repair may involve cleaning beneath the edge, adding compatible adhesive, and clamping through a flat caul without crushing the face.
Cracks and seams become visible when raw leaves are dry, poorly jointed, bent against the grain, or installed without conditioning. Joint replacement material from a nearby grain line, dry-fit it, and use a tapered patch where possible instead of a conspicuous rectangle.
Glue bleed-through blocks stain and leaves dull or pale areas. Scraping or sanding can cut through the face, so test a mild cleanup method on an offcut and consider toner above a sealed surface when removal would cause greater damage.
Uneven Stain
Uneven stain may come from glue, residual finish, variable sanding, sapwood, or natural density changes. A dye, washcoat, or sprayed toner often gives more control than repeatedly wiping dark pigment into areas that already absorb too much.
Sand-through damage appears as a pale patch exposing paper, crossband, or core. It can’t be restored with stain; use a grain-aligned patch, replace the full leaf or panel face, or hide a tiny edge defect with carefully mixed color and finish.
Warping and cold creep point to unbalanced faces, moisture differences, a weak core, heat, or adhesive movement under sustained stress. Flattening alone rarely fixes the cause; balance the panel, control humidity, and check whether the adhesive is rated for its actual service temperature.
Cleaning and refinishing should start with a soft cloth and a cleaner approved for the topcoat, not raw wood. Avoid soaking seams, silicone polish, abrasive pads, and aggressive sanding; light scuffing and recoating may work if the finish remains bonded and enough walnut face remains.
Before repairing valuable furniture, identify whether the surface is veneer, solid walnut, or printed film. The broader furniture wood guide helps separate material types, while an inconspicuous test area reveals how the old coating reacts to cleaners and new finish.
FAQs
Is Walnut Veneer Real Wood?
Yes, walnut veneer is real wood cut into very thin sheets from walnut logs. It has the natural grain, color variation, and character of solid walnut while using less lumber.
Veneer is commonly bonded to a stable core, such as plywood or MDF, for furniture, cabinets, and decorative panels.
How Thick Are Walnut Wood Veneer Sheets?
Walnut wood veneer sheets are typically between 0.5 mm and 3 mm thick. Standard decorative veneers are often about 0.6 mm thick, while thicker veneer can be sanded more easily.
Paper-backed and peel-and-stick products may feel thicker because of their backing material. Always check the product specification before buying.
Is Paper-Backed Or Peel-And-Stick Walnut Veneer Better?
Paper-backed walnut veneer is usually better for durable projects because it offers more flexibility and works with a wider range of adhesives. It is a dependable choice for large panels, cabinets, and curved surfaces.
Peel-and-stick veneer is easier and faster for small repairs or beginner projects. Choose it when convenience matters more than maximum long-term bonding strength.
What Adhesive Should I Use For Walnut Veneer?
Use contact cement for paper-backed walnut veneer, especially on large flat surfaces where clamping is difficult. Apply it evenly to both surfaces and allow it to become tacky before joining them.
For raw wood veneer, veneer glue, PVA wood glue, or urea resin glue can work well with proper clamping. Follow the adhesive manufacturer’s instructions for coverage and curing time.
Can Walnut Veneer Be Sanded And Refinished?
Yes, walnut veneer can be lightly sanded and refinished if the veneer is thick enough and undamaged. Use fine-grit sandpaper and sand carefully with the grain to avoid sanding through the wood layer.
After sanding, apply a compatible stain, oil, lacquer, or clear finish. Thin decorative veneer requires extra care, so test the process on an offcut first.
Affiliate Disclosure: Some links in this post are affiliate links. If you make a purchase through these links, we may earn a small commission at no extra cost to you. We only recommend products we genuinely believe in.