
Wood Grain Pattern Visual Guide: Types, Cuts, and Identification

A wood grain pattern is the visible arrangement of a tree’s structural cells, shaped by species, growth conditions, natural irregularities, and the angle at which a log is cut. Common appearances include straight, cathedral, curly, quilted, birdseye, burl, ribbon, and ray-fleck patterns, though several are forms of figure rather than grain direction.
This visual guide explains natural grain patterns in wood, mahogany identification, cut orientation, material selection, digital textures, and practical ways to recreate grain with paint or film.
Table of Contents
Wood Grain Pattern Meaning and Formation
A wood grain pattern forms when a board exposes growth rings, vessels, fibers, rays, and other cells at a particular angle. Species controls the basic anatomy, while climate, branches, injury, fungi, and sawing determine the final visible pattern.
What Is a Wood Grain Pattern?
In wood science, grain describes cell direction, arrangement, and relative size. In design catalogs, the same phrase may describe a photograph, vector, laminate print, faux-painted surface, or repeating background, so labels should identify the material and image type.
Wood grain structure develops in the xylem produced beneath the cambium. New cells conduct water, store nutrients, and support the trunk; their size, wall thickness, direction, and seasonal arrangement leave the lines and pores visible after cutting.
Growth rings often represent annual growth in seasonal climates, but drought, frost, defoliation, or interrupted growth can create false or missing rings. Earlywood commonly contains larger or thinner-walled cells, while denser latewood creates darker boundaries in pine, oak, ash, and similar species.
Hardwood vessels appear as pores on clean end grain. Ring-porous woods such as oak and ash place large earlywood pores near ring boundaries; diffuse-porous woods such as maple, cherry, birch, and mahogany distribute smaller pores more evenly.
Rays, Fibers, Heartwood, and Growth Effects
Medullary rays run outward from the tree’s center and transport or store material across the stem. A quartersawn cut may expose them as shiny flakes, especially in white oak, lacewood, and other woods with prominent rays.
Long hardwood fibers contribute structure and reveal grain direction. Softwoods lack vessels and rely heavily on tracheids for water transport and support, though resin canals may provide useful identification clues in certain pines and spruces.
Heartwood and sapwood can differ sharply in color. Heartwood consists of older inner xylem, while lighter outer sapwood remains active in water movement; walnut shows an obvious contrast, while maple may show a subtler boundary.
Leaning trunks, branch unions, wounds, disease, and uneven light create irregular growth. Tension wood in hardwoods and compression wood in softwoods may move, fuzz, or machine unpredictably, so dramatic figure doesn’t prove that a board is structurally superior.
The USDA Wood Handbook explains how anatomy, moisture, and directional properties affect appearance and performance. Its data also shows why wood expands far more across the grain than along it.
| Term | What it describes | Examples | Identification limit |
|---|---|---|---|
| Grain | Cell direction, arrangement, and size | Straight, spiral, interlocked, cross, wavy | Rarely proves species alone |
| Figure | Decorative effect produced by anatomy, growth, color, and cut | Curly, birdseye, quilted, burl, ribbon | Can occur in several species |
| Texture | Relative size and distribution of cells or pores | Fine, medium, coarse, even, uneven | Finish can obscure it |
| Color | Natural or altered surface color | Pale maple, reddish cherry, brown walnut | Changes with stain, light, age, and screens |
This comparison prevents a common labeling error: birdseye, burl, quilting, knots, and spalting aren’t simple grain directions. They arise from abnormal growth, fiber distortion, anatomy, biological activity, or the chosen cut.
How Sawing Changes Wood Grain

Sawing changes wood grain because each board face intersects curved growth rings at a different angle. Flatsawn faces often show arches, quartersawn faces show straighter lines and rays, while riftsawn faces favor a consistent linear appearance.
Flatsawn, Quartersawn, and Riftsawn Grain
Flatsawn or plainsawn boards are efficient to produce and commonly provide broad faces. Where the face cuts tangentially across growth rings, it creates cathedral arches, loops, or flame-shaped lines; these boards also tend to move more across their width.
Quartersawn grain is associated with growth rings meeting the board face at roughly 60–90 degrees, though trade definitions vary. The face often shows narrow parallel lines, and ray-rich woods may display reflective flecks; see this comparison of quarter-sawn oak.
Riftsawn grain commonly falls near a 30–60-degree ring angle. It gives oak a calm, straight pattern with less ray fleck, but radial cutting produces more waste and raises milling cost; examples of rift-cut white oak show the distinction.
End-Grain Anatomy, Cut Orientation, and Movement
End grain exposes cells across their length and reveals pore distribution, rays, ring boundaries, and resin canals. It drinks stain and finish quickly, often feeling slightly rough and looking much darker than an equally sanded face-grain surface.
A useful cut orientation diagram shows a log cross-section with boards placed tangentially, radially, and between those positions. Angle thresholds differ among flooring, lumber, and grading systems, so a diagram should show ring orientation rather than rely solely on a label.
- Flatsawn: broad cathedral figure, efficient yield, higher tangential movement.
- Quartersawn: straighter lines, possible ray fleck, reduced cupping tendency.
- Riftsawn: uniform linear grain, restrained ray display, lower log yield.
- End grain: pores and rings viewed across the fibers, high liquid absorption.
Dimensional stability depends on species, moisture change, grain angle, board width, and defects. Quartersawing can reduce cupping, but it can’t compensate for wet lumber, missing expansion space, reaction wood, or poor indoor humidity control.
The National Wood Flooring Association guidelines provide practical moisture and installation guidance. A visually stable grain choice still needs moisture testing and acclimation appropriate to the flooring system and site.
Visual Guide to Grain Patterns in Wood
The main grain patterns of wood can be sorted by visual appearance, anatomical cause, typical species, and cut orientation. This method is more reliable than matching color against an unlabeled stock photograph.
Wood Grain Pattern Identification Matrix
| Pattern | Appearance and cause | Common examples | Practical caution |
|---|---|---|---|
| Straight | Fibers run mainly along the board | Maple, cherry, pine, mahogany | Diagonal cutting can still create short grain |
| Cathedral | Arches formed where a flatsawn face crosses rings | Oak, ash, pine, walnut | It describes the cut, not the species |
| Curly or wavy | Undulating fibers reflect light in alternating bands | Maple, birch, koa, walnut | Grain reversal promotes planer tear-out |
| Quilted | Broad rounded waves with a padded appearance | Bigleaf maple | Deep figure may occur in a thin usable zone |
| Birdseye | Small eye-shaped disturbances | Hard maple | Digital repetition quickly looks artificial |
| Burl | Chaotic grain from abnormal growth | Walnut, maple, redwood, elm | Voids, bark, and cracks are common |
| Ribbon | Alternating bands from quartersawn interlocked grain | Mahogany, sapele, utile | Light and dark bands reverse with viewing angle |
| Ray fleck | Radial cells exposed on the face | White oak, lacewood | Can be mistaken for damage or spalting |
| Spalted | Zone lines and bleaching created by fungi | Maple, beech, birch | Advanced decay weakens the material |
Straight, Cathedral, Curly, and Decorative Figures
Straight grain runs predominantly with the board’s length and usually planes cleanly when fibers remain consistent. Cross grain wood contains fibers crossing the intended line, often near knots, sloping grain, branch unions, or interlocked areas.
Cathedral grain consists of nested arches or pointed loops produced by flatsawing. Oak and ash show bold ring contrast, pine displays alternating earlywood and latewood bands, and walnut tends to produce softer brown arches.
Wavy and curly grain bends through the board in repeated undulations. Under raking light, alternating fibers flash from pale to dark as the board turns; the surface can feel smooth under a fingertip while looking deeply corrugated.
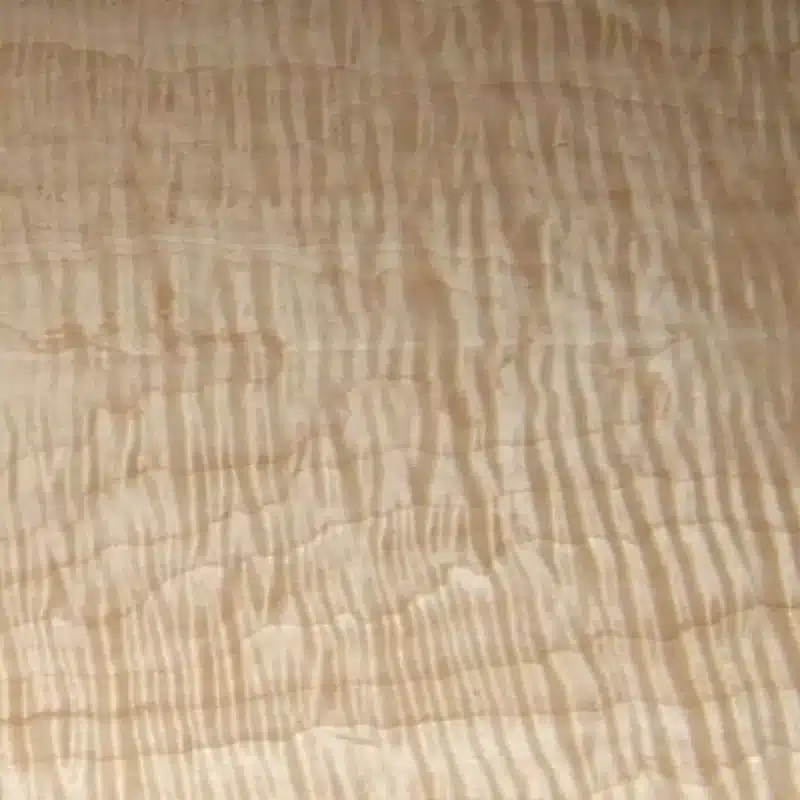
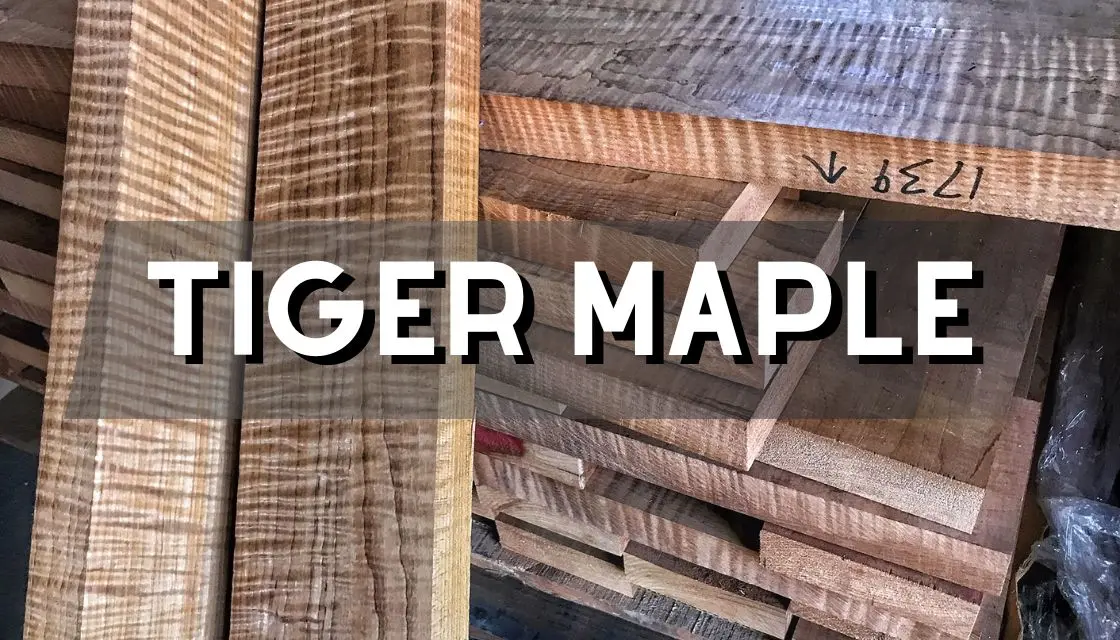
Tight, regular waves are often called fiddleback figure, especially on musical-instrument wood. Wider rounded waves describe quilted maple, while stronger linear bands may be sold as tiger maple; these trade terms overlap.
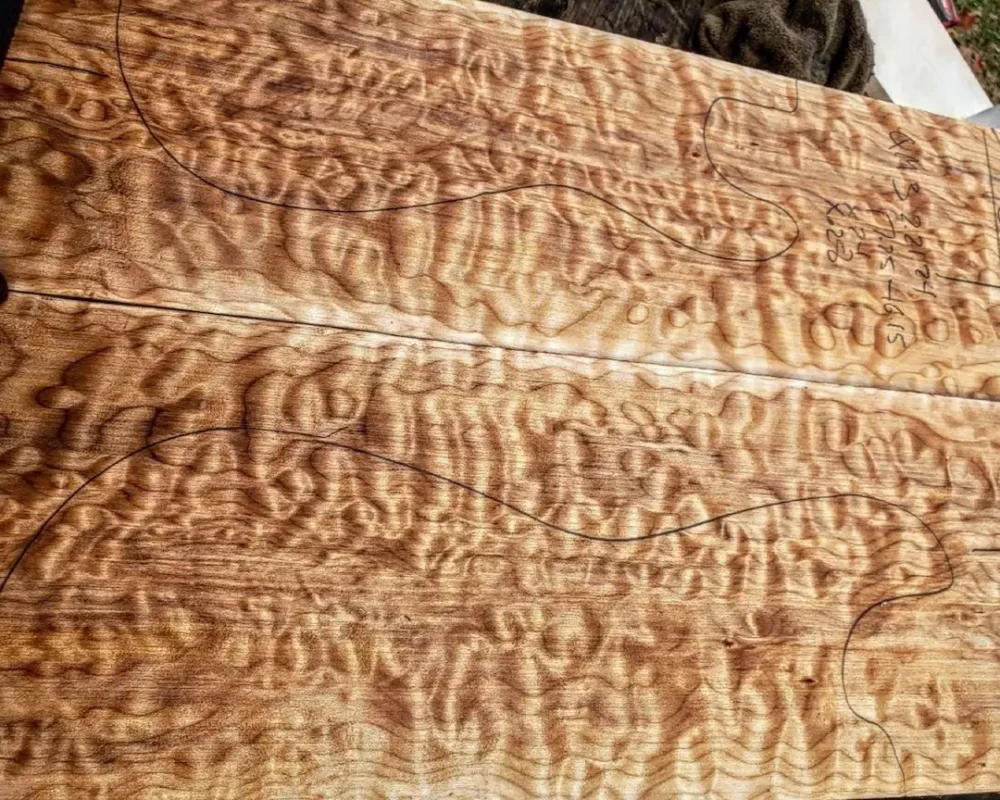
Birdseye figure consists of small circular or elliptical marks, most closely associated with hard maple. The precise biological trigger remains unsettled, and eye density varies enough that a regular computer-generated grid rarely looks believable; compare verified birdseye maple.
Burl figure comes from highly irregular growth containing dormant buds, bark inclusions, or tangled fibers. A fresh cut may reveal dense swirls beside soft cavities, so stabilize fragile areas before turning or routing; this guide to tree burl growth explains its formation.
Ribbon, tiger, and braided stripes need careful labels. Ribbon usually comes from quartersawn interlocked grain; tiger may mean curly maple, striped tropical wood, or ray-rich oak; braided grain describes crossing bands that resemble a loose plait rather than a formal anatomical category.
Crotch and flame figure develop where a trunk divides into major limbs. The feathered plume looks dramatic in veneer, but short grain, internal stress, and hidden checks make crotch wood a poor default choice for narrow load-bearing parts.
Ray fleck appears as bright flakes or ribbons in quartersawn oak and related woods. Spalting looks different: fungi produce dark zone lines, bleaching, or staining, and heavily decayed spalted wood may crush beneath a fingernail.
Oak and ash are ring porous and show large earlywood pores with strong ring contrast. Beech has a finer, diffuse-porous look and visible rays that may appear as tiny dashes on flatsawn faces or larger flecks on radial cuts.
Maple, walnut, and cherry have smaller pores and smoother visual texture. Maple can carry curly, birdseye, quilted, or ambrosia marks; walnut combines brown heartwood with cathedral faces; cherry often darkens from pinkish brown to a deeper warm red.
Pine and tropical woods vary widely. Pine displays strong earlywood-latewood bands and resinous knots, while sapele, genuine mahogany, zebrawood, koa, and other tropical species may show interlocked stripes, bold color bands, or intense chatoyance.
Mahogany Wood Grain Pattern
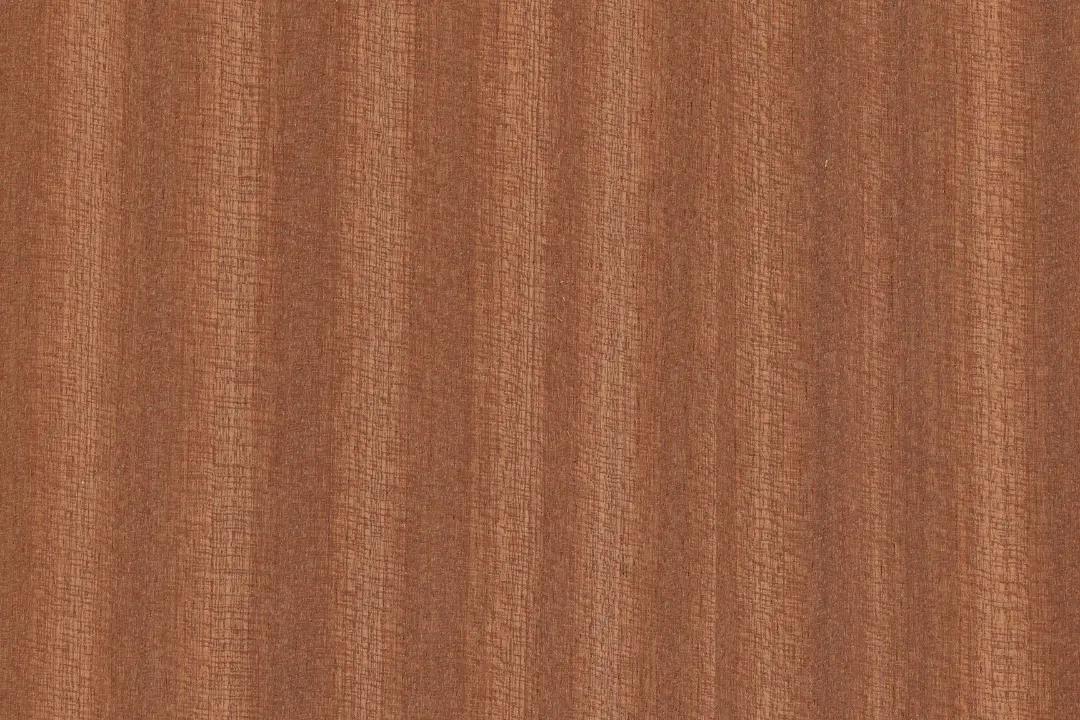
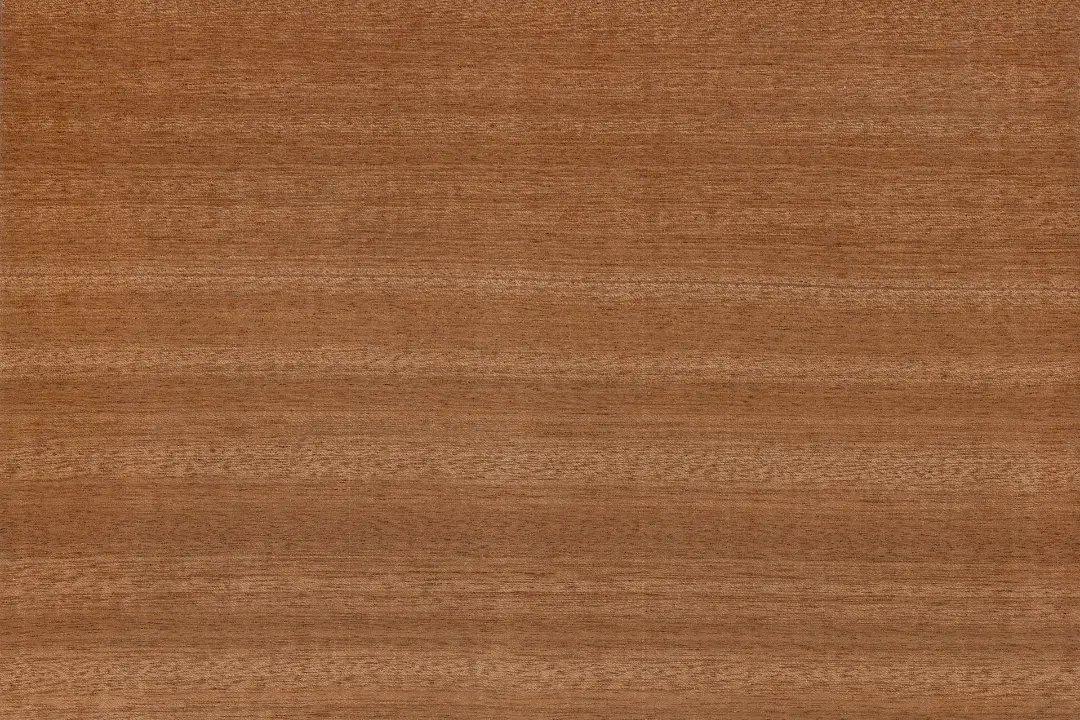
A genuine mahogany wood grain pattern has visible open pores, medium and fairly even texture, and grain ranging from straight to interlocked. Quartersawn interlocked boards can show ribbon stripes that shift from light to dark as the viewing angle changes.
Genuine Mahogany Grain and Bigleaf Data
Genuine mahogany refers to species in the genus Swietenia. Bigleaf mahogany, Swietenia macrophylla, is commonly reported near 900 lbf or 4,020 N Janka hardness and about 37 lb/ft³ or 590 kg/m³ average dried weight, though specimens vary.
Mahogany is diffuse porous, yet its pores remain visible without magnification. Freshly sanded wood often appears pinkish or muted reddish brown, then deepens with oxygen and light; stain, steaming, and tinted finish can make color-based identification unreliable.
Interlocked grain forms when fiber direction reverses during successive growth periods. A quartersawn face cuts across those alternating directions, creating ribbon stripe, roe, or mottled effects and the moving shimmer known as chatoyance.
The reported property ranges for Honduran mahogany provide useful comparisons, but Janka hardness measures indentation resistance rather than stability, bending strength, decay resistance, or finish quality.
Mahogany Look-Alikes, Sourcing, Working, and Finish
Mahogany look-alikes include African mahogany in the genus Khaya, sapele, utile, Philippine mahogany from many Shorea species, and Santos mahogany. None becomes genuine mahogany through a trade label or reddish stain.
Sapele often has a tighter, more regular ribbon stripe and can feel denser beneath a hand plane. African mahogany varies by species and board; some pieces resemble genuine mahogany closely, so face grain and color alone won’t settle an identification.
For trade names and provenance, request the botanical name, origin, supplier paperwork, and chain-of-custody records. “Mahogany finish” or “mahogany color” describes appearance and may refer to stained rubberwood, laminate, vinyl, or a printed panel.
As checked in 2026, bigleaf mahogany remains listed under CITES Appendix II. That listing regulates international trade rather than banning every sale; buyers should retain applicable permits and sourcing documents, especially for imported stock and high-value antiques.
Working interlocked mahogany requires attention to changing fiber direction. A conventional plane may leave fuzzy, torn patches that feel rough against the grain; use a sharp high-angle setup, light cuts, a scraper, or careful sanding instead of forcing a deeper pass.
The best finish for mahogany wood depends on the target look and exposure. Clear shellac, lacquer, varnish, and oil-varnish blends can highlight chatoyance, while a compatible pore filler creates the level surface needed for a piano-smooth gloss.
Test filler and finish on matching offcuts. Dark filler sharpens pore contrast, clear filler preserves a quieter look, and heavy pigment can muddy ribbon figure; wipe across the grain so filler stays in pores rather than streaking along them.
How to Identify Wood Grains
Wood grain identification works best when face appearance is combined with clean end-grain anatomy, pore arrangement, ray size, density, odor, and provenance. A photograph of color and figure alone rarely provides a reliable species ID.
End Grain, Pores, Rays, Density, and Chatoyance
Start with color and provenance, but treat both as screening clues. Sunlight, oxidation, finish, heat treatment, steaming, stain, camera white balance, and screen settings can shift the same board from pale tan to deep red-brown.
For a clean end-grain inspection, slice the surface with a sharp blade or sand through progressively finer abrasives. Under roughly 10× magnification, compare pore size, vessel grouping, growth-ring boundaries, rays, and resin canals.
Pores and rays quickly narrow the field. Large earlywood pores suggest ring-porous oak, ash, elm, or hickory; evenly distributed pores suggest maple, birch, cherry, poplar, or mahogany; prominent rays point toward oak, beech, or lacewood-like material.
Rotate the sample under raking light. Curly and interlocked fibers flash as the angle changes, ray flecks brighten across a quartersawn face, and printed images stay visually flat unless an embossed layer imitates surface relief.
Physical property checks include measured density, odor, fluorescence, hardness clues, and response to cutting. Don’t taste unknown wood or rely on burning tests; dust and extracts from many species can irritate skin, eyes, and airways.
The searchable anatomy records at InsideWood help compare pore grouping, rays, and other features. Laboratory or expert verification is warranted when an identification affects CITES paperwork, antique value, allergies, sales claims, or structural safety.
Solid Wood, Veneer, Laminate, and Faux Grain
Solid wood carries face grain into genuine end grain, though edge profiles and stain can hide the transition. Natural boards vary from piece to piece and move seasonally, while knots rarely repeat at identical spacing.
Natural veneer is real wood sliced into thin leaves and bonded to a substrate. Grain won’t continue through a cut edge, but consecutive leaves may repeat naturally through book, slip, reverse-slip, or sequence matching.
Laminate and printed film often reveal repeated knots, pores that fail to align with embossing, and a paper, vinyl, resin, or composite edge. Large installations make repetition easier to spot because the same feature returns at fixed intervals.
Faux-painted grain may cross joints unnaturally, repeat a roller width, or place identical cathedrals in parallel rows. Skilled work varies color, line weight, speed, direction, and spacing while respecting rails, stiles, panels, and end-grain locations.
Choosing Wood Grain Design by Use
Choose a wood grain design by matching appearance to structural needs, surface scale, moisture exposure, manufacturing method, and viewing distance. Highly figured material works well on decorative panels, while straight grain offers more predictable performance in long structural parts.
Furniture, Flooring, Veneer, and Architectural Surfaces
For furniture and structural parts, orient straighter fibers along rails, legs, handles, and other narrow components. Reserve intense curl, burl, crotch, or quilting for veneer fields, doors, drawer fronts, instrument bodies, and areas where short grain won’t carry a major load.
Flooring selection needs moisture testing, suitable board width, wear expectations, hardness, cut orientation, and installation planning. Busy grain can disguise dents and dust, while dark uniform floors tend to show pale scratches and footprints more clearly.
Veneer matching methods include book match, slip match, random match, reverse slip match, end match, and four-way match. Bookmatched leaves create symmetry, but alternating fiber direction can produce a light-dark barber-pole effect after finishing.
Architectural surfaces may use solid lumber, natural veneer, engineered veneer, high-pressure laminate, thermally fused laminate, printed panels, or vinyl film. Obtain a large sample because a hand-sized piece won’t reveal repetition across a full wall.
Wood and veneer pricing uses different units. Rough lumber is commonly sold by the board foot, flooring by square foot, and veneer by square foot, sheet, flitch, or bundle; figure intensity, width, defects, moisture, matching, and paperwork all affect cost.
The board-foot formula is thickness in inches × width in inches × length in feet ÷ 12. A board measuring 2 × 8 inches × 10 feet contains 13.33 board feet before waste, surfacing, defects, and usable-width deductions.
Digital Textures: Scale, Seams, Color, and Licensing
Digital texture formats serve different jobs. JPEG suits compact photographic previews, PNG can retain transparency, TIFF preserves production data, SVG works for stylized vectors, while 3D work may need color, normal, displacement, and roughness maps.
Set scale and orientation before placing a texture. Grain on a tabletop usually runs along its length, door grain follows rails, stiles, and panels, and an oversized pore pattern can make maple resemble a coarse tropical wood.
For seamless pattern testing, tile the file at least four times horizontally and vertically, then reduce the view. Repeated knots, mirrored cathedrals, dark edge bands, and recurring highlights become obvious across the larger field.
Print resolution near 300 pixels per inch is a common target for close viewing, but printer type, substrate, screening, and distance change the requirement. Print a full-scale crop rather than judging pore size from a zoomed screen preview.
Convert and proof print color using the printer’s requested profile. RGB browns can lose saturation or print darker in CMYK, while warm indoor lighting may add an orange cast that wasn’t visible on a calibrated monitor.
Review licensing and usage rights as of 2026 before production. Free files may require attribution, and standard licenses may exclude editable redistribution, templates, print-on-demand goods, high production runs, or products where the texture is the main design.
How to Recreate Wood Grain
A convincing faux wood grain pattern comes from smooth preparation, layered color, controlled variation, correct board direction, and restrained repetition. Tools create marks, but surface preparation and timing determine whether the result looks natural.
Surface Preparation, Paint Colors, and Graining Tools
Clean, degrease, repair, sand, and prime the surface before graining. Under a glossy film, a speck of dust feels like a grain of sand beneath a fingertip, while dents and open joints cast shadows that no painted line can hide.
Use a lighter base coat beneath a translucent brown or colored glaze. Select two or three related tones rather than one dark stripe color; commercial systems, including Asian Paints wooden colour paint ranges, should be checked for compatible primers, glaze time, and clear coats.
Pull a comb through the wet glaze for straight fibers, then rock a graining tool gently to form cathedral arches. Change pressure and speed, wipe the tool often, and offset each pass so the pattern doesn’t repeat in rigid rows.

Decorative Wood Graining Tool Set
- Creates realistic faux wood grain effects
- Designed for decorative paint projects
- Helps add texture to walls and furniture
- Useful for practicing varied grain patterns
- Suitable for creative DIY finishes
 Buy on Amazon
A compact graining tool set is useful for practicing arches, lines, knots, and transitions. Make a sample panel first because glaze open time changes with temperature, humidity, paint chemistry, film thickness, and airflow.

Six-Piece Wood Grain Roller Set
- Six-piece set expands pattern options
- Seven-inch rollers cover broader areas
- Rubber texture creates convincing grain effects
- Handles support smooth paint application
- Great for decorative walls and furniture
Buy on Amazon
Wide grain rollers cover walls and furniture panels faster, but repeating the same roller position creates mechanical bands. Rotate or shift the tool, interrupt long runs, and soften selected lines with a dry brush before the glaze sets.

Reusable Wood Texture Stencil
- Layers a wood grain look with paint
- Reusable stencil supports repeat projects
- A4 size works well for craft surfaces
- Suitable for furniture and wall art
- Helps create consistent grain details
Buy on Amazon
A reusable texture stencil suits stylized crafts, borders, and controlled motifs. It’s less convincing for photographic imitation because fixed line spacing and repeated knots become apparent across a broad surface.

This demonstration helps show the rocking motion that still photographs can’t convey. Practice until arches widen and narrow naturally; a stop-start wrist movement leaves blunt blocks that look stamped rather than grown.
Decorative Wood-Look Film and Digital Texture Creation

Brown Wood Grain Contact Paper
- Natural-look brown wood grain pattern
- Peel-and-stick backing simplifies application
- Waterproof vinyl suits everyday surfaces
- Refreshes furniture and countertops quickly
- Removable option for temporary updates
Buy on Amazon
Decorative wood-look film offers a quick surface change but remains printed vinyl rather than wood veneer. Check roll width, pattern repeat, batch number, heat limit, adhesive compatibility, seam direction, and likely removal damage before covering furniture or counters.
“Waterproof” doesn’t make film suitable for submersion or high heat. Moisture can enter through seams and cut edges, while hot cookware, exterior sun, or steam may soften adhesive or distort vinyl.
For digital texture creation, photograph a clean, evenly lit board with a scale reference and lens kept square to the surface. Correct perspective and lighting before cloning defects, then create the repeat at full output size.
Remove obvious seams without erasing natural variation. Preserve species-appropriate pores, avoid mirrored knots, and build roughness or normal maps from surface detail rather than simply converting a high-contrast color image.
Common Wood Grain Pattern Mistakes
The most common mistakes are confusing grain with species, ignoring cut orientation, assuming decorative figure means strength, repeating digital features, and sanding across fibers. Each error can lead to misidentification, weak parts, visible seams, or finish defects.
Identification, Construction, and Digital Pattern Errors
Confusing grain and species leads to weak claims such as identifying every red-brown ribbon board as mahogany. Several species share straight, cathedral, curly, or striped appearances, so compare anatomy and provenance before assigning a botanical name.
Mislabeling figure as grain creates another accuracy problem. Birdseye, burl, crotch, knots, ray fleck, quilting, and spalting describe figure, growth features, anatomy, or fungal effects rather than basic fiber direction.
Ignoring cut orientation makes same-species photographs look contradictory. Label face, edge, and end grain, then state whether the board is flatsawn, quartersawn, or riftsawn; include dimensions or a scale bar for useful comparisons.
Figure doesn’t equal strength. Curly, crotch, burl, and knotty wood may contain reversing, short, or broken fibers, so place striking material where it won’t compromise a narrow handle, chair rail, leg, or other stressed component.
Unrealistic pattern repetition becomes obvious when identical knots return every few inches. Test the completed tile over the full wall, panel, or floor rather than reviewing a single square at high magnification.
Incorrect grain direction can make a realistic scan look fake. Grain should respond to construction: lengthwise on rails, vertical on stiles, contained within raised panels, and sensibly aligned across veneer leaves.
Failed seams and bookmatches often come from mirroring an arbitrary texture. Real bookmatching uses consecutive veneer leaves, while random mirroring may duplicate knots, reverse lighting, or create an implausible central shape.
Poor scale and lighting produce pores the size of grooves or highlights that repeat across every tile. Remove directional glare from a base texture and restore controlled lighting later in the render or final composition.
Print color shifts arise from uncalibrated screens, RGB-to-CMYK conversion, substrate color, ink limits, and room lighting. Approve a physical proof from the production device before committing to a large run.
Practical Notes From Real-World Use
Surface preparation failures appear most clearly under low side lighting. Glue smears resist stain, filled dents form flat patches, dust becomes hard bumps, and loose old finish causes paint or film to peel around edges.
With cross-grain sanding, scratches may seem invisible on pale bare wood and then turn into dark hooks after stain. Use fresh abrasives, remove random-orbit pigtails, and finish in the dominant grain direction where the surface permits.
Don’t select one universal final grit for every species. Coarse-pored oak, dense maple, pigment stain, dye, oil, and film finishes react differently; use the finish maker’s range and test the full schedule on matching scrap.
During identification, a polished face can be misleading while a freshly prepared end-grain patch reveals the answer. Under magnification, oak’s earlywood pores look like an orderly row of openings, while maple presents a much finer, quieter field.
For image labeling standards, state the species and botanical name when verified, cut orientation, image type, approximate scale, and whether the surface is solid wood, veneer, laminate, faux paint, vector art, scan, render, or AI-generated illustration.
Never use a generated pattern as proof of anatomy. A useful wood grain reference connects appearance to pores, rays, growth rings, fiber direction, sawing angle, physical scale, and documented material origin.
FAQs
What Are The Main Wood Grain Patterns?
The main wood grain patterns are straight, cathedral, wavy, curly, interlocked, and burl grain. The pattern depends on how the tree grew and how the board was cut from the log. Plain-sawn boards often show broad cathedral shapes, while quarter-sawn boards usually display straighter lines.
What Causes Cathedral Grain In Wood?
Cathedral grain is caused by cutting a board tangentially through the curved growth rings of a log. This common plain-sawn cutting method exposes arch-like patterns across the board face. The effect is especially visible in woods with strong contrast between earlywood and latewood.
What Does A Mahogany Wood Grain Pattern Look Like?
Mahogany usually has a straight, even grain with a fine to medium texture and a warm reddish-brown color. Some boards show ribbon-like stripes, especially when the grain is interlocked or quarter-sawn. Its grain is generally smoother and more uniform than heavily patterned woods such as oak.
Can You Identify A Wood Species By Grain Alone?
You cannot reliably identify a wood species by grain alone because many woods can look similar. Grain should be considered alongside color, pore size, density, end-grain structure, scent, and hardness. A clear view of the unfinished end grain provides much more accurate identification clues.
How Can I Tell Real Wood From A Printed Grain Pattern?
Real wood has natural variation, texture, pores, and grain lines that continue around edges and into cuts. A printed grain pattern often repeats, feels unusually smooth, or stops abruptly at seams and corners. Check an unfinished edge or underside, where real wood fibers are easier to see.
Affiliate Disclosure: Some links in this post are affiliate links. If you make a purchase through these links, we may earn a small commission at no extra cost to you. We only recommend products we genuinely believe in.